# Table of Contents
# Welcome - An open-source prompt engineering framework
# Open-Source - How Lilypad balances open-source and enterprise features
# Lilypad Quickstart - Start using Lilypad in one line of code
# Self Hosting - Run Lilypad in your own infrastructure
# Playground - No-code interface for experimenting with Lilypad
# OpenTelemetry - Observability made easy
# Spans - Easily instrument arbitrary blocks of code with OpenTelemetry
# Traces - Structured collections of spans
# Versioning - Track versions of your LLM functions
# Cost & Latency - Monitor the performance and cost of your LLM functions
# Comparisons - Compare different LLM function implementations
# Annotations - Add labels and feedback to your LLM outputs
# Lilypad API Reference - API documentation for Lilypad
# Welcome to Lilypad
Welcome to the Lilypad documentation! We're excited you're here.
## Why Lilypad (we think you should read this)
When building with LLMs, a typical development flow might look like this:
1. [Prototype](#1-prototype) — make sure everything is functional
2. [Vibe Check](#2-vibe-check) — gut feeling should be "good enough"
3. [Annotate](#3-annotate) — systematically label the data you look at
4. [Analyze](#4-analyze) — understand where and why the system is failing
5. [Optimize](#5-optimize) — apply your learnings to improve the system (e.g. your prompt)
6. [Iterate](#6-iterate) — repeat steps 3-5 (forever, or at least until it's "good enough")
Let's break each of these steps down further.
## 1. Prototype
The first and most important step is simply getting started.
We recommend taking a look at our open-source LLM library `mirascope`, which we've purpose built to make both prototyping and the steps that follow simple, easy, and elegant.
For the remaining sections, let's use a simple LLM call as an example:
```python
from mirascope import llm
@llm.call(provider="$PROVIDER", model="$MODEL") # [!code highlight]
def answer_question(question: str) -> str:
return f"Answer this question: {question}" # [!code highlight]
response = answer_question("What is the capital of France?")
print(response.content)
# > The capital of France is Paris.
```
We're using the `@llm.call()` decorator to turn the `answer_question` function into an LLM API call.
## 2. Vibe Check
How do we feel about "The capital of France is Paris." as the answer to our question?
Let's say our gut feeling is "not good enough" because we want a single word answer, so we update our prompt to make this more clear:
```python
from mirascope import llm
@llm.call(provider="$PROVIDER", model="$MODEL")
def answer_question(question: str) -> str:
return f"Answer this question in one word: {question}" # [!code highlight]
response = answer_question("What is the capital of France?")
print(response.content)
# > Paris
```
Oops, we forgot to commit our previous prompt. Not good.
For a simple example this might not seems like a big deal, but LLMs are fickle. What if the prompt we just lost happened to be the one that would've performed the best, and now you can't replicate it. How do you decide when to commit what? And how do you properly keep track of all of the different versions?
This is the point at which most people reach for observability tooling. This is *almost* the right choice. The issue is that today's observability tooling was not built for the LLM era. It was built for deterministic software, but LLMs are non-deterministic.
You need more than just observability — you need to build a data flywheel.
This requires:
1. Some place to put your data
2. Some place to see / query / etc. that data
3. Some way to annotate that data
4. Some way to track / version artifacts (so you can compare performance over time)
Current observability tools provide 1 and 2 but not 3 or 4, which are critical.
Lilypad provides all four — in just one line of code.
```python {6}
import lilypad
from mirascope import llm
lilypad.configure(auto_llm=True)
@lilypad.trace(versioning="automatic") # [!code highlight]
@llm.call(provider="$PROVIDER", model="$MODEL")
def answer_question(question: str) -> str:
return f"Answer this question in one word: {question}"
response = answer_question("What is the capital of France?")
print(response.content)
# > Paris
```
Check out the [Versioning](/docs/lilypad/observability/versioning) section for more information.
## 3. Annotate
The next step is to look at real (or synthetic) data and systematically label it.
With Lilypad, you annotate the data right where you look at it. This makes it seamless.
It's also extremely important that we annotate not just the inputs/outputs but also everything about the trace. This includes the code, the prompt, the call parameters, the cost, the latency — everything you might need to know if you'd consider it "good enough" or not.
## 4. Analyze
Once you've annotated enough data, it's time to look for trends — common failure points. Compare outputs from different versions on the same input. Did the changes help?
Distilling your annotations into action items makes for much easier optimization.
## 5. Optimize
Now we can apply our analysis and update the system to improve it.
For example, we can identify the most common points of failure and work to resolve those first. Consider our earlier example. We identify that there are a lot of longer answers and we really want single word answers, so we add "in one word" to the prompt and run the process again.
This step is just the systematic version of our earlier "vibe check" process that results in real data and actionable insights.
## 6. Iterate
Part of the optimization process involves making changes — a new version.
All we have to do is repeat steps 3 through 5 until we deem the system "good enough".
## Getting Started
# Open-Source
As an open-source project, Lilypad makes it so:
- You can see exactly what's going on under the hood and how it works.
- You can [self-host](/docs/lilypad/getting-started/self-hosting) Lilypad on your own servers and customize it to your heart's content.
- You can [contribute](https://github.com/Mirascope/lilypad/blob/main/CONTRIBUTING.md) to the project.
We're excited to see where the community takes it!
## Lilypad License
Except for the contents and code contained in any `ee` directory or sub-directory of this repository, which is covered by a commercial license (see below), all code in this repository is licensed under the terms of the [MIT License](https://github.com/Mirascope/lilypad/blob/main/LICENSE).
The contents and code of any `ee` directory or sub-directory of this repository are licensed under the Enterprise Edition (EE) License. This content and code is only available to users using Mirascope's hosted version of Lilypad or those with a valid Enterprise Edition (EE) License. See [ee/LICENSE](https://github.com/Mirascope/lilypad/blob/main/ee/LICENSE) for the full terms.
The [pricing](/pricing) page has more information on the features available in the Enterprise Edition (EE) of Lilypad and how to purchase a license.
# Lilypad Quickstart
## Create an account
You'll need a GitHub or Google account to sign up.
First, navigate to [https://lilypad.mirascope.com](https://lilypad.mirascope.com/) and create an account.
## Environment Variables
Navigate to [Settings -> Organization](https://lilypad.mirascope.com/settings/org) and:
1. Create a new project.
2. Generate an API key for that project.
The API key will only be shown once, so make sure to copy and save it.
```bash
LILYPAD_PROJECT_ID="YOUR_PROJECT_ID"
LILYPAD_API_KEY="YOUR_API_KEY"
```
If using a `.env` file, remember to use something like [`load_dotenv()`](https://github.com/theskumar/python-dotenv) so they are properly loaded.
### LLM API Key
You'll need to set the API key for the provider you're using in your environment.
We recommend creating one in [Google AI Studio](https://aistudio.google.com/apikey) if you don't have one yet.
They have a very generous free tier.
## Installation
Install the `lilypad-sdk` with any additional dependencies you may need:
```bash
# For spans / tracing
uv add lilypad-sdk
# For Google Gemini/Vertex support
uv add "lilypad-sdk[google]"
# For multiple providers
uv add "lilypad-sdk[google,openai,anthropic]"
```
```bash
# For spans / tracing
pip install lilypad-sdk
# For OpenAI support
pip install "lilypad-sdk[openai]"
# For multiple providers
pip install "lilypad-sdk[openai,anthropic,google]"
```
Available provider extras:
- `google` - Google Gemini/Vertex models (genai SDK)
- `openai` - OpenAI models
- `anthropic` - Anthropic models
- `bedrock` - AWS Bedrock models
- `azure` - Azure AI models
- `mistral` - Mistral models
- `outlines` - Outlines framework
## Automatically Trace & Version
Run your first automatically [traced](/docs/lilypad/observability/traces) and [versioned](/docs/lilypad/observability/versioning) function:
```python
import os
from google.genai import Client
import lilypad
# [!code highlight:6]
lilypad.configure(
project_id=os.environ["LILYPAD_PROJECT_ID"],
api_key=os.environ["LILYPAD_API_KEY"],
auto_llm=True,
)
client = Client()
@lilypad.trace(versioning="automatic") # [!code highlight]
def answer_question(question: str) -> str | None:
response = client.models.generate_content(
model="gemini-2.0-flash-001",
contents=f"Answer this question: {question}",
)
return response.text
response = answer_question("What is the capital of France?")
print(response)
# > The capital of France is Paris.
```
```python
import os
import lilypad
from openai import OpenAI
# [!code highlight:6]
lilypad.configure(
project_id=os.environ["LILYPAD_PROJECT_ID"],
api_key=os.environ["LILYPAD_API_KEY"],
auto_llm=True,
)
client = OpenAI()
@lilypad.trace(versioning="automatic") # [!code highlight]
def answer_question(question: str) -> str | None:
response = client.chat.completions.create(
model="gpt-4o-mini",
messages=[{"role": "user", "content": f"Answer this question: {question}"}],
)
return response.choices[0].message.content
response = answer_question("What is the capital of France?")
print(response)
# > The capital of France is Paris.
```
```python
import os
from anthropic import Anthropic
import lilypad
# [!code highlight:6]
lilypad.configure(
project_id=os.environ["LILYPAD_PROJECT_ID"],
api_key=os.environ["LILYPAD_API_KEY"],
auto_llm=True,
)
client = Anthropic()
@lilypad.trace(versioning="automatic") # [!code highlight]
def answer_question(question: str) -> str | None:
response = client.messages.create(
model="claude-3-7-sonnet-latest",
messages=[{"role": "user", "content": f"Answer this question: {question}"}],
max_tokens=1024,
)
content = response.content[0]
return content.text if content.type == "text" else None
response = answer_question("What is the capital of France?")
print(response)
# > The capital of France is Paris.
```
```python
import os
import lilypad
from mistralai import Mistral
# [!code highlight:6]
lilypad.configure(
project_id=os.environ["LILYPAD_PROJECT_ID"],
api_key=os.environ["LILYPAD_API_KEY"],
auto_llm=True,
)
client = Mistral(api_key=os.environ["MISTRAL_API_KEY"])
@lilypad.trace(versioning="automatic") # [!code highlight]
def answer_question(question: str) -> str | None:
response = client.chat.complete(
model="mistral-small-latest",
messages=[{"role": "user", "content": f"Answer this question: {question}"}],
)
choices = response.choices
if not choices:
return None
content = choices[0].message.content
return str(content) if content is not None and content != "" else None
response = answer_question("What is the capital of France?")
print(response)
# > The capital of France is Paris.
```
```python
import os
from boto3.session import Session
import lilypad
# [!code highlight:6]
lilypad.configure(
project_id=os.environ["LILYPAD_PROJECT_ID"],
api_key=os.environ["LILYPAD_API_KEY"],
auto_llm=True,
)
session = Session()
client = session.client("bedrock-runtime")
@lilypad.trace(versioning="automatic") # [!code highlight]
def answer_question(question: str) -> str | None:
response = client.converse(
modelId="anthropic.claude-3-haiku-20240307-v1:0",
messages=[
{"role": "user", "content": [{"text": f"Answer this question: {question}"}]}
],
)
return response["output"]["message"]["content"][0]["text"] # type: ignore[reportTypedDictNotRequiredAccess]
response = answer_question("What is the capital of France?")
print(response)
# > The capital of France is Paris.
```
```python
import os
from azure.ai.inference import ChatCompletionsClient
from azure.core.credentials import AzureKeyCredential
import lilypad
# [!code highlight:6]
lilypad.configure(
project_id=os.environ["LILYPAD_PROJECT_ID"],
api_key=os.environ["LILYPAD_API_KEY"],
auto_llm=True,
)
client = ChatCompletionsClient(
endpoint="https://your-endpoint.openai.azure.com/openai/deployments/gpt-4o-mini",
credential=AzureKeyCredential(key="..."),
)
@lilypad.trace(versioning="automatic") # [!code highlight]
def answer_question(question: str) -> str | None:
response = client.complete(
model="gpt-4o-mini",
messages=[{"role": "user", "content": f"Answer this question: {question}"}],
)
return response.choices[0].message.content
response = answer_question("What is the capital of France?")
print(response)
# > The capital of France is Paris.
```
Follow the link output in your terminal to view the captured version and corresponding trace.
See the [observability](/docs/lilypad/observability/opentelemetry) section to learn more.
## Look At Your Data!
Go build and run some LLM functions and inspect their results using Lilypad.
While you're at it, try [annotating](/docs/lilypad/evaluation/annotations) some data too.
# Self Hosting
The Free version is available for self hosting with community support. Pro and Team plan features are available for beta testing upon request.
Interested in participating in the closed beta? [Join our community](/slack-invite) and send a message to William Bakst. If we determine it's a good fit, you'll get early access to Pro and Team plan features when self hosting.
Lilypad is fully [open-source](/docs/lilypad/open-source) and can be self-hosted in your own infrastructure.
You can also run Lilypad on your local machine.
### Requirements:
To self-host Lilypad, you'll need:
1. Python 3.10+
2. PostgreSQL
3. A GitHub or Google account (for authentication)
4. Docker
In the following sections we will be using `http://localhost:8000` as the host/port URL.
Replace this with the URL where you are ultimately hosting Lilypad and making it accessible.
## Setup
First, you'll need to clone the repository:
```bash
git clone git@github.com:Mirascope/lilypad.git
cd lilypad/app
```
Next, you'll need to install `uv` and the package's dependencies:
```bash
curl -LsSf https://astral.sh/uv/install.sh | sh
uv sync --all-extras
```
Last, create a `.env` file where you'll store all of the upcoming environment variables.
## Authentication
First, you'll need to generate and set a JWT secret (e.g. using [https://jwtsecret.com/generate](https://jwtsecret.com/generate)).
Then set it in your environment:
```bash
LILYPAD_JWT_SECRET=...
```
Next, you'll need to set up OAuth 2.0 Authentication. You can choose between GitHub or Google:
- Homepage URL: `http://localhost:8000`
- Authorization Callback URL: `http://localhost:8000/auth/callback`
### GitHub
To authenticate with GitHub, create a new [OAuth app on GitHub](https://docs.github.com/en/apps/oauth-apps/building-oauth-apps/creating-an-oauth-app) and set the following environment variables:
```bash
LILYPAD_GITHUB_CLIENT_ID=...
LILYPAD_GITHUB_CLIENT_SECRET=...
```
### Google
To authenticate with Google, create a new [OAuth app on Google](https://developers.google.com/identity/protocols/oauth2) and set the following environment variables:
```bash
LILYPAD_GOOGLE_CLIENT_ID=...
LILYPAD_GOOGLE_CLIENT_SECRET=...
```
## Client
First, set your environment variables:
```bash
LILYPAD_API_SERVE_FRONTEND=true
```
You can optionally set `LILYPAD_CLIENT_BASE_URL` to the URL where you're hosting the client separately. In this case, you would set `LILYPAD_API_SERVE_FRONTEND=false`.
Now, build the client:
```bash
cd client
touch .env
echo "VITE_REMOTE_API_URL=http://localhost:8000/v0" > .env
pnpm i
pnpm run build
cd ..
```
## Server
Set the remote API and client URLs so the server knows where to route everything:
```bash
LILYPAD_REMOTE_API_URL=http://localhost:8000
LILYPAD_REMOTE_CLIENT_URL=http://localhost:8000
```
Whether you're running this locally or hosted in the cloud, you'll need to build the image:
```bash
DOCKER_BUILDKIT=1 docker build -t lilypad .
```
## Local
You can use Docker Compose to run everything together locally:
```bash
docker-compose up
```
You must update `docker-compose.yml` to match your `.env` setup.
You should now be able to access your Lilypad instance at `http://localhost:8000`.
Note that spinning down the container will not result in a loss of data, as the database is persisted in a volume.
## Hosted
You'll need to set up a PostgreSQL database and set the following environment variables:
```bash
LILYPAD_DB_HOST=...
LILYPAD_DB_NAME=...
LILYPAD_DB_PASSWORD=...
LILYPAD_DB_PORT=...
LILYPAD_DB_USER=...
```
Now you can run the server:
```bash
docker run -p 8000:8000 --env-file .env lilypad
```
You should now be able to access your Lilypad instance at `http://localhost:8000`.
## Application
In your LLM code that uses Lilypad, you'll need to set the API and client URLs so that your code points to your self-hosted instance:
```bash
LILYPAD_BASE_URL=http://localhost:8000/v0
LILYPAD_REMOTE_CLIENT_URL=http://localhost:8000
```
Now you can use Lilypad as [documented](/docs/lilypad/getting-started/quickstart).
The production-stable latest release of the SDK on PyPI may not be the same version as the one you're self-hosting. Make sure to install the version that matches your self-hosted instance.
# Playground
The Playground is under active development during the beta period.
Any and all feedback, bug reports, and feature requests are welcome!
# OpenTelemetry
Lilypad instruments everything using [OpenTelemetry](https://opentelemetry.io/).
This also means that any code that has already been instrumented with OpenTelemetry will already work with Lilypad — no changes necessary.
```python
import lilypad
# configure Lilypad's `TraceProvider`
lilypad.configure()
```
## Your Code Will Always Execute
_This is important, so if you ever find that it's not the case, please let us know asap!_
Barring user errors that are supposed to throw errors during development, Lilypad will never crash your code. If there's ever an issue connecting to Lilypad or pulling information, your code will run as-written as though Lilypad was not there.
## Automatically Monitor LLM API Calls
One additional benefit of Lilypad is that any call made to an LLM can be traced automatically in adherence with the [OpenTelemetry Gen AI Spec](https://opentelemetry.io/docs/specs/semconv/registry/attributes/gen-ai/).
You only need to call `configure`. No other code change necessary!
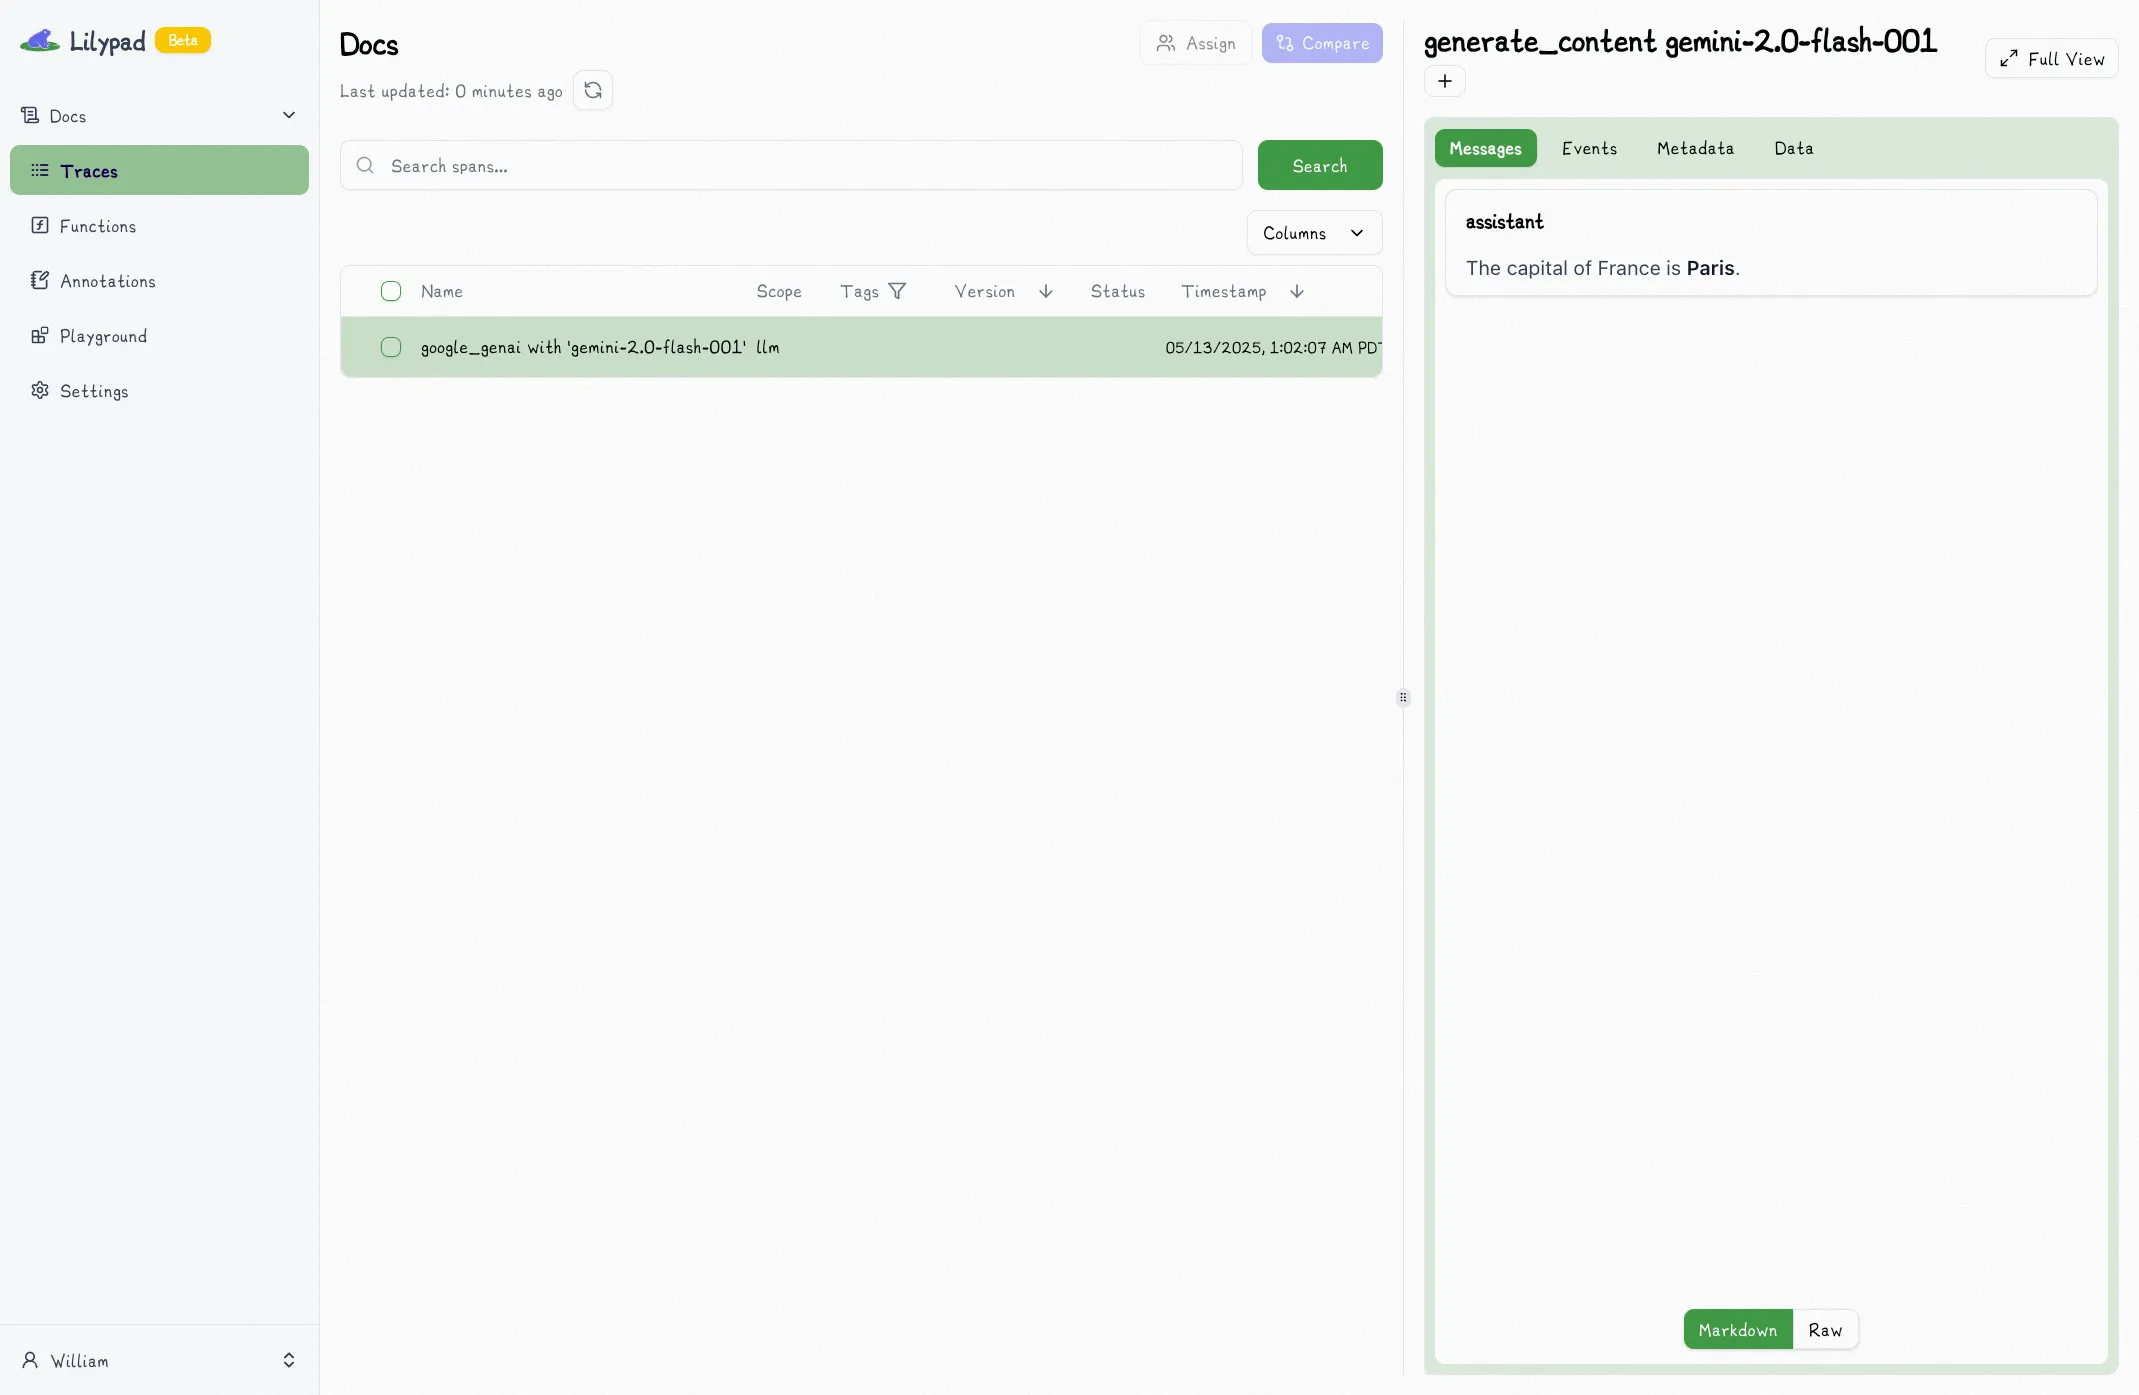
For example, if you make a call to Google's Gemini API as in the example below, that call will show up in your Lilypad project as a detailed [span](/docs/lilypad/observability/spans).
```python
from google.genai import Client
import lilypad
lilypad.configure(auto_llm=True) # [!code highlight]
client = Client()
question = "What is the capital of France?"
response = client.models.generate_content(
model="gemini-2.0-flash-001",
contents=f"Answer this question: {question}",
)
print(response.text)
# > The capital of France is Paris.
```
Follow the link to see the trace (or navigate to your project's home page).
# Spans
> If you haven't already, we recommend reading [OpenTelemetry](/docs/lilypad/observability/opentelemetry) first.
None of the tooling below requires LLMs. It is, however, very handy when working with them.
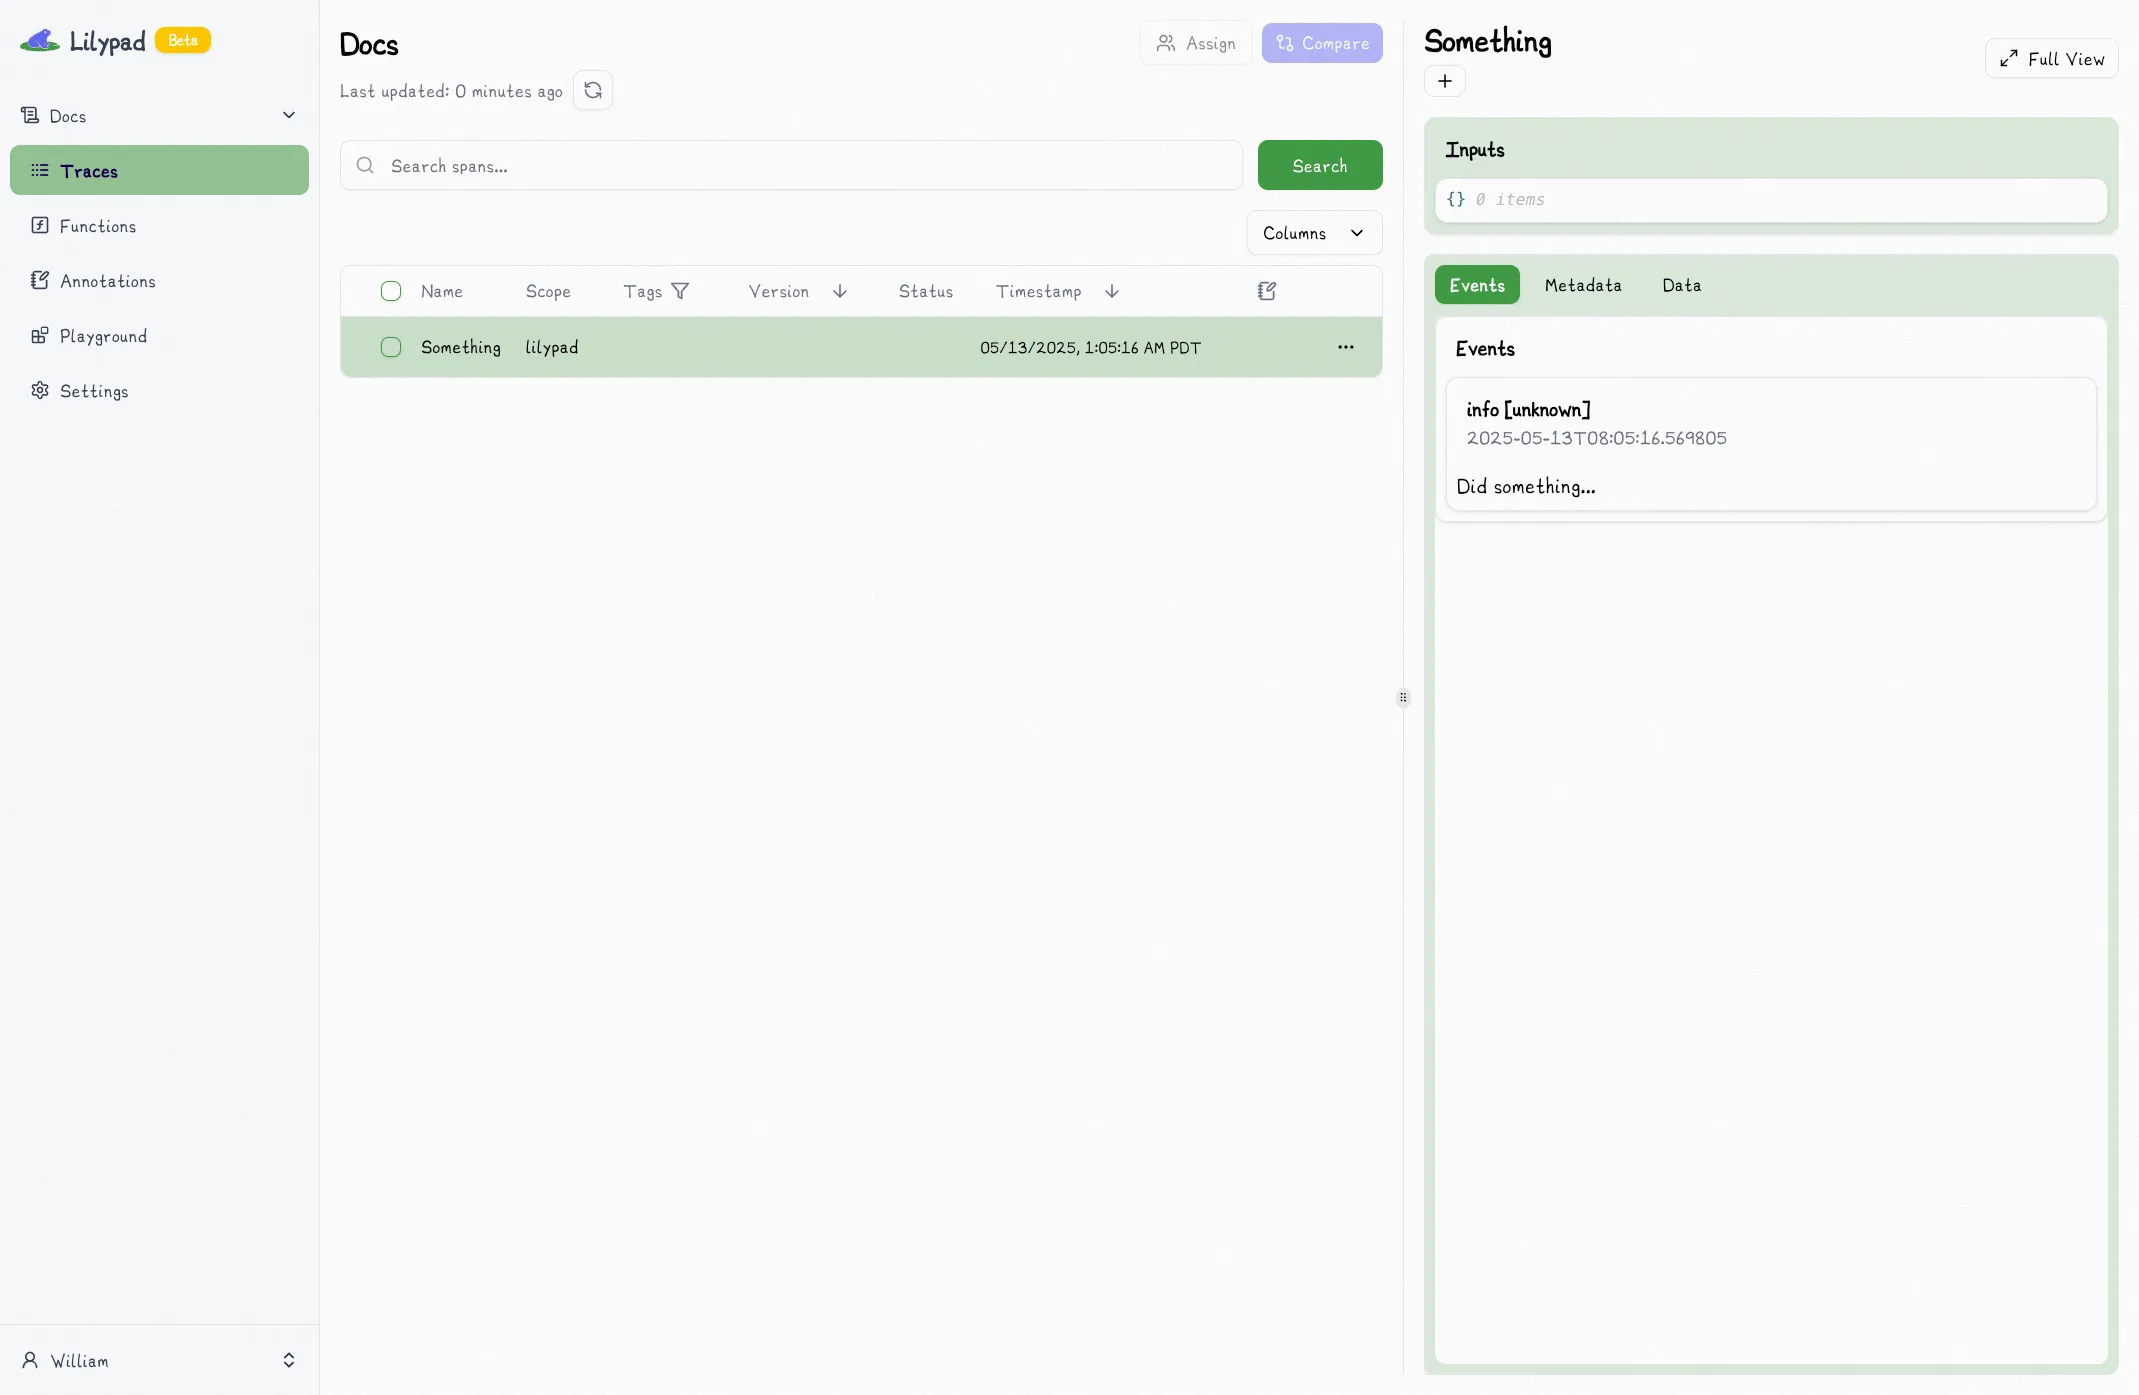
Lilypad implements a `span` context manager that makes it easy to instrument a block of code:
```python
import lilypad
lilypad.configure()
with lilypad.span("Something") as span: # [!code highlight]
span.log("Did something...") # [!code highlight]
```
This will automatically capture information such as the latency of the code run within the span, including any calls to `log` that you make inside of the block.
## Logging Levels
The `span` context manager provides additional convenience methods for common logging levels:
* `log` — alias for the `info` method.
* `info` — log an informational message.
* `debug` — log a debug message.
* `warning` — log a warning message.
* `error` — log an error message.
* `critical` — log a critical message.
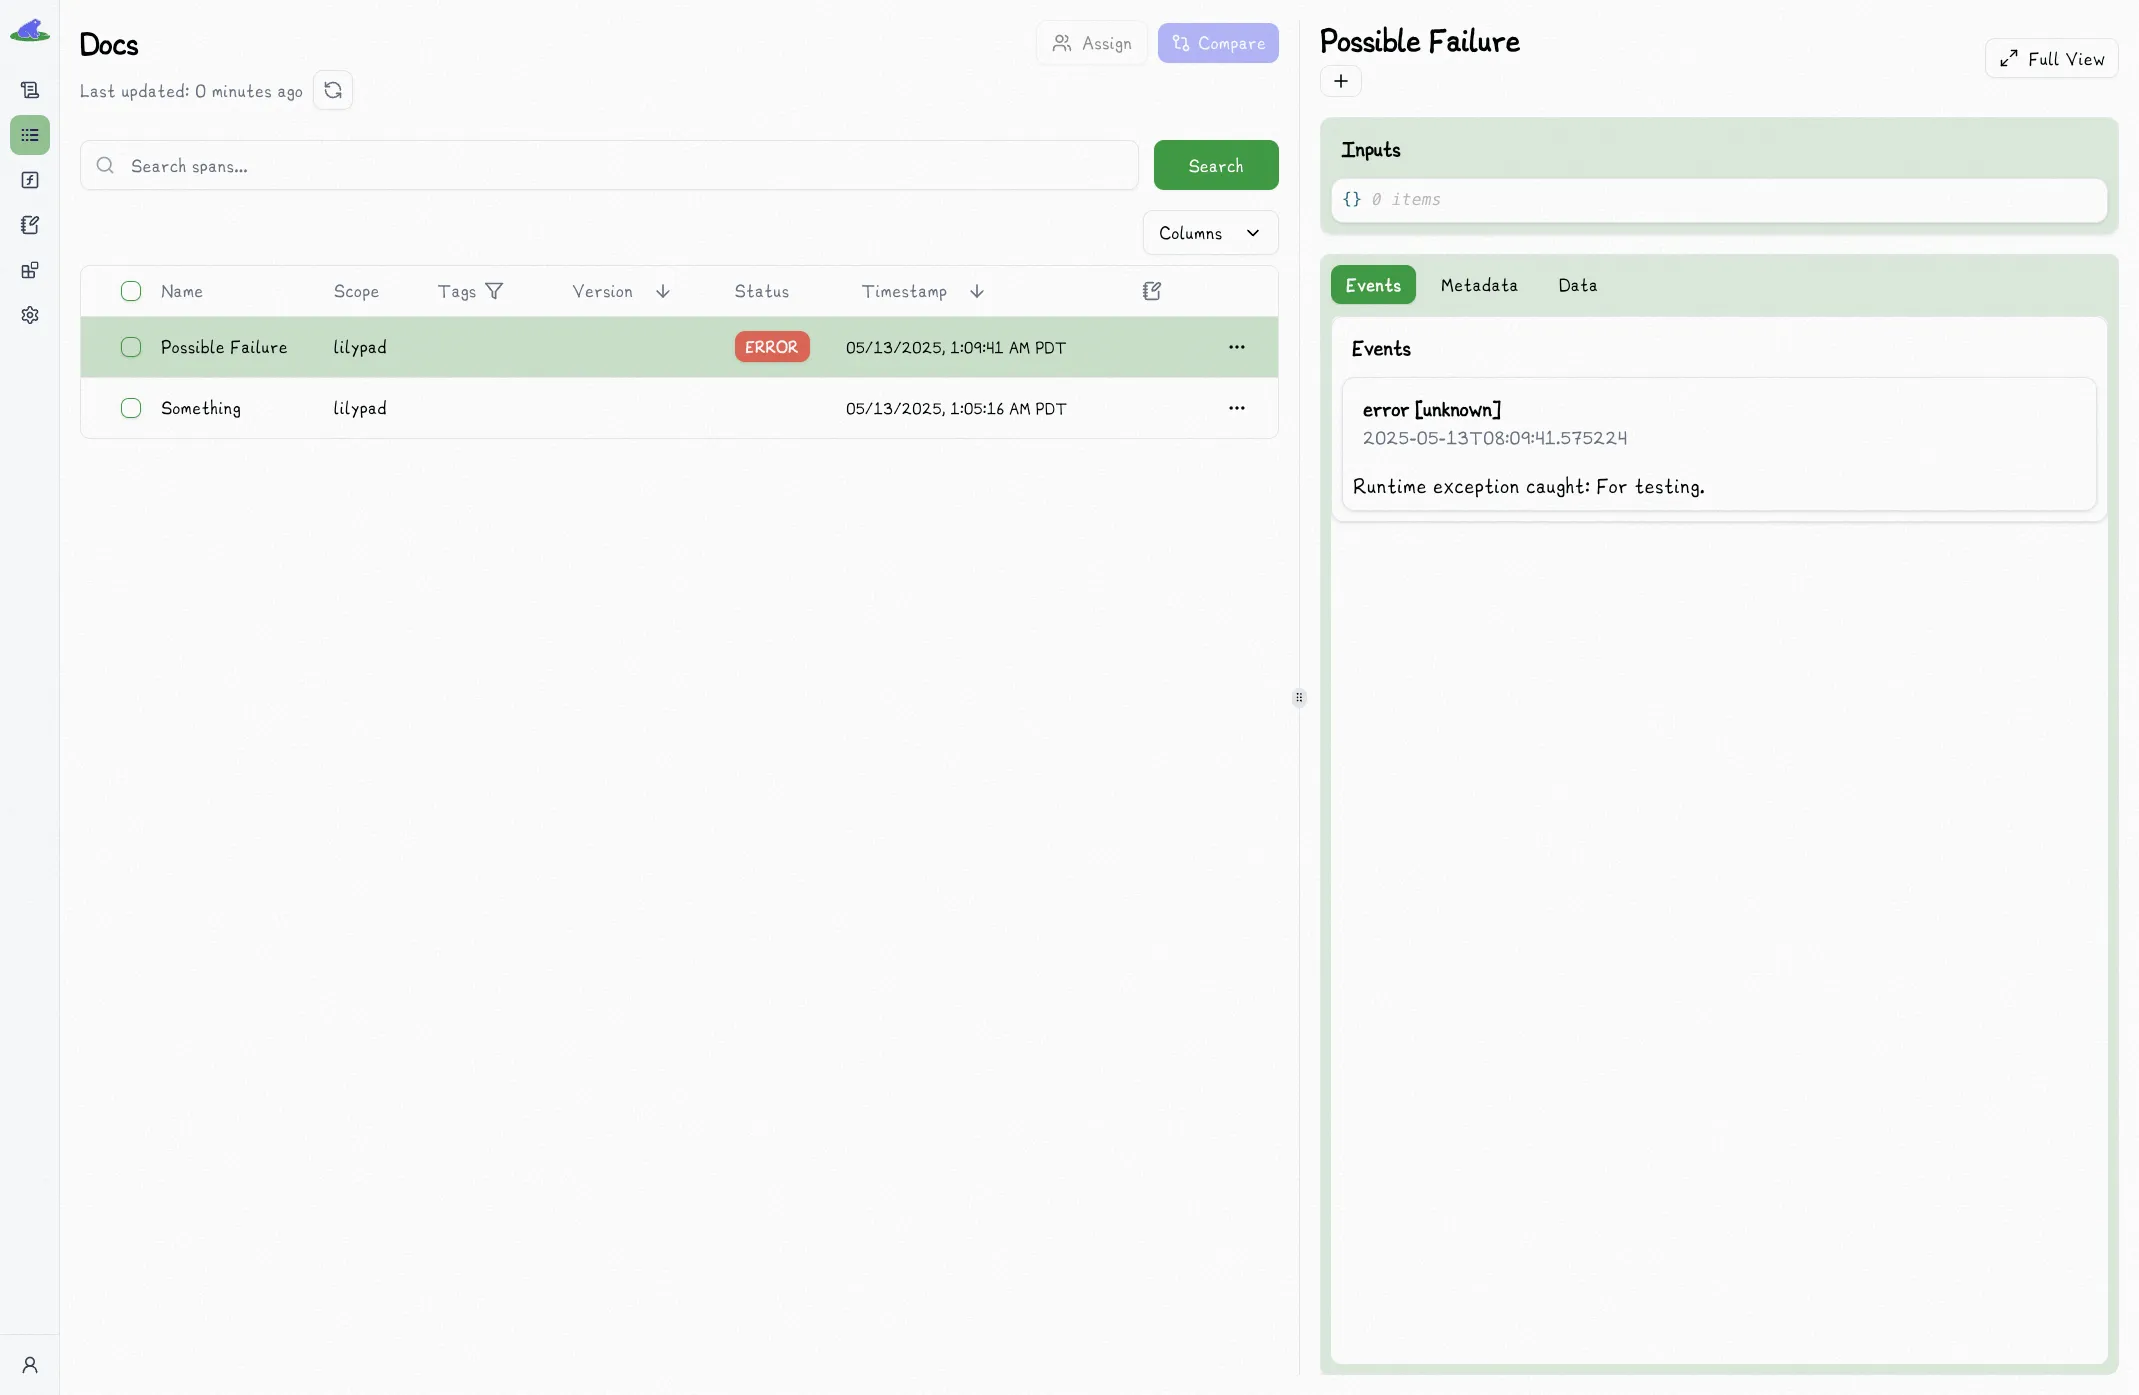
For example, you may want to catch and log and exception:
```python
import lilypad
lilypad.configure()
with lilypad.span("Possible Failure") as span:
try:
# do something that could error
raise RuntimeError("For testing.")
except RuntimeError as e:
span.error(f"Runtime exception caught: {e}") # [!code highlight]
```
## Metadata
You can also capture arbitrary structured metadata:
```python
import lilypad
lilypad.configure()
with lilypad.span("Structured Metadata") as span:
span.metadata({"key": "value"}) # [!code highlight]
```
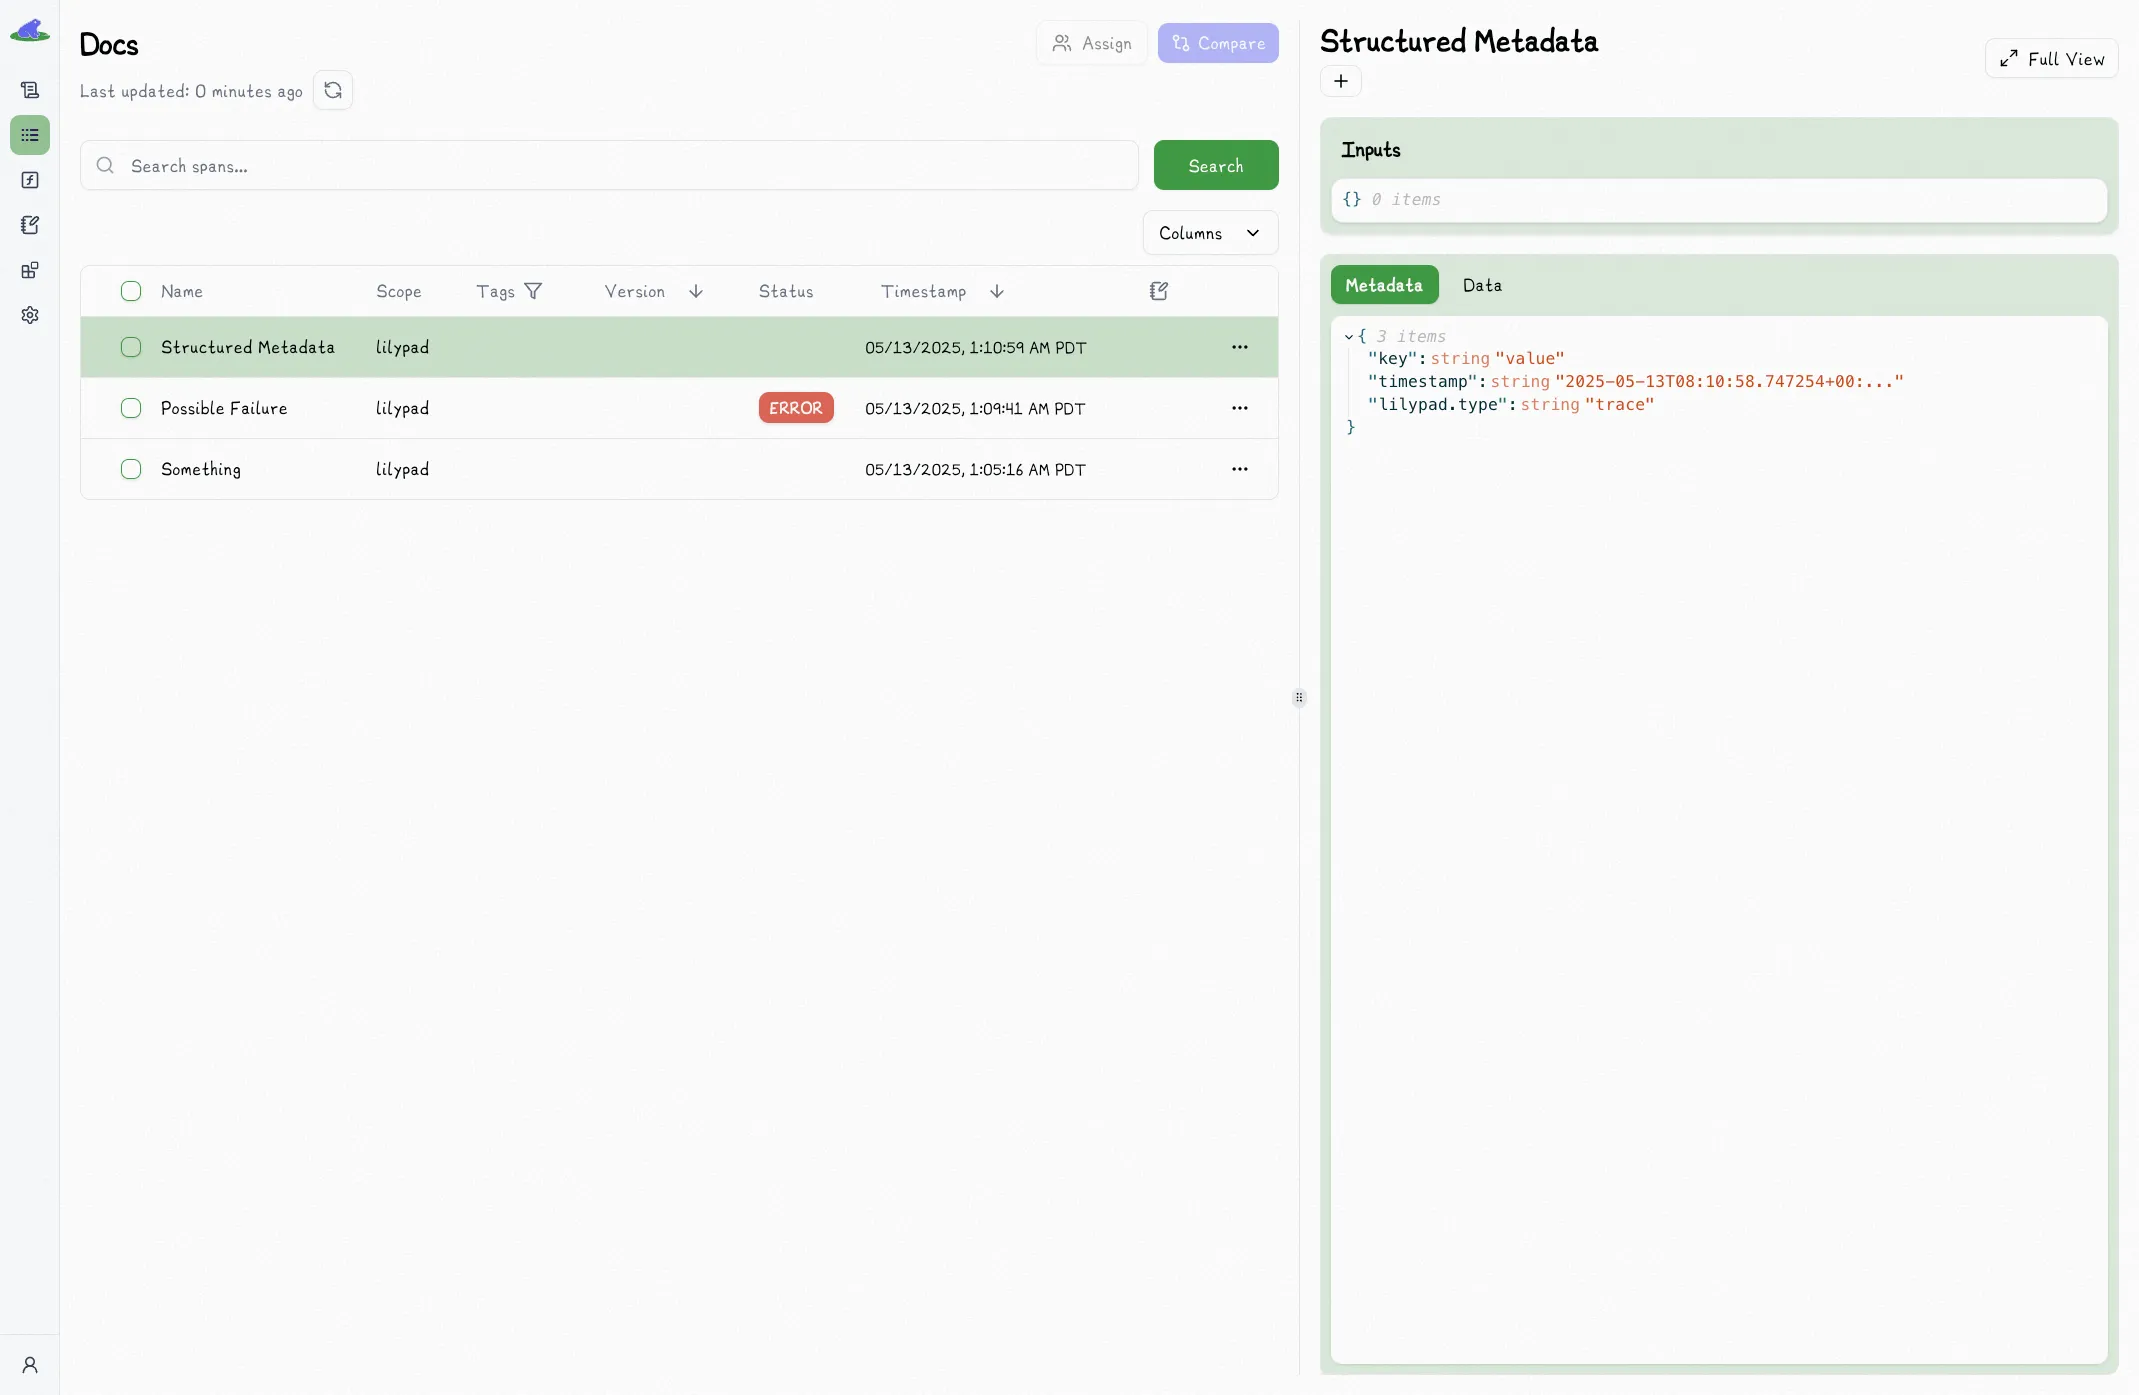
Calling `metadata` multiple times will merge the dictionaries.
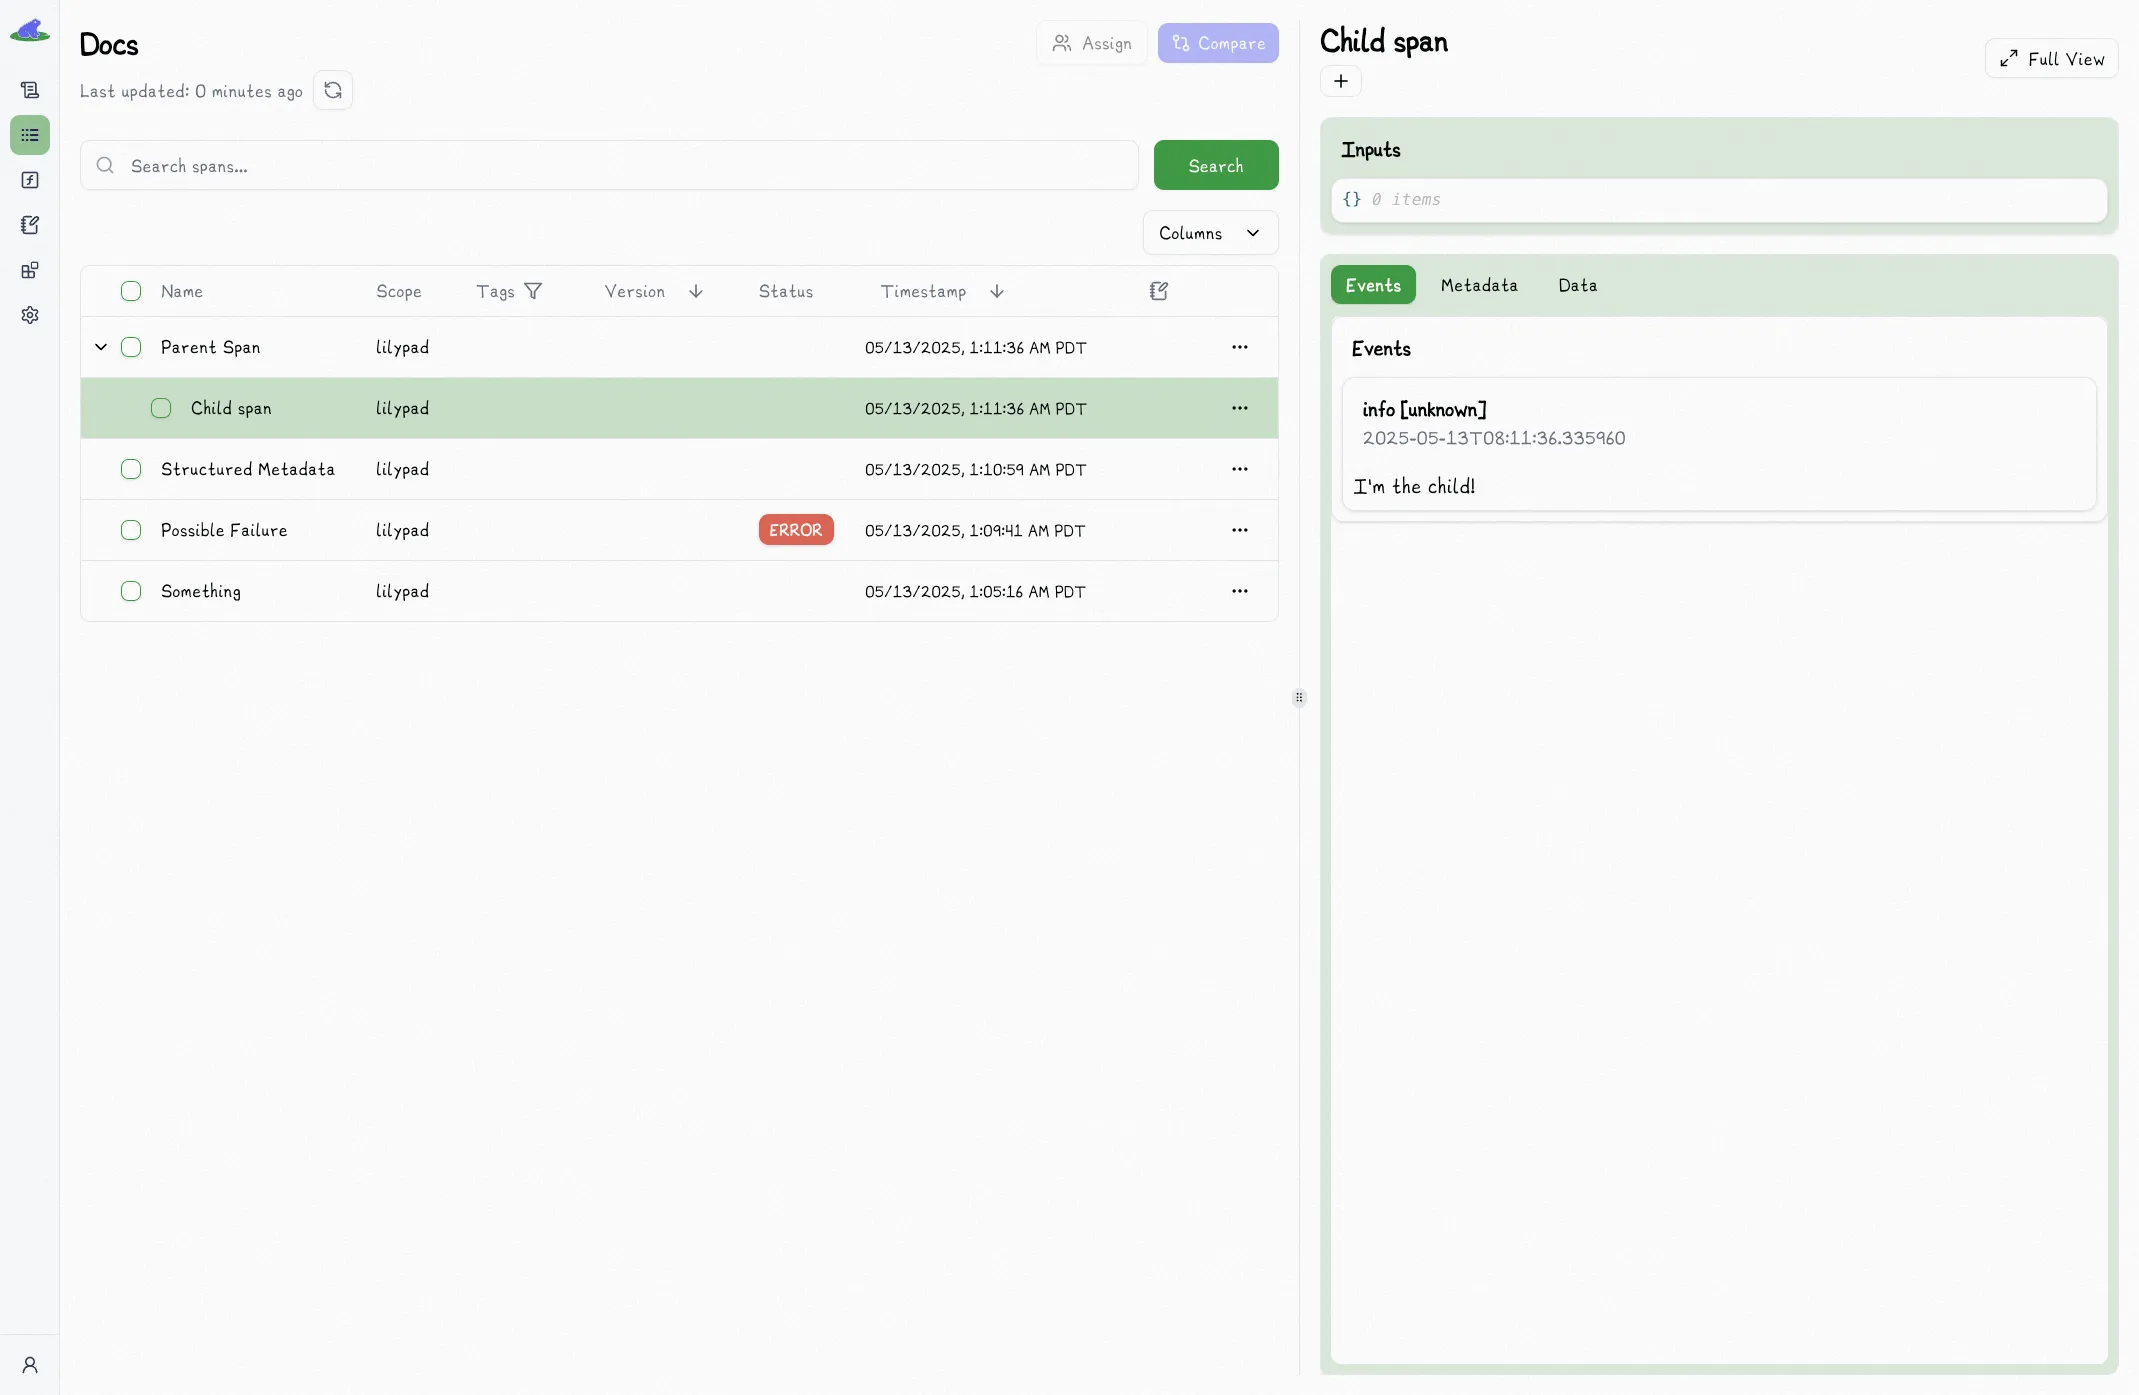
## Nested Spans
Lilypad will properly capture nested spans as what we call [Traces](/docs/lilypad/observability/traces), which are really just a collection of nested spans that share a single common parent.
```python
import lilypad
lilypad.configure()
with lilypad.span("Parent Span") as parent_span:
parent_span.log("I'm the parent!")
with lilypad.span("Child span") as child_span: # [!code highlight]
child_span.log("I'm the child!") # [!code highlight]
```
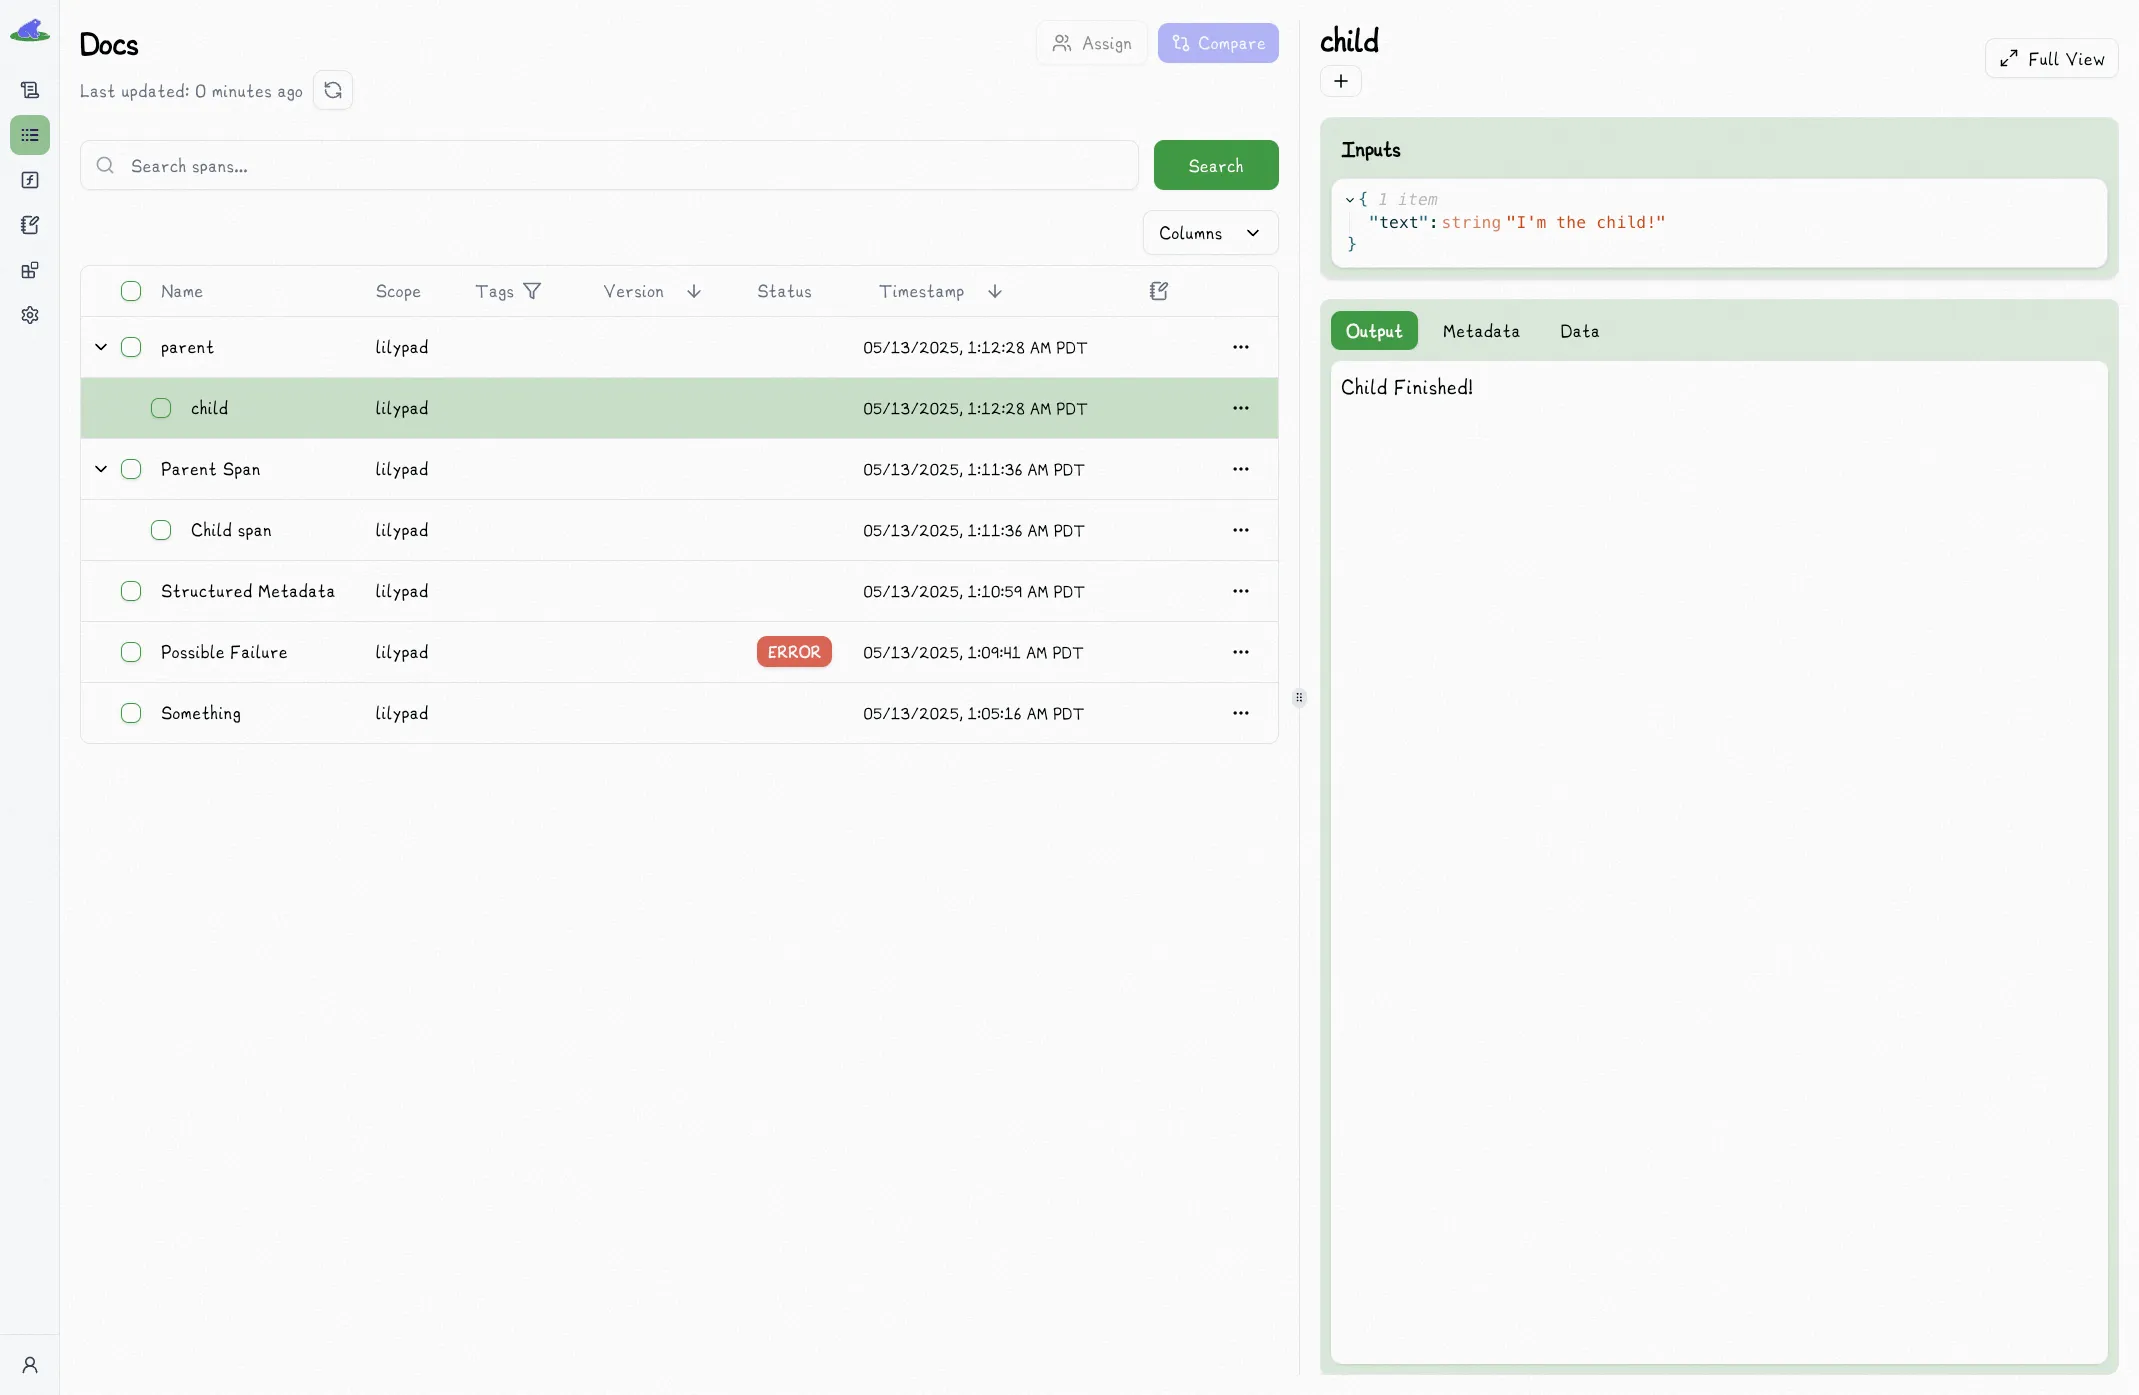
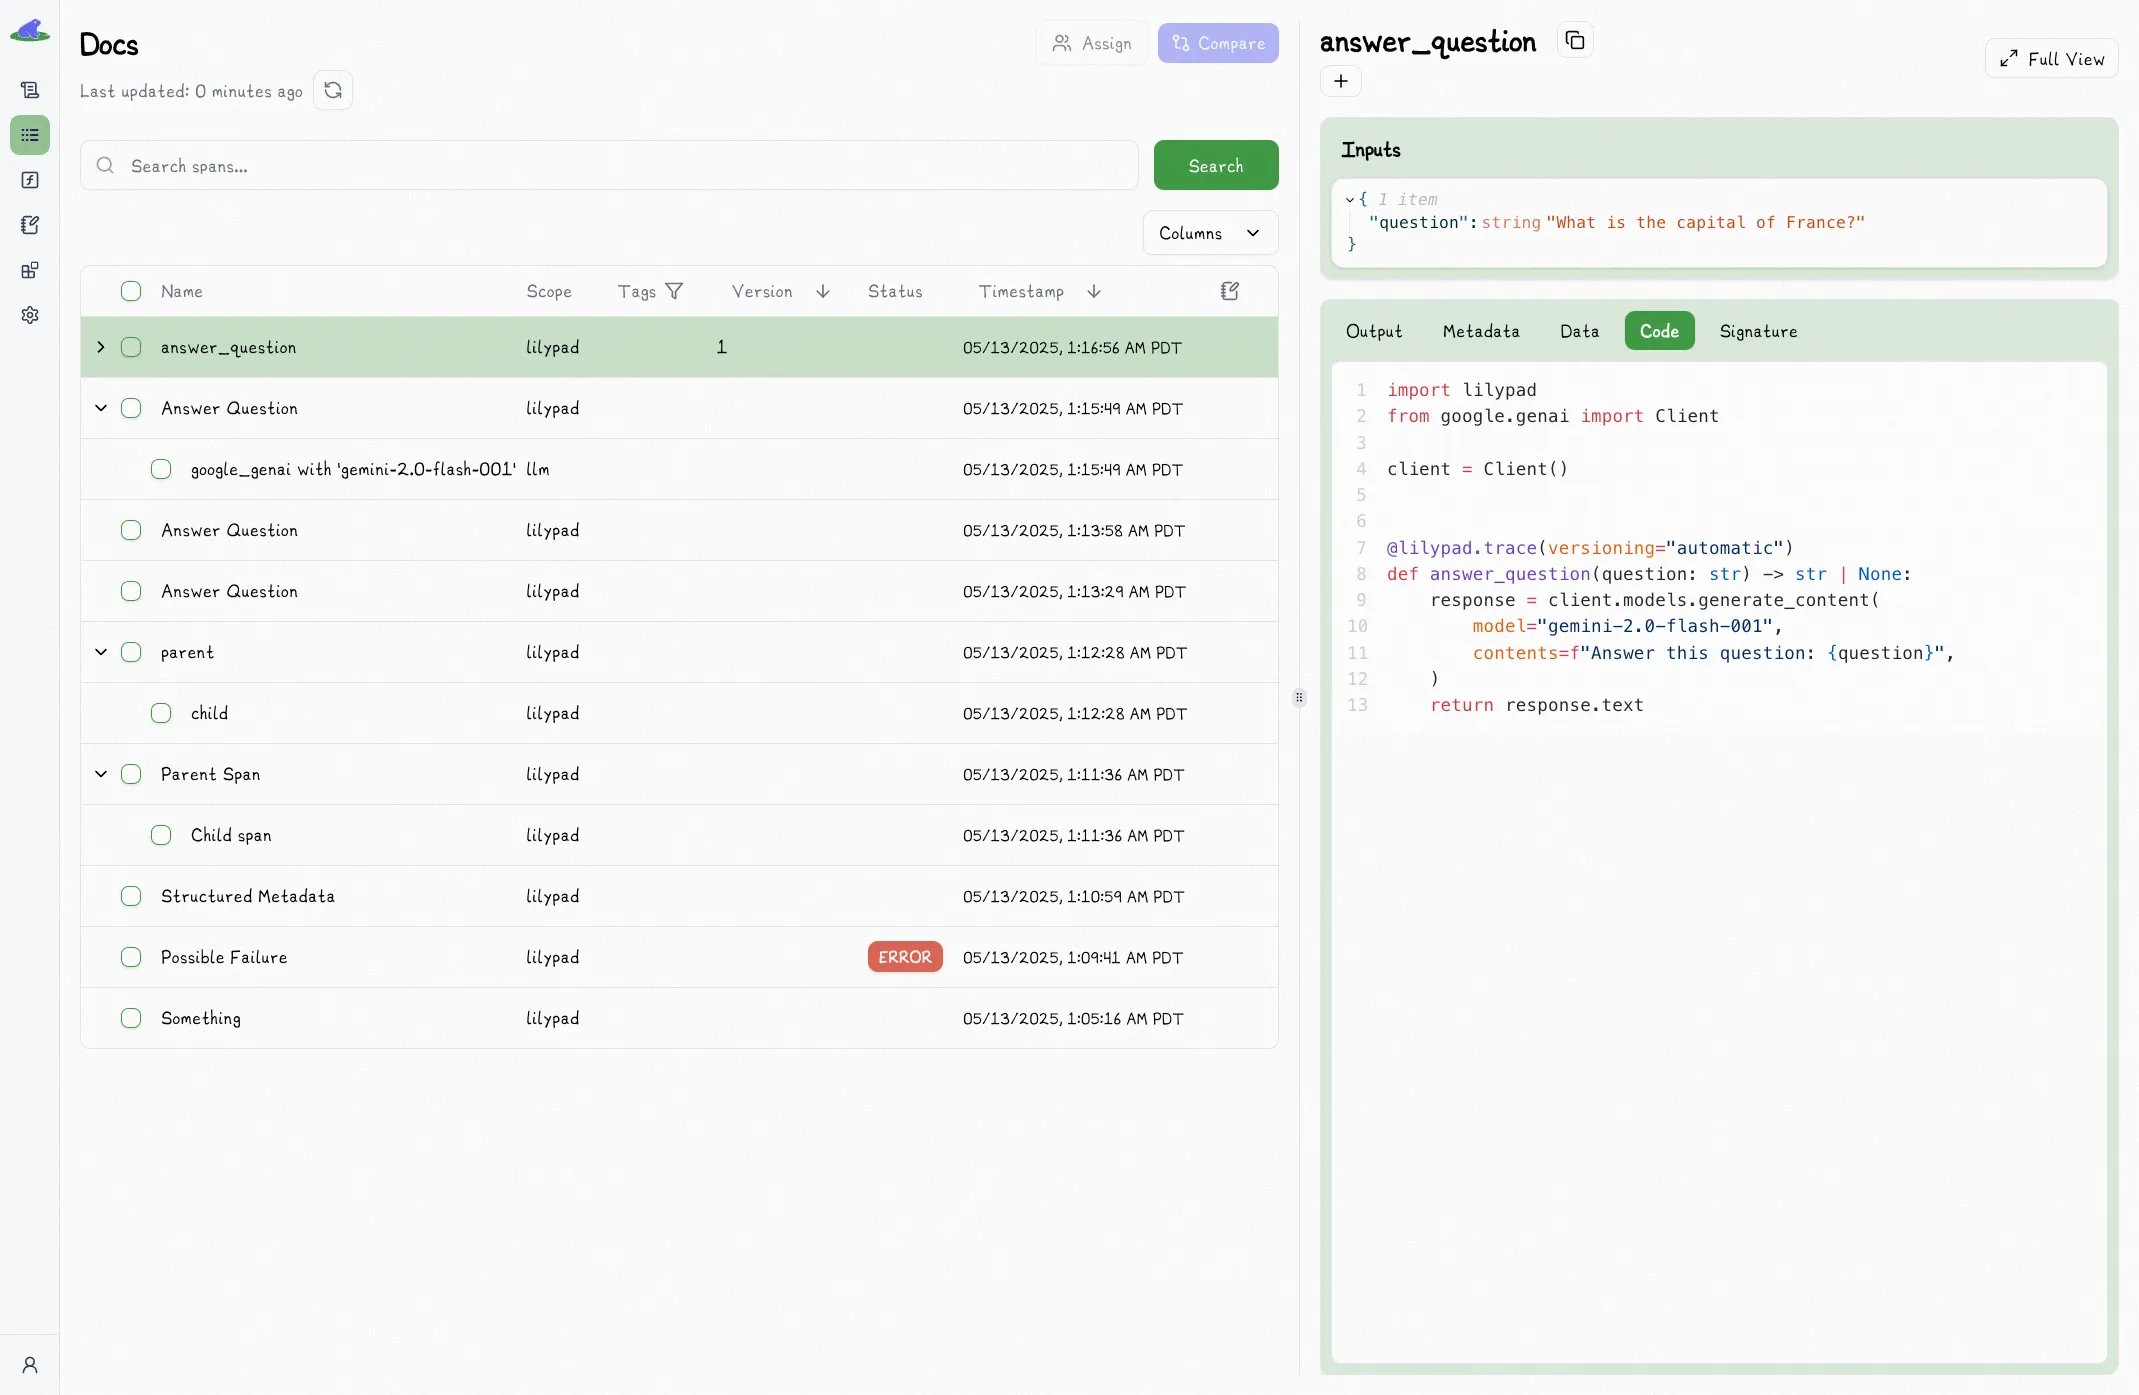
The project home page will only display the parent in each row. You can click the dropdown to view the entire collection of spans contained within that trace:
# Traces
> If you haven't already, we recommend reading [Spans](/docs/lilypad/observability/spans) first.
None of the tooling below requires LLMs. It is, however, very handy when working with them.
As mentioned in the section on [nested spans](/docs/lilypad/observability/spans#nested-spans), traces are really just collections of spans.
In the context of observability, a "trace" often refers to a record of events in a system's execution. Generally this means capturing the inputs, outputs, and additional metadata for each function or module in your system's execution flow.
Lilypad makes this simple and easy with the `trace` decorator:
```python
import lilypad
lilypad.configure()
@lilypad.trace() # [!code highlight]
def child(text: str) -> str:
return "Child Finished!"
@lilypad.trace() # [!code highlight]
def parent(text: str) -> str:
output = child("I'm the child!")
print(output)
return "Parent Finished!"
output = parent("I'm' the parent!")
print(output)
# > Child Finished!
# > Parent Finished!
```
```python
import lilypad
lilypad.configure()
def child(text: str) -> str:
return "Child Finished!"
def parent(text: str) -> str:
with lilypad.span("child") as child_span:
child_input = "I'm the child!"
child_span.metadata({"input": child_input})
child_output = child(child_input)
child_span.metadata({"output": child_output})
print(child_output)
return "Parent Finished!"
with lilypad.span("parent") as parent_span:
parent_input = "I'm the parent!"
parent_span.metadata({"input": parent_input})
parent_output = parent(parent_input)
parent_span.metadata({"output": parent_output})
print(parent_output)
```
As you can see, the `trace` decorator above cleans things up significantly and reduces the cognitive overhead involved in instrumenting your code.
Of course, everything works well together, and sometimes `span` makes more sense and will work better for certain use-cases where you want to instrument code that is not structured (or does not make sense to structure) as a function.
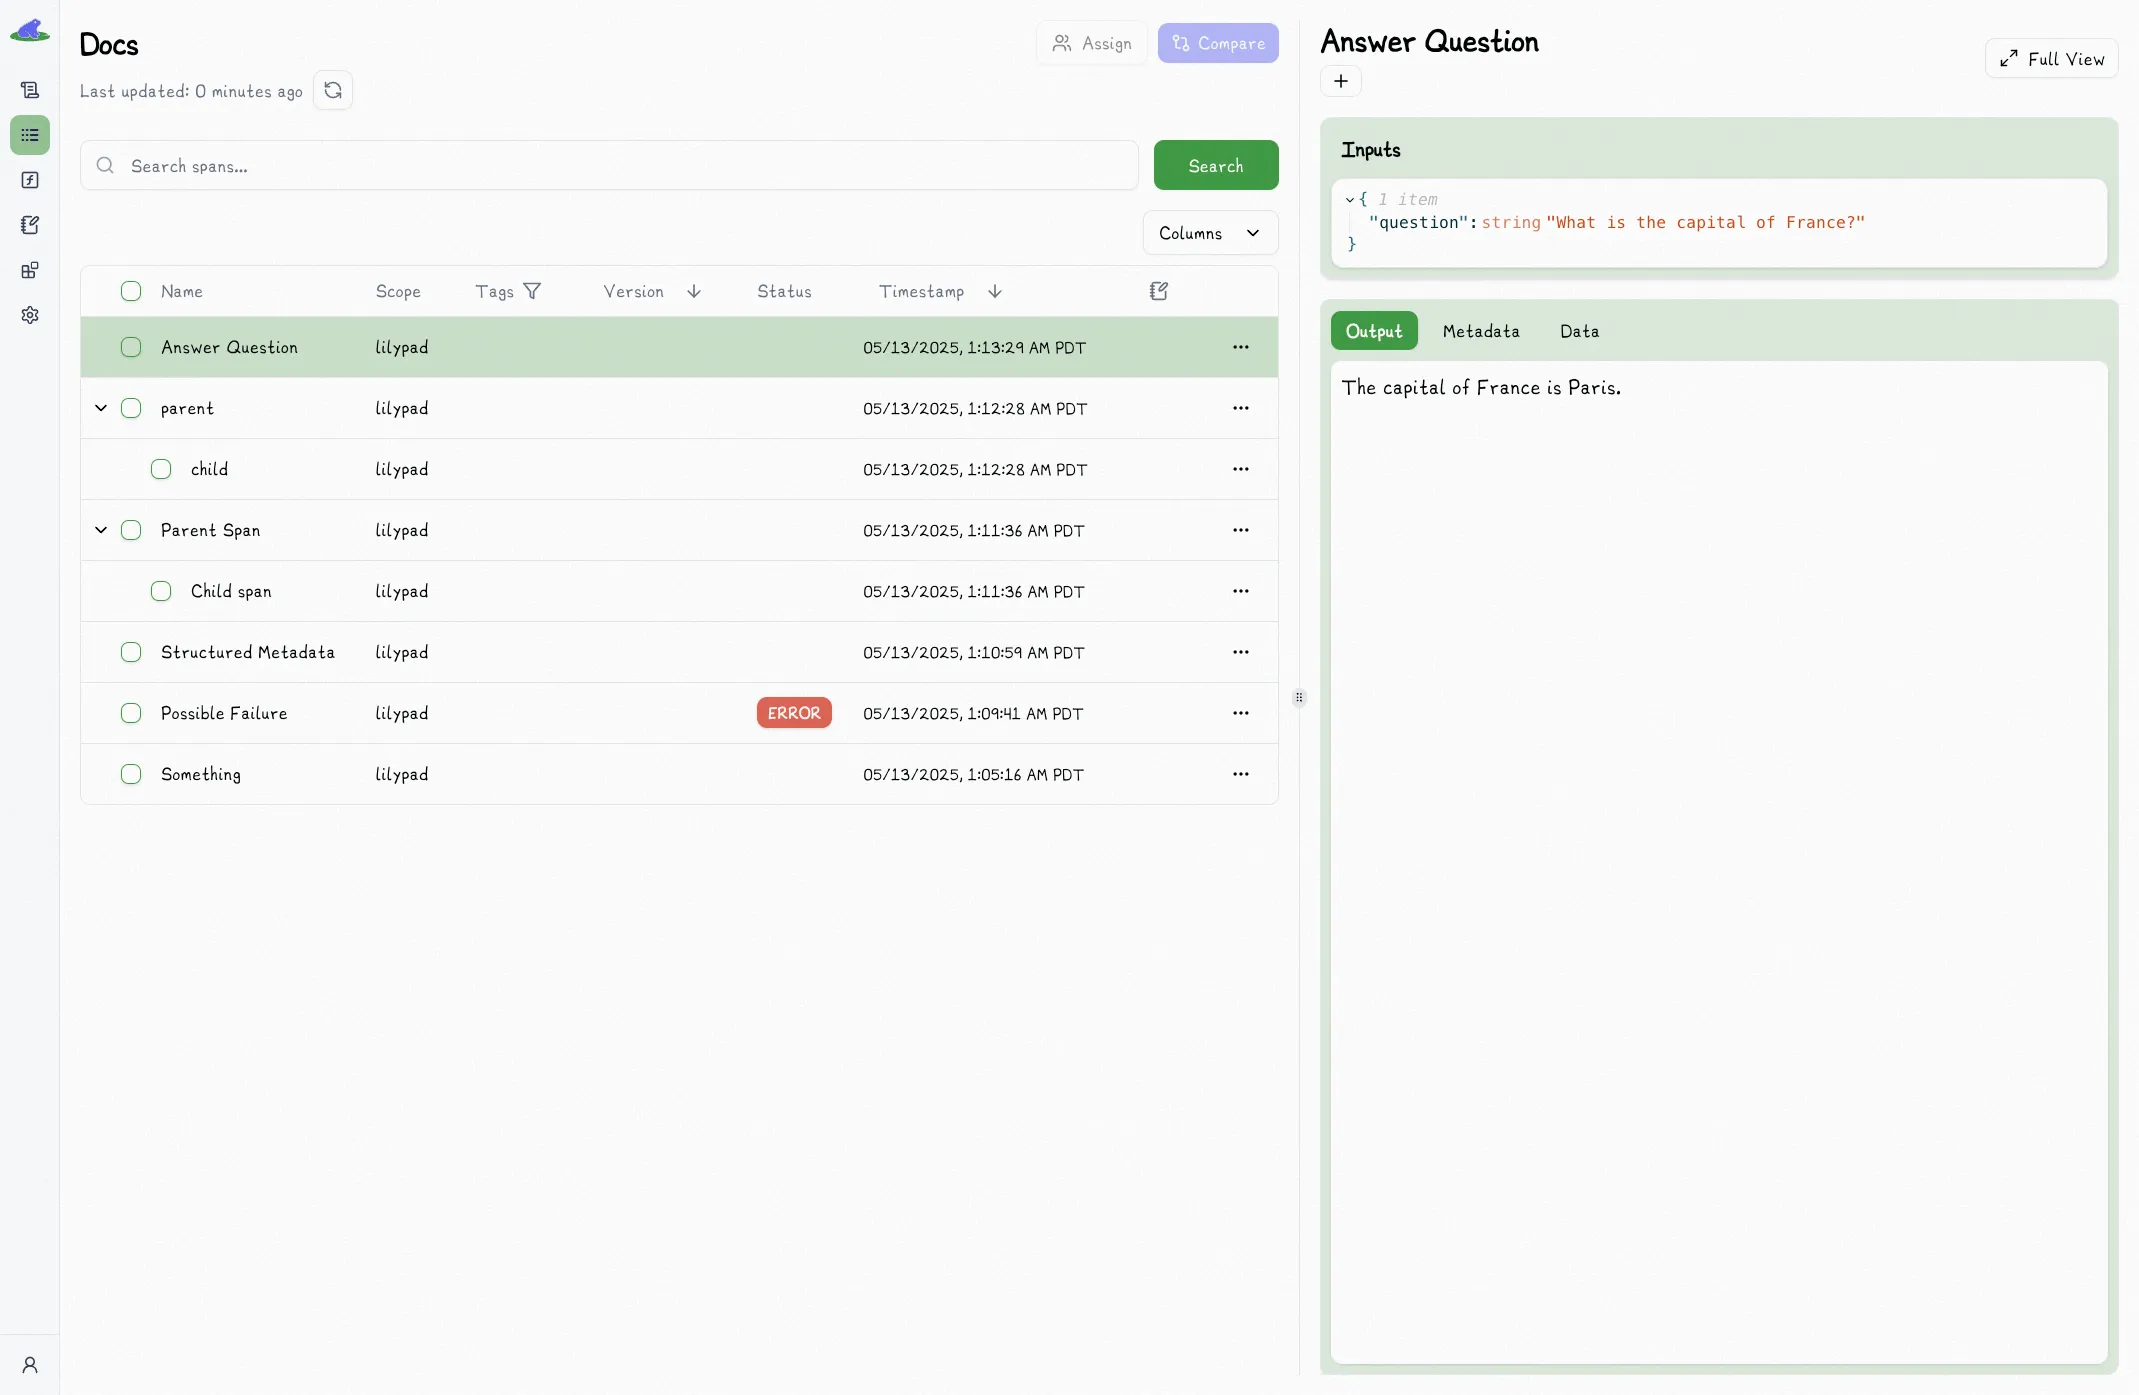
## Custom Name
By default, the `trace` decorator will use the decorated function's name for the trace. Sometimes it makes more sense to use a custom (more readable) name:
```python
import lilypad
lilypad.configure()
@lilypad.trace(name="Answer Question") # [!code highlight]
def answer_question(question: str) -> str:
return "The capital of France is Paris."
answer = answer_question("What is the capital of France?")
print(answer)
# > The capital of France is Paris.
```
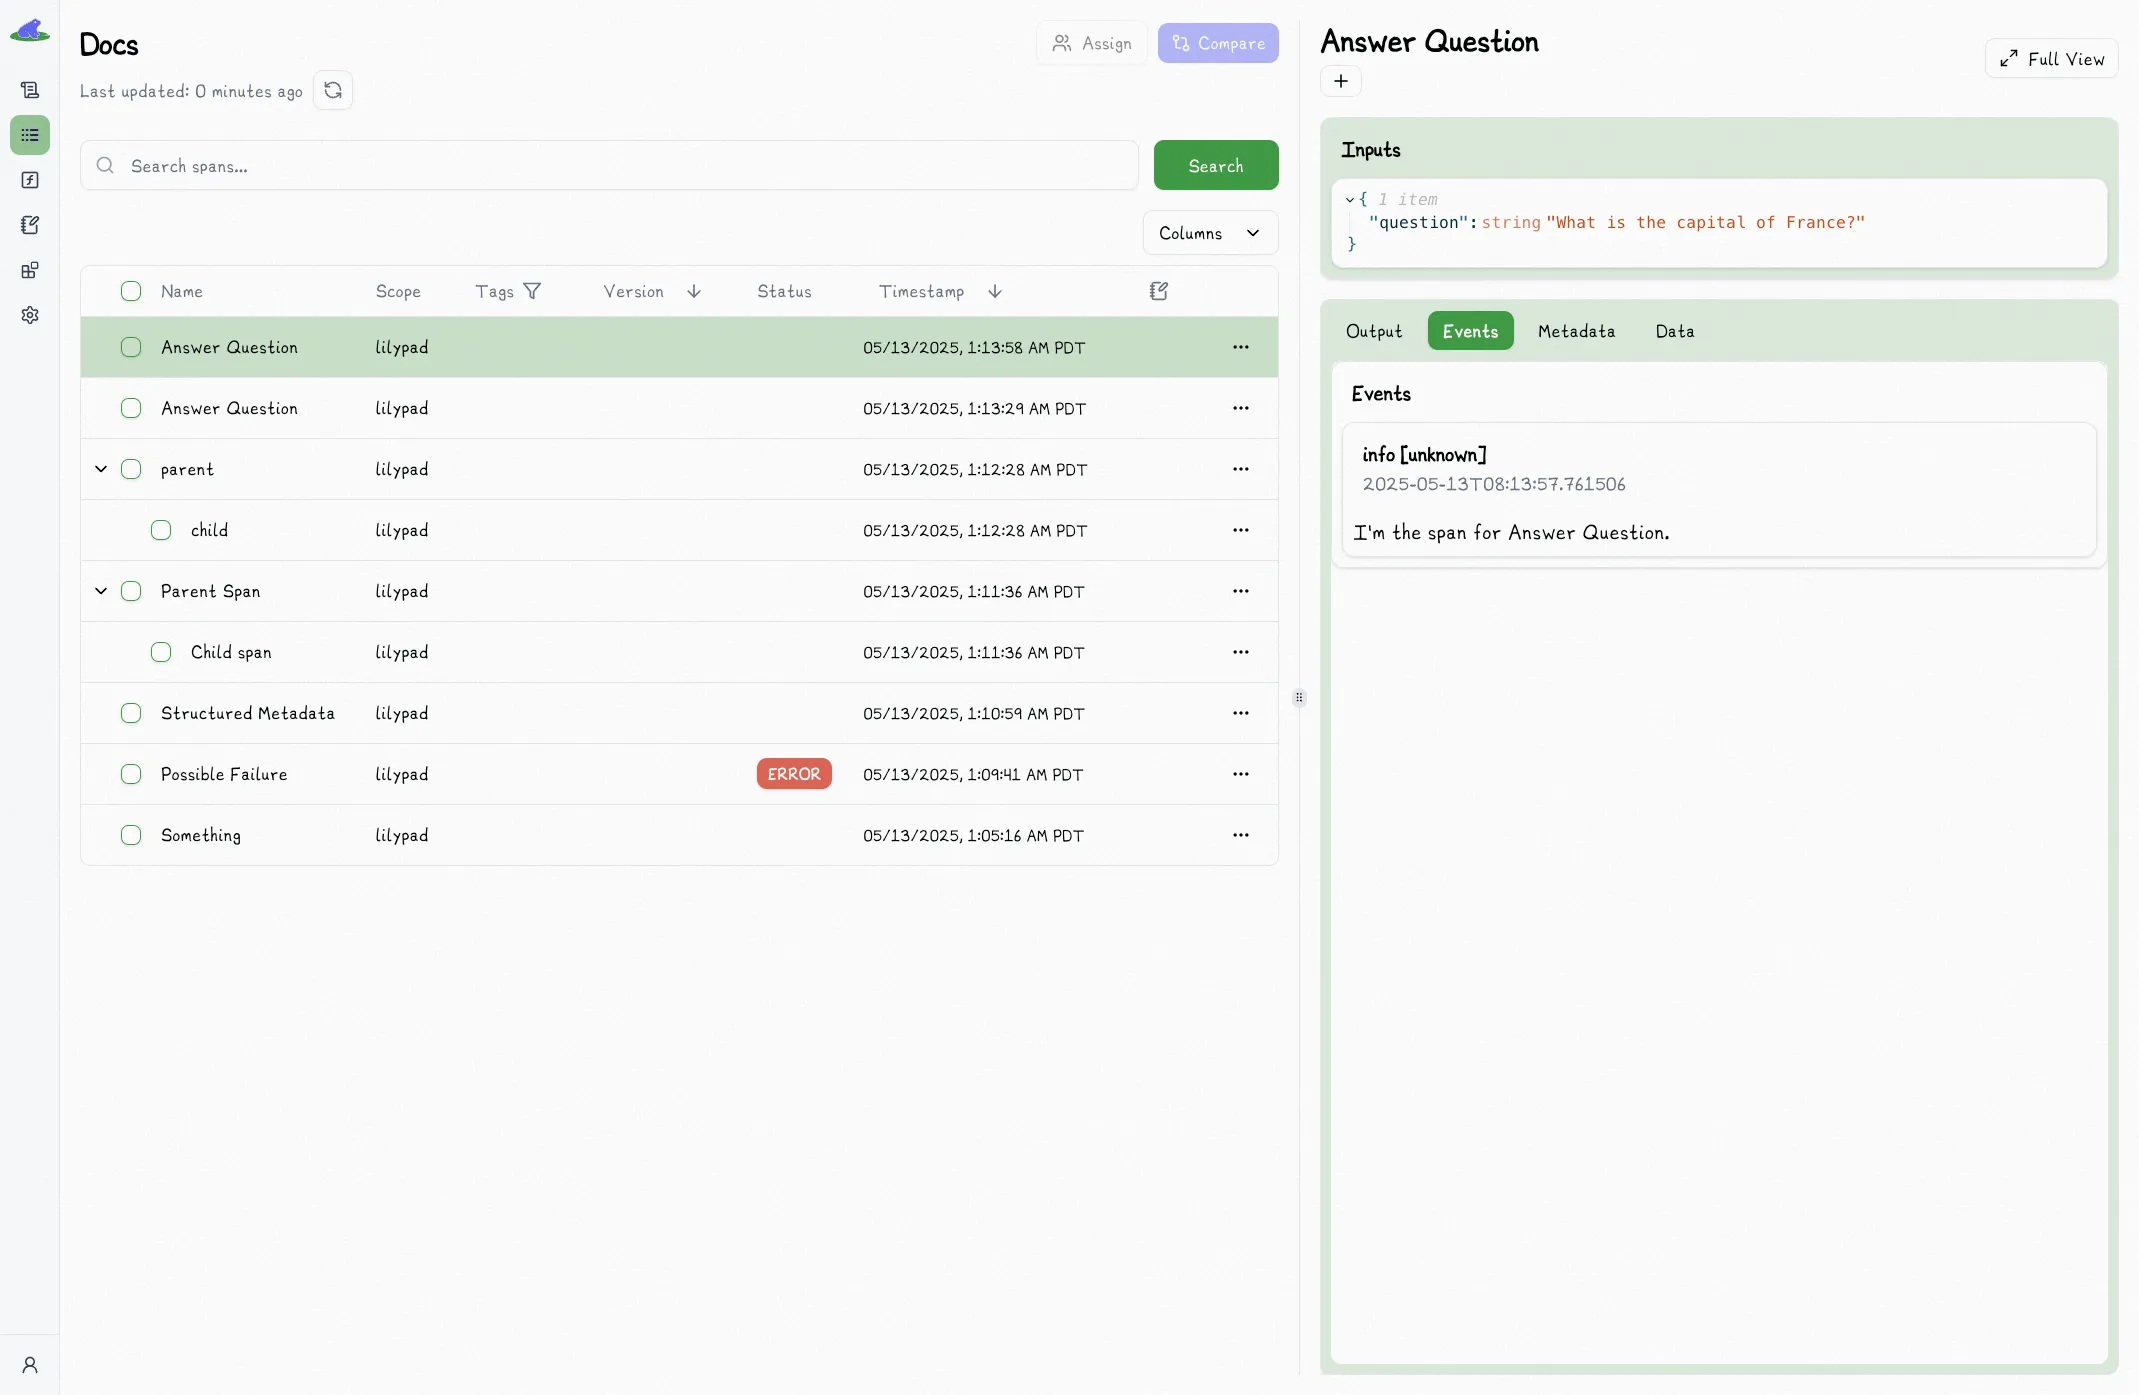
## Updating Trace Metadata
The `trace` decorator captures information such as inputs/outputs by default, but often you'll want to log additional information or metadata as part of that function's span (and not a sub-span).
_We've made this possible in a type-safe way with a special `trace_ctx` reserved argument name._
```python
import lilypad
lilypad.configure()
@lilypad.trace(name="Answer Question")
def answer_question(trace_ctx: lilypad.Span, question: str) -> str: # [!code highlight]
trace_ctx.log("I'm the span for Answer Question.") # [!code highlight]
return "The capital of France is Paris."
answer = answer_question("What is the capital of France?")
print(answer)
# > The capital of France is Paris.
```
If a `trace`-decorated functions has `trace_ctx: lilypad.Span` as it's first argument, the decorator will inject the span into the argument so that you can access it directly inside the function.
The resulting decorated function's call signature will then be updated such that `trace_ctx` is excluded (since `trace_ctx` will be supplied by the decorator, not the user).
Above, `answer_question` only expects `question` as an input — and your editor knows this.
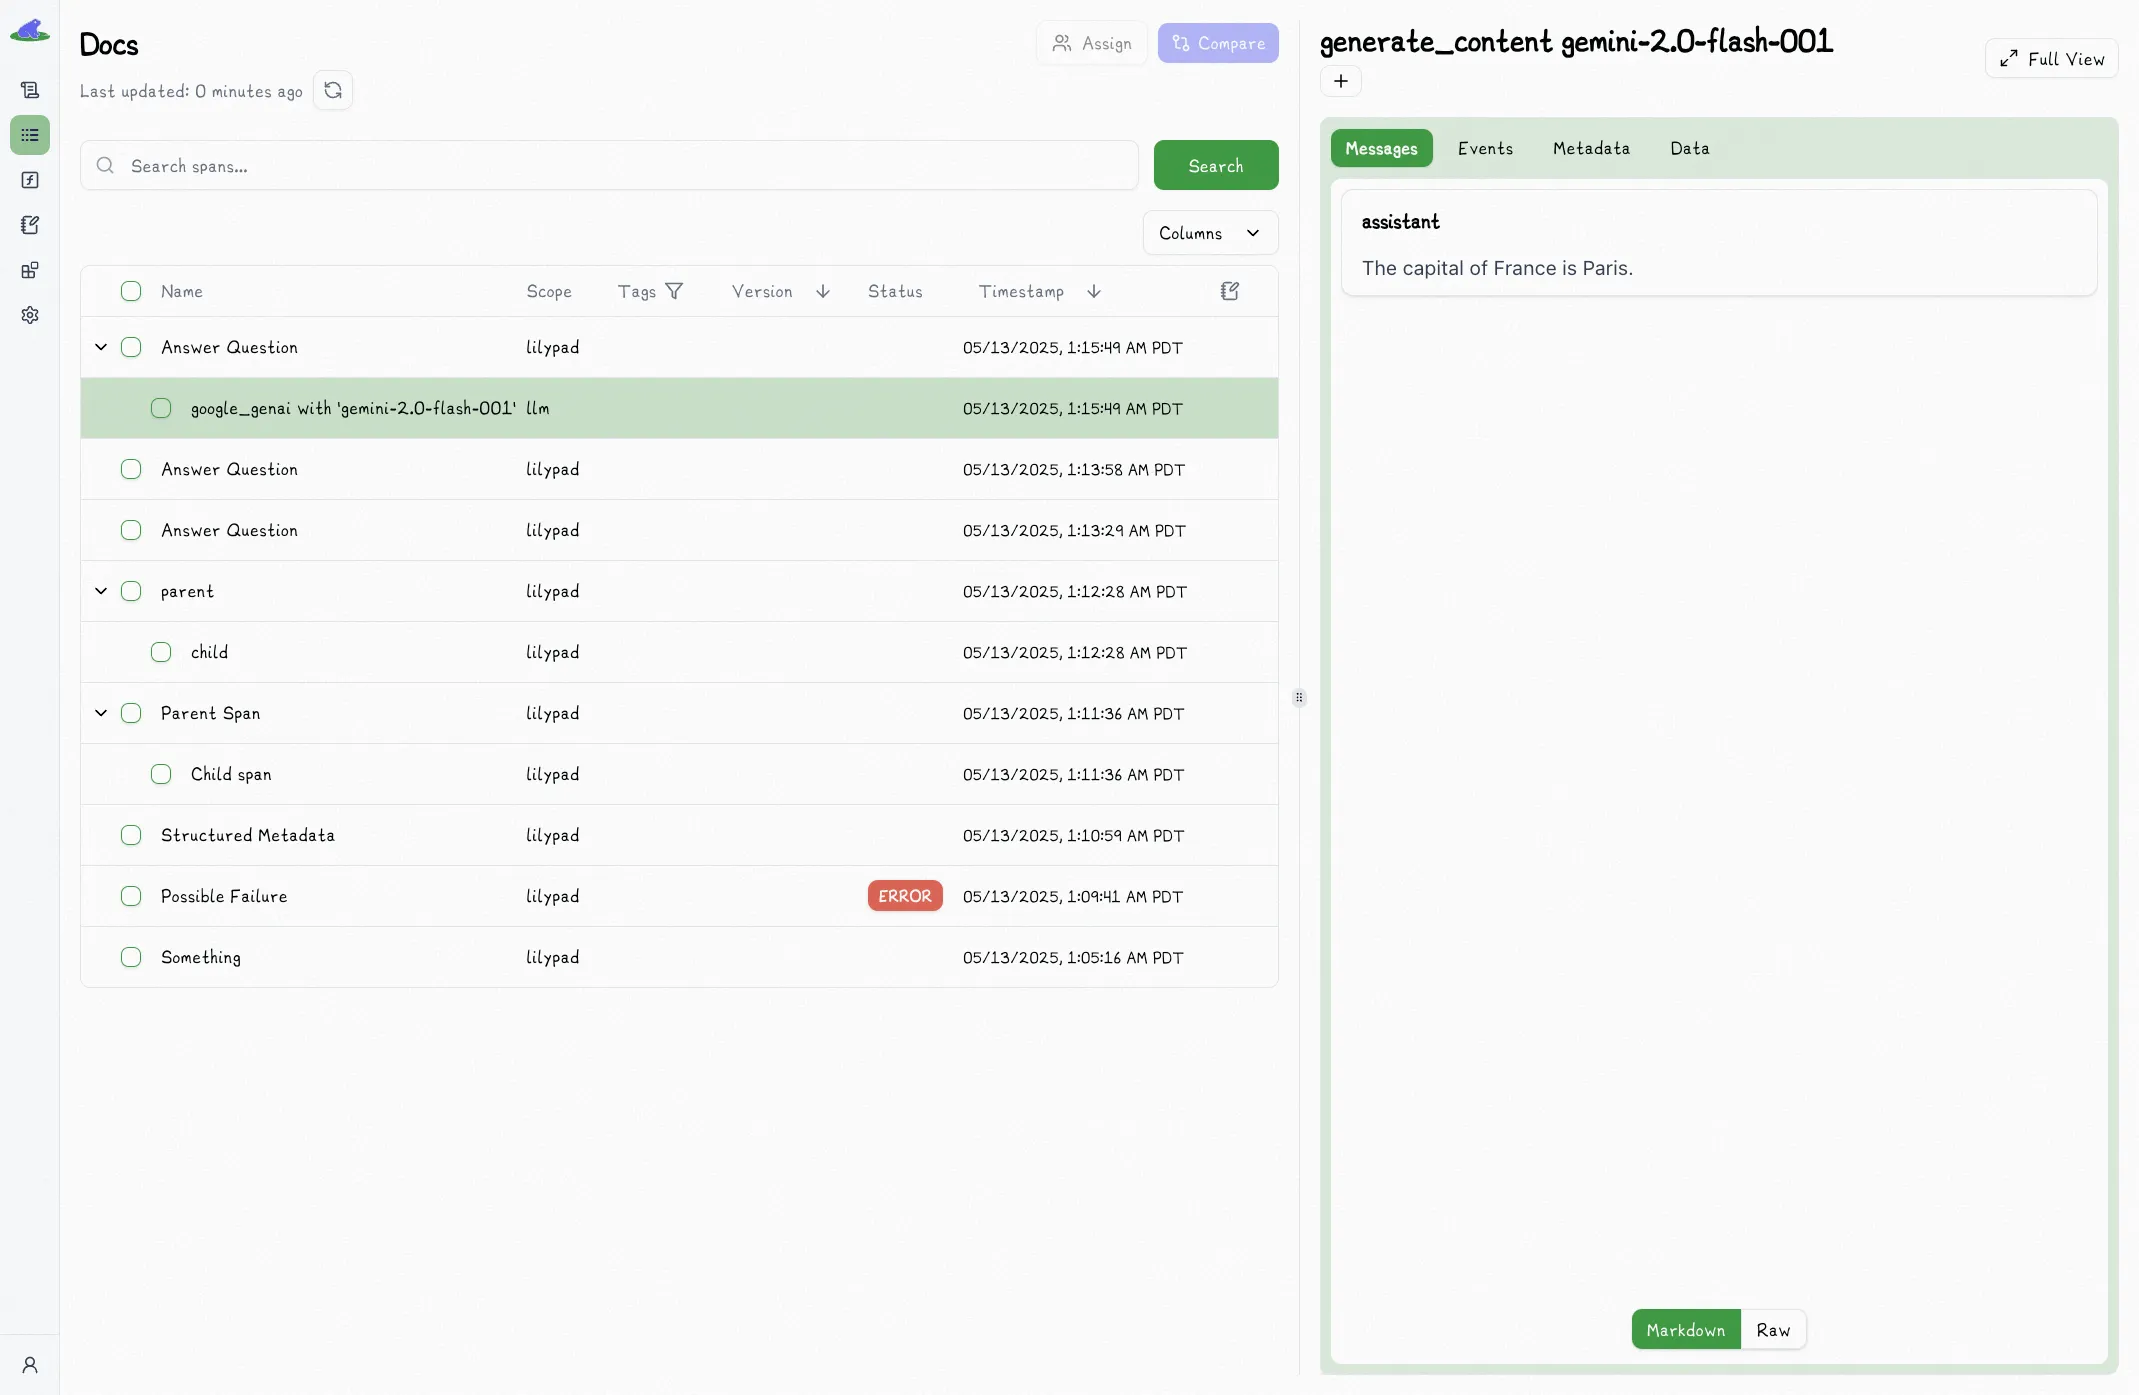
## Tracing LLM Calls
Since LLMs are non-deterministic, we recommend [versioning](/docs/lilypad/observability/versioning) any functions that use them.
Since Lilypad can create spans for LLM API calls automatically, simple calling the API inside of a `trace`-decorated function will nest that span inside of the parent function:
```python
from google.genai import Client
import lilypad
lilypad.configure(auto_llm=True) # [!code highlight]
client = Client()
@lilypad.trace(name="Answer Question")
def answer_question(question: str) -> str | None:
response = client.models.generate_content(
model="gemini-2.0-flash-001",
contents=f"Answer this question: {question}",
)
return response.text
response = answer_question("What is the capital of France?")
print(response)
```
# Versioning
> If you haven't already, we recommend reading [Traces](/docs/lilypad/observability/traces) first.
When working with non-determinism (cough cough LLMs), it's extremely important that we take a snapshot of the exact version of the code that was used to produce an output. This reproducibility is necessary for proper evaluation.
## Automatic Versioning
Setting `versioning="automatic"` will tell Lilypad to automatically version the decorated function every time it's executed:
```python
from google.genai import Client
import lilypad
lilypad.configure(auto_llm=True)
client = Client()
@lilypad.trace(versioning="automatic") # [!code highlight]
def answer_question(question: str) -> str | None:
response = client.models.generate_content(
model="gemini-2.0-flash-001",
contents=f"Answer this question: {question}",
)
return response.text
response = answer_question("What is the capital of France?") # automatically versioned
print(response)
# > The capital of France is Paris.
```
Whenever you run a `trace`-decorated function with `versioning="automatic"`, we compute the entire code execution graph necessary to reproduce the current execution of the function.
_This is what we use to determine the version._
This means that changing the code to an existing version will automatically attach the trace to that version.
It also means that changes to anything that would change how the function is executed will be captured:
```python
import lilypad
from google.genai import Client
client = Client()
# This function will be included in the version and any changes
# to it will result in a new version of `answer_question`
def answer_question_prompt(question: str) -> str: # [!code highlight]
return f"Answer this question: {question}" # [!code highlight]
@lilypad.trace(name="Answer Question", versioning="automatic")
def answer_question(question: str) -> str | None:
response = client.models.generate_content(
model="gemini-2.0-flash-001",
contents=answer_question_prompt(question), # [!code highlight]
)
return response.text
```
## Version Override
Since a function's version is a snapshot, we can re-run the exact code for a given version.
First, generate type-safe stubs for all available versions:
```bash
lilypad sync
```
This ensures that the `.version` method return type-safe function signatures matching the expected arguments for that version, which you can then run in a sandbox:
```python-snippet-concat
response = answer_question.version(1)("What is the capital of France?")
```
The `.version` method will have proper type hints when the function is imported but not if used in the same file.
This is due to the way that `.pyi` files work in Python.
## A/B Testing
You can use the `.version` method to run different versions of the same function easily. This makes A/B testing quite easy — just run each version for a subset of users and evaluate which one is better.
## Remote Deployment
Environments are currently under active development during the beta period.
If remote deployment is important to you, please reach out to us on Slack or via email.
# Cost & Latency
Lilypad automatically captures the latency of every span. For spans containing LLM API calls, Lilypad also automatically captures the cost of that call.
## Trace View
When you select a trace to view more details, you'll find the latency of the span in the top right corner:
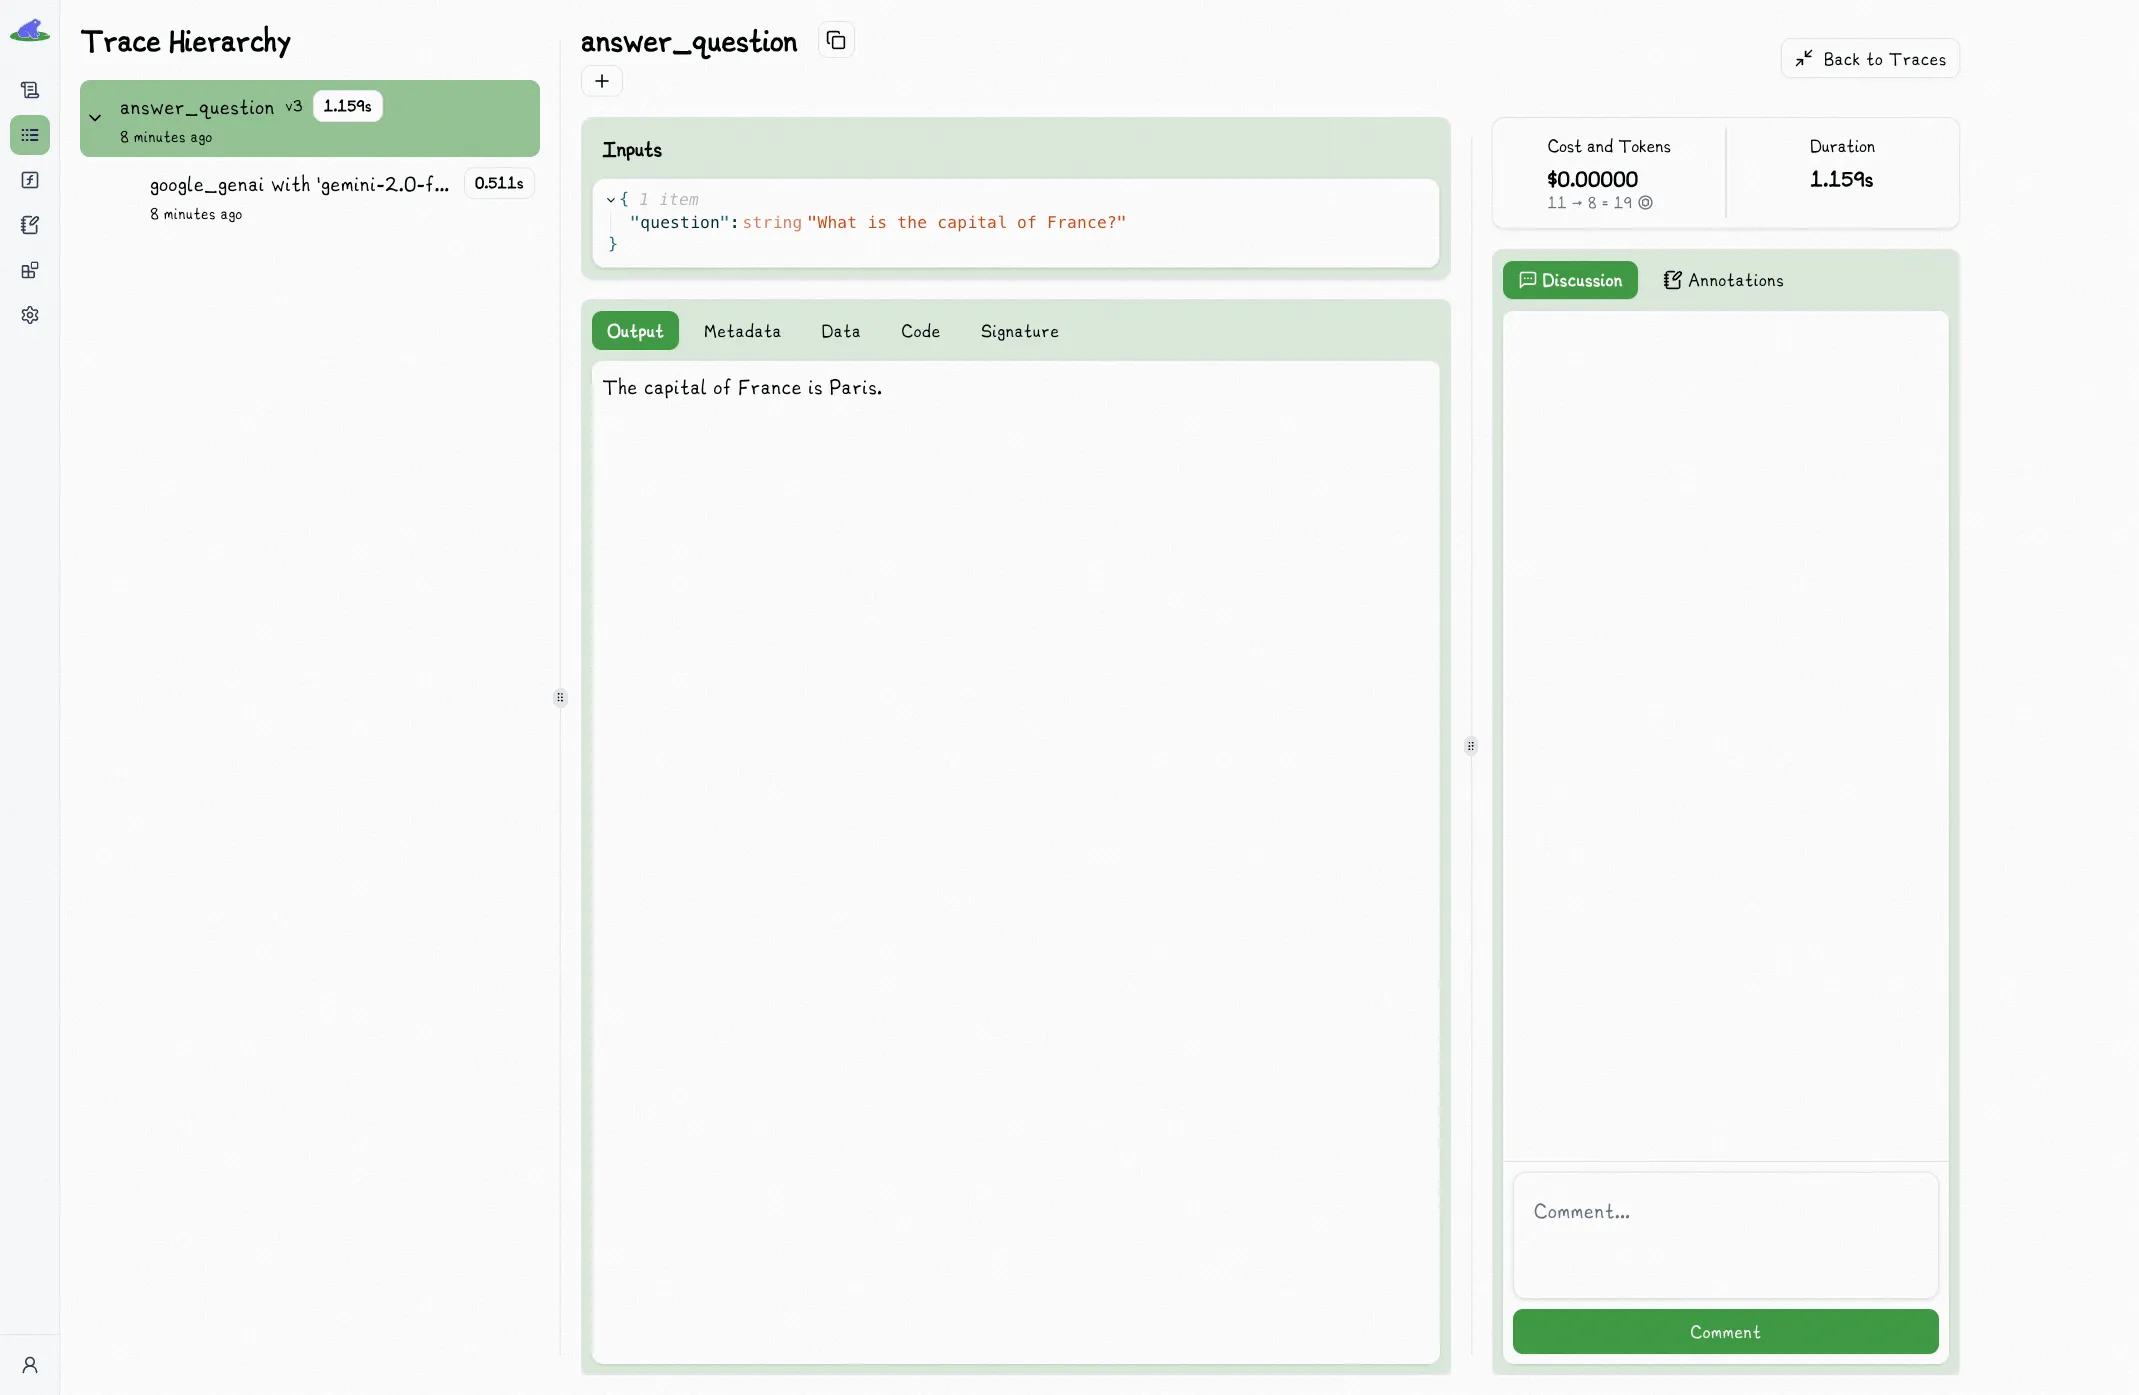
If the span is or contains an LLM call, there will also be a pill for cost.
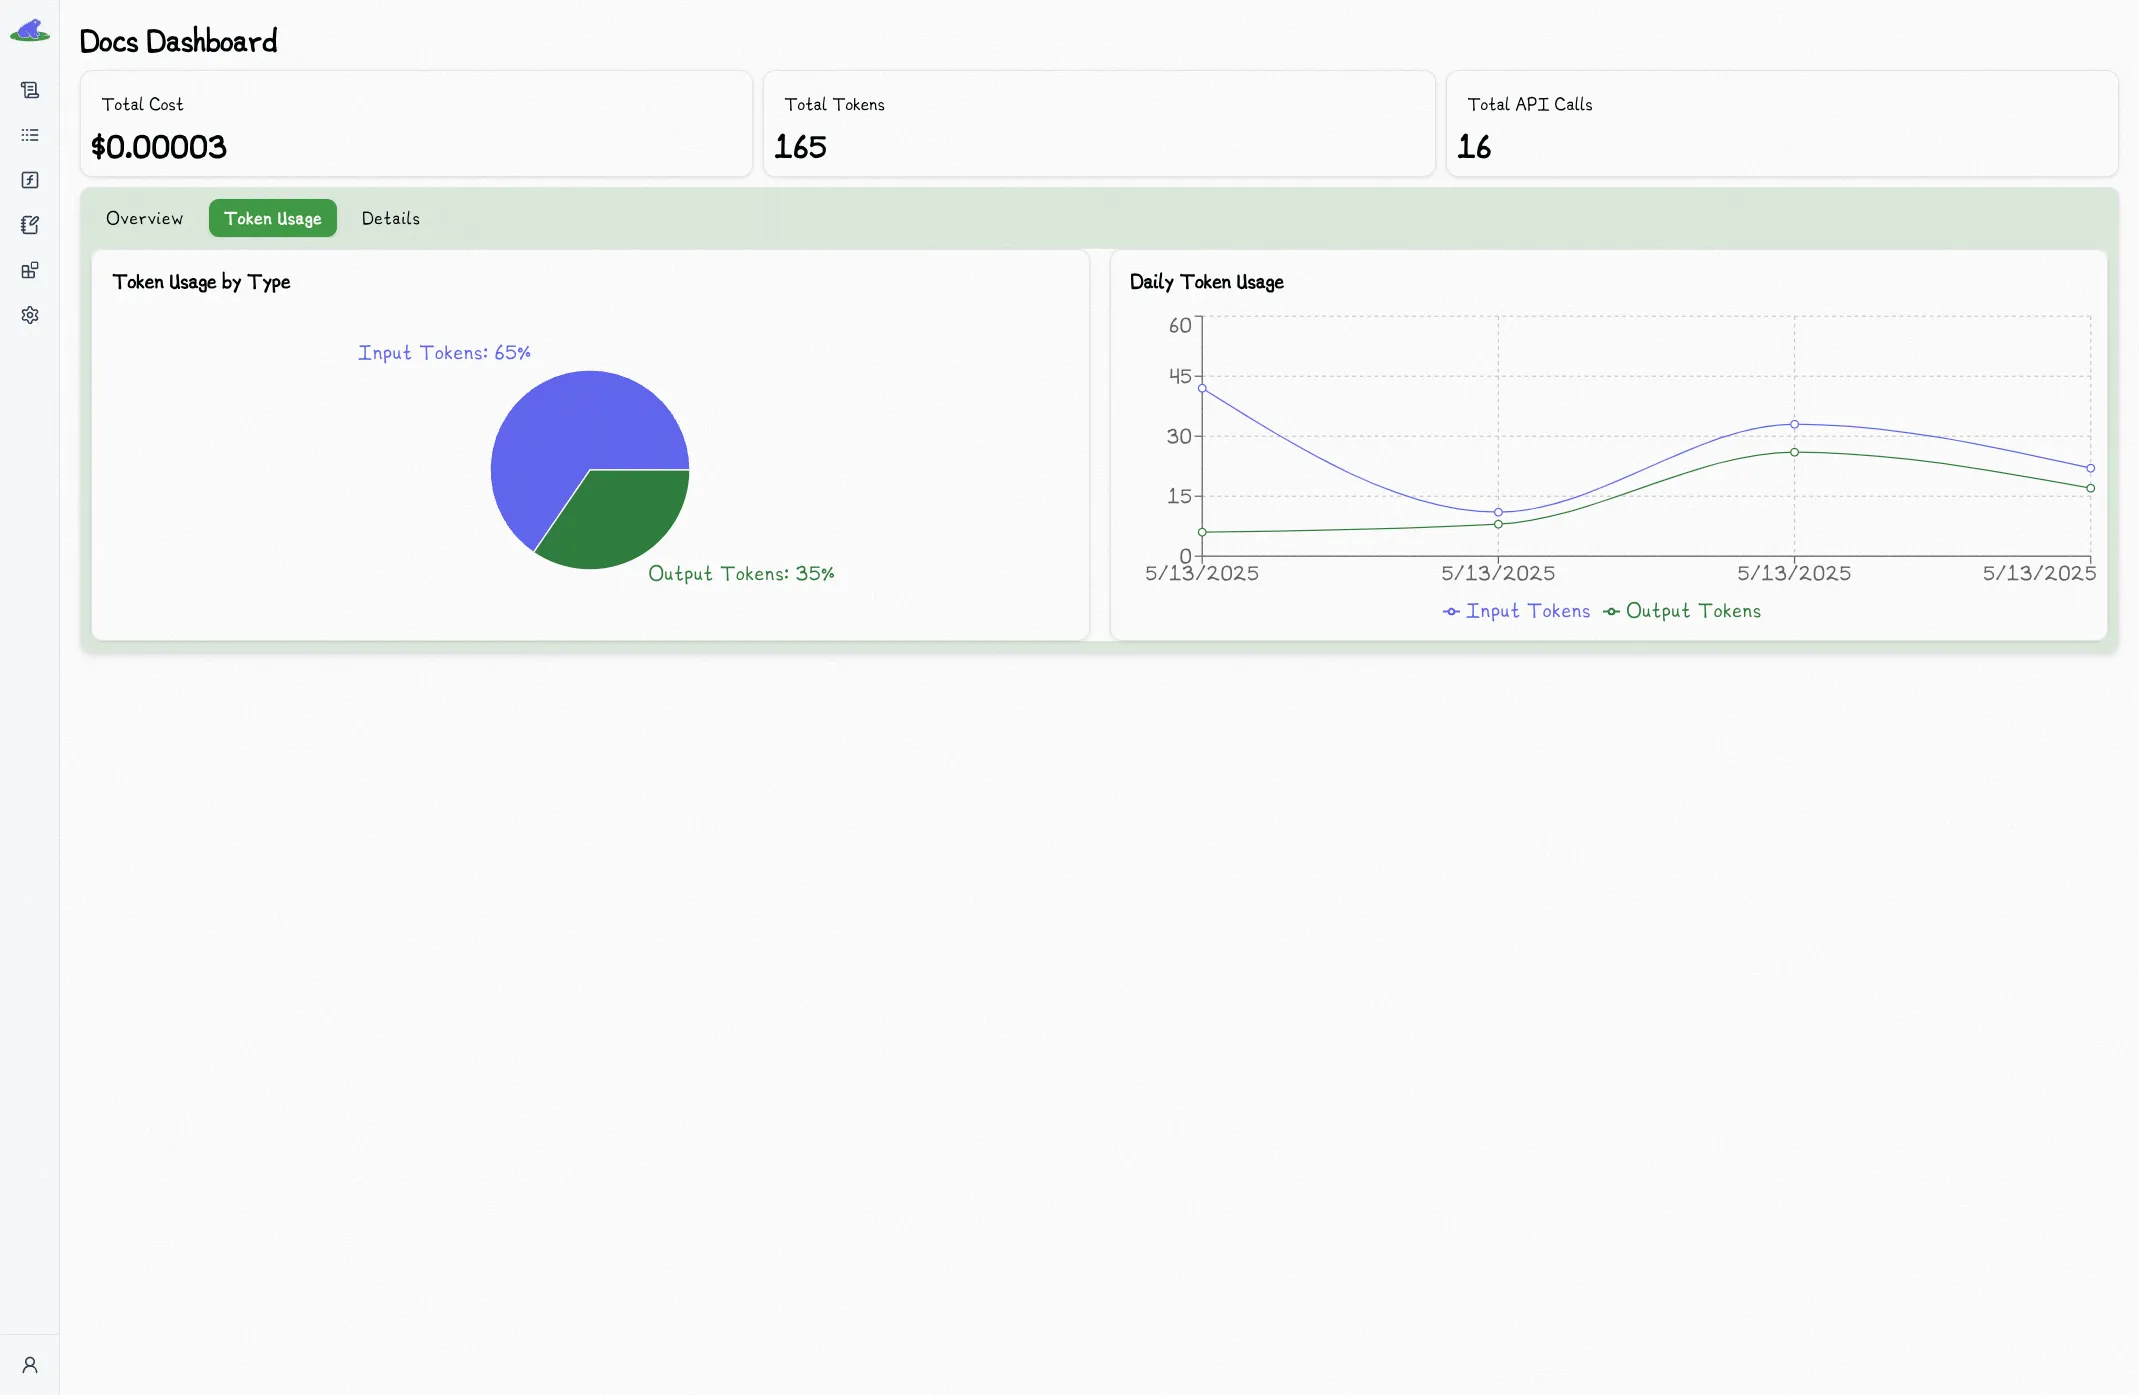
## Project Dashboard
The home page for each project acts as a dashboard overview of the project.
You can see cost and latency charts amongst other stats:
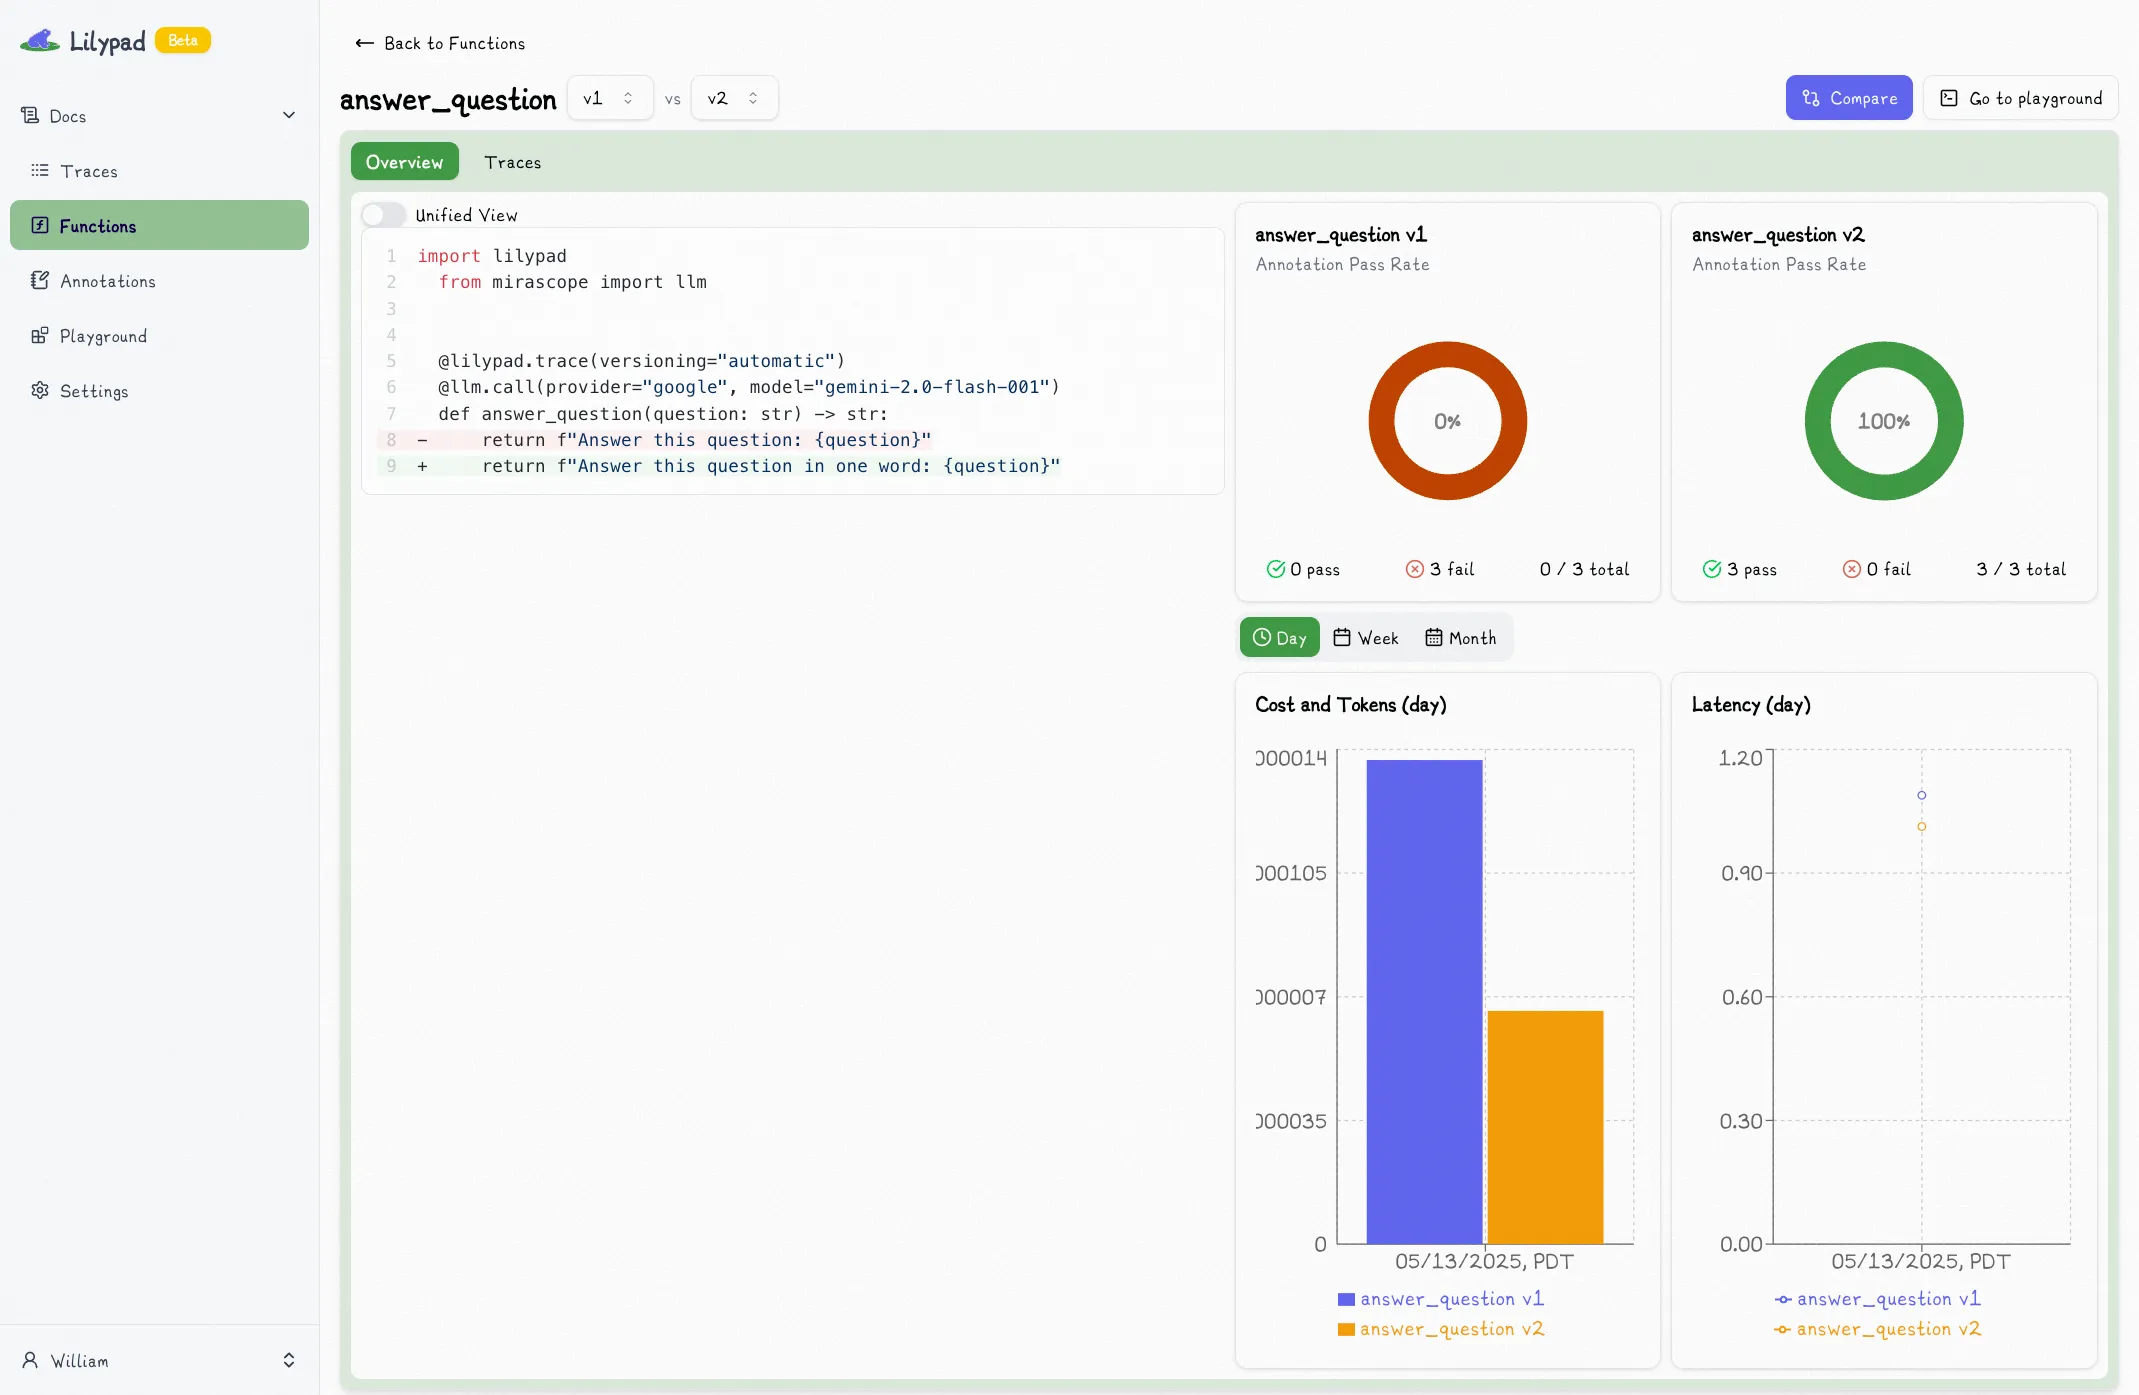
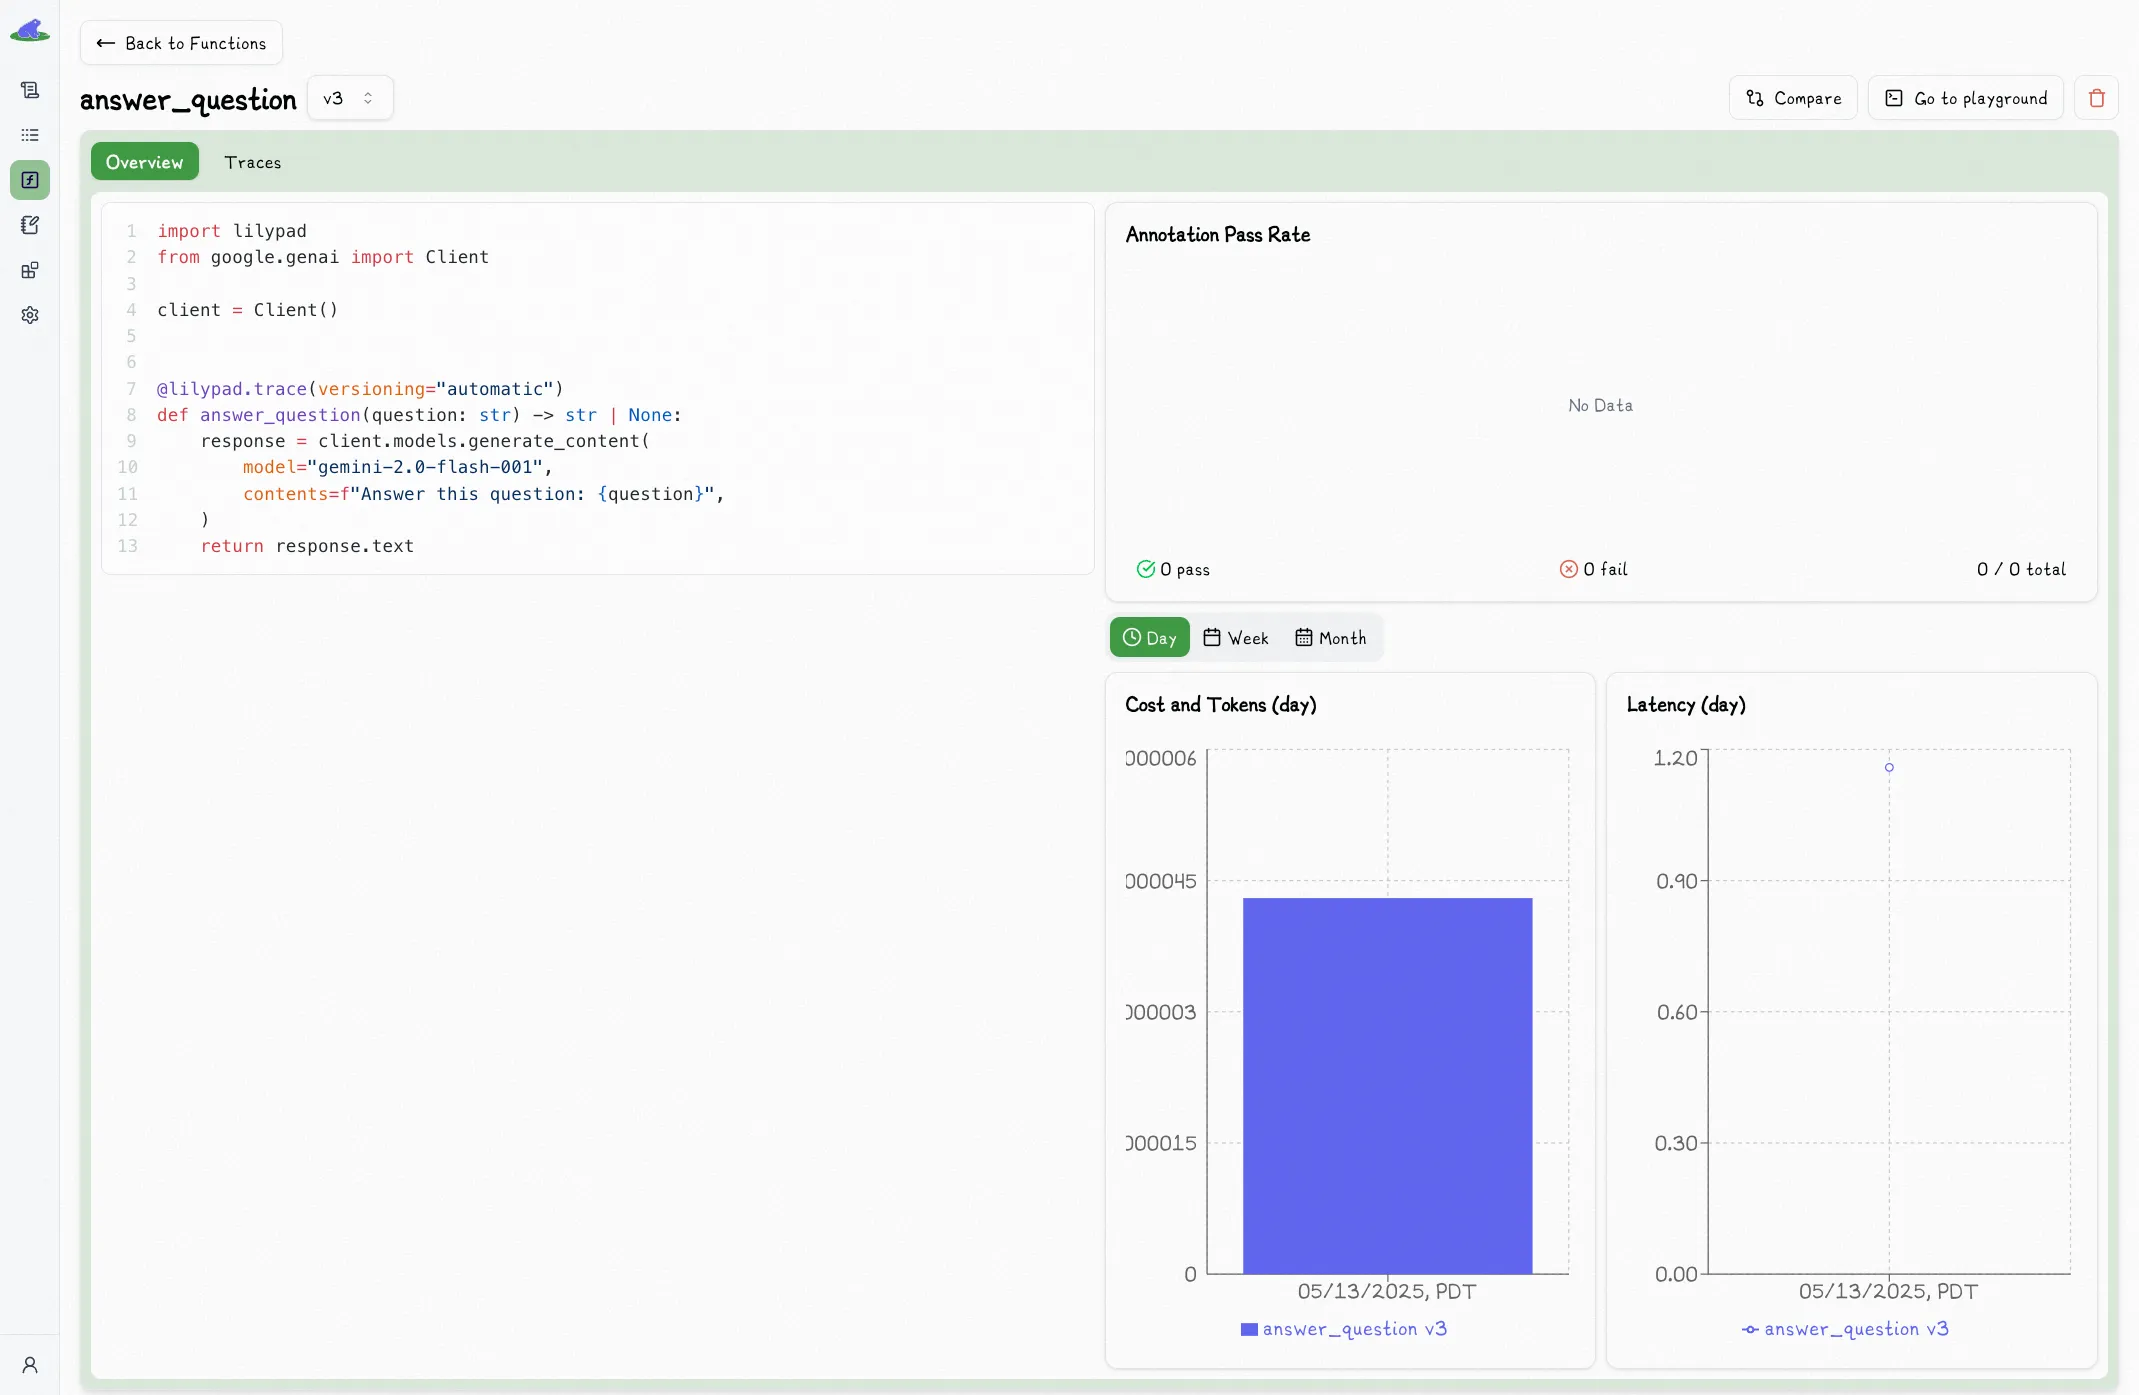
## Versioned Function Dashboard
The main page for a versioned function will show you cost and latency charts, which you can toggle to show by day, week, or month:
# Comparisons
Comparisons are a core to any evaluation process. Lilypad provides a simple way to compare spans and versioned functions.
## Comparing Spans
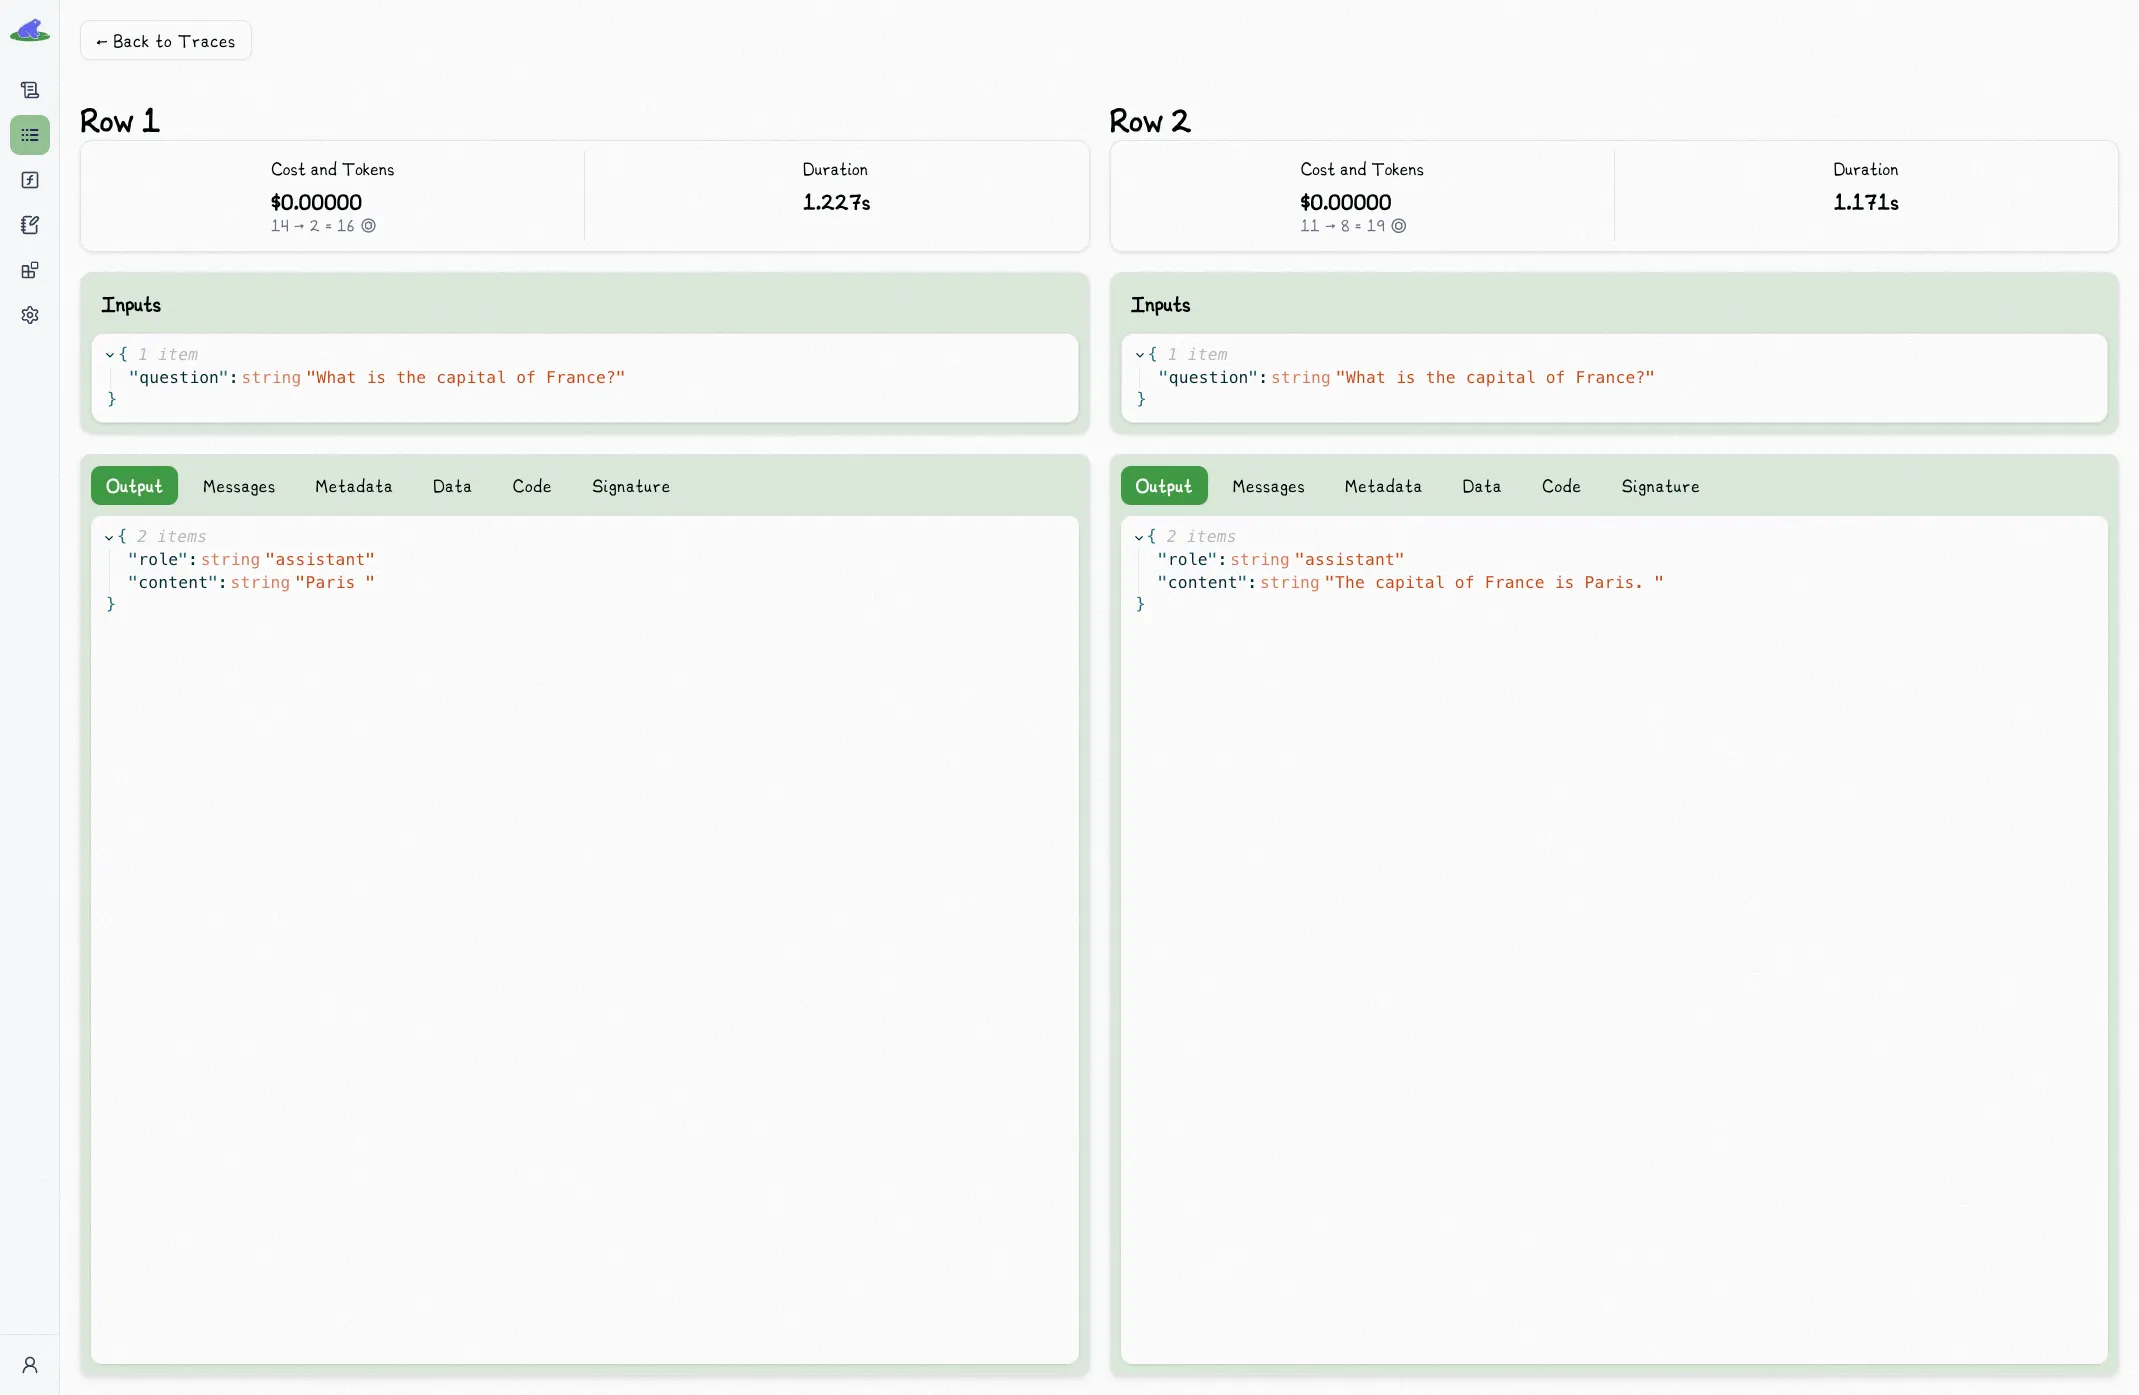
You can compare spans by selecting the two spans you want to compare and clicking the "Compare" button.
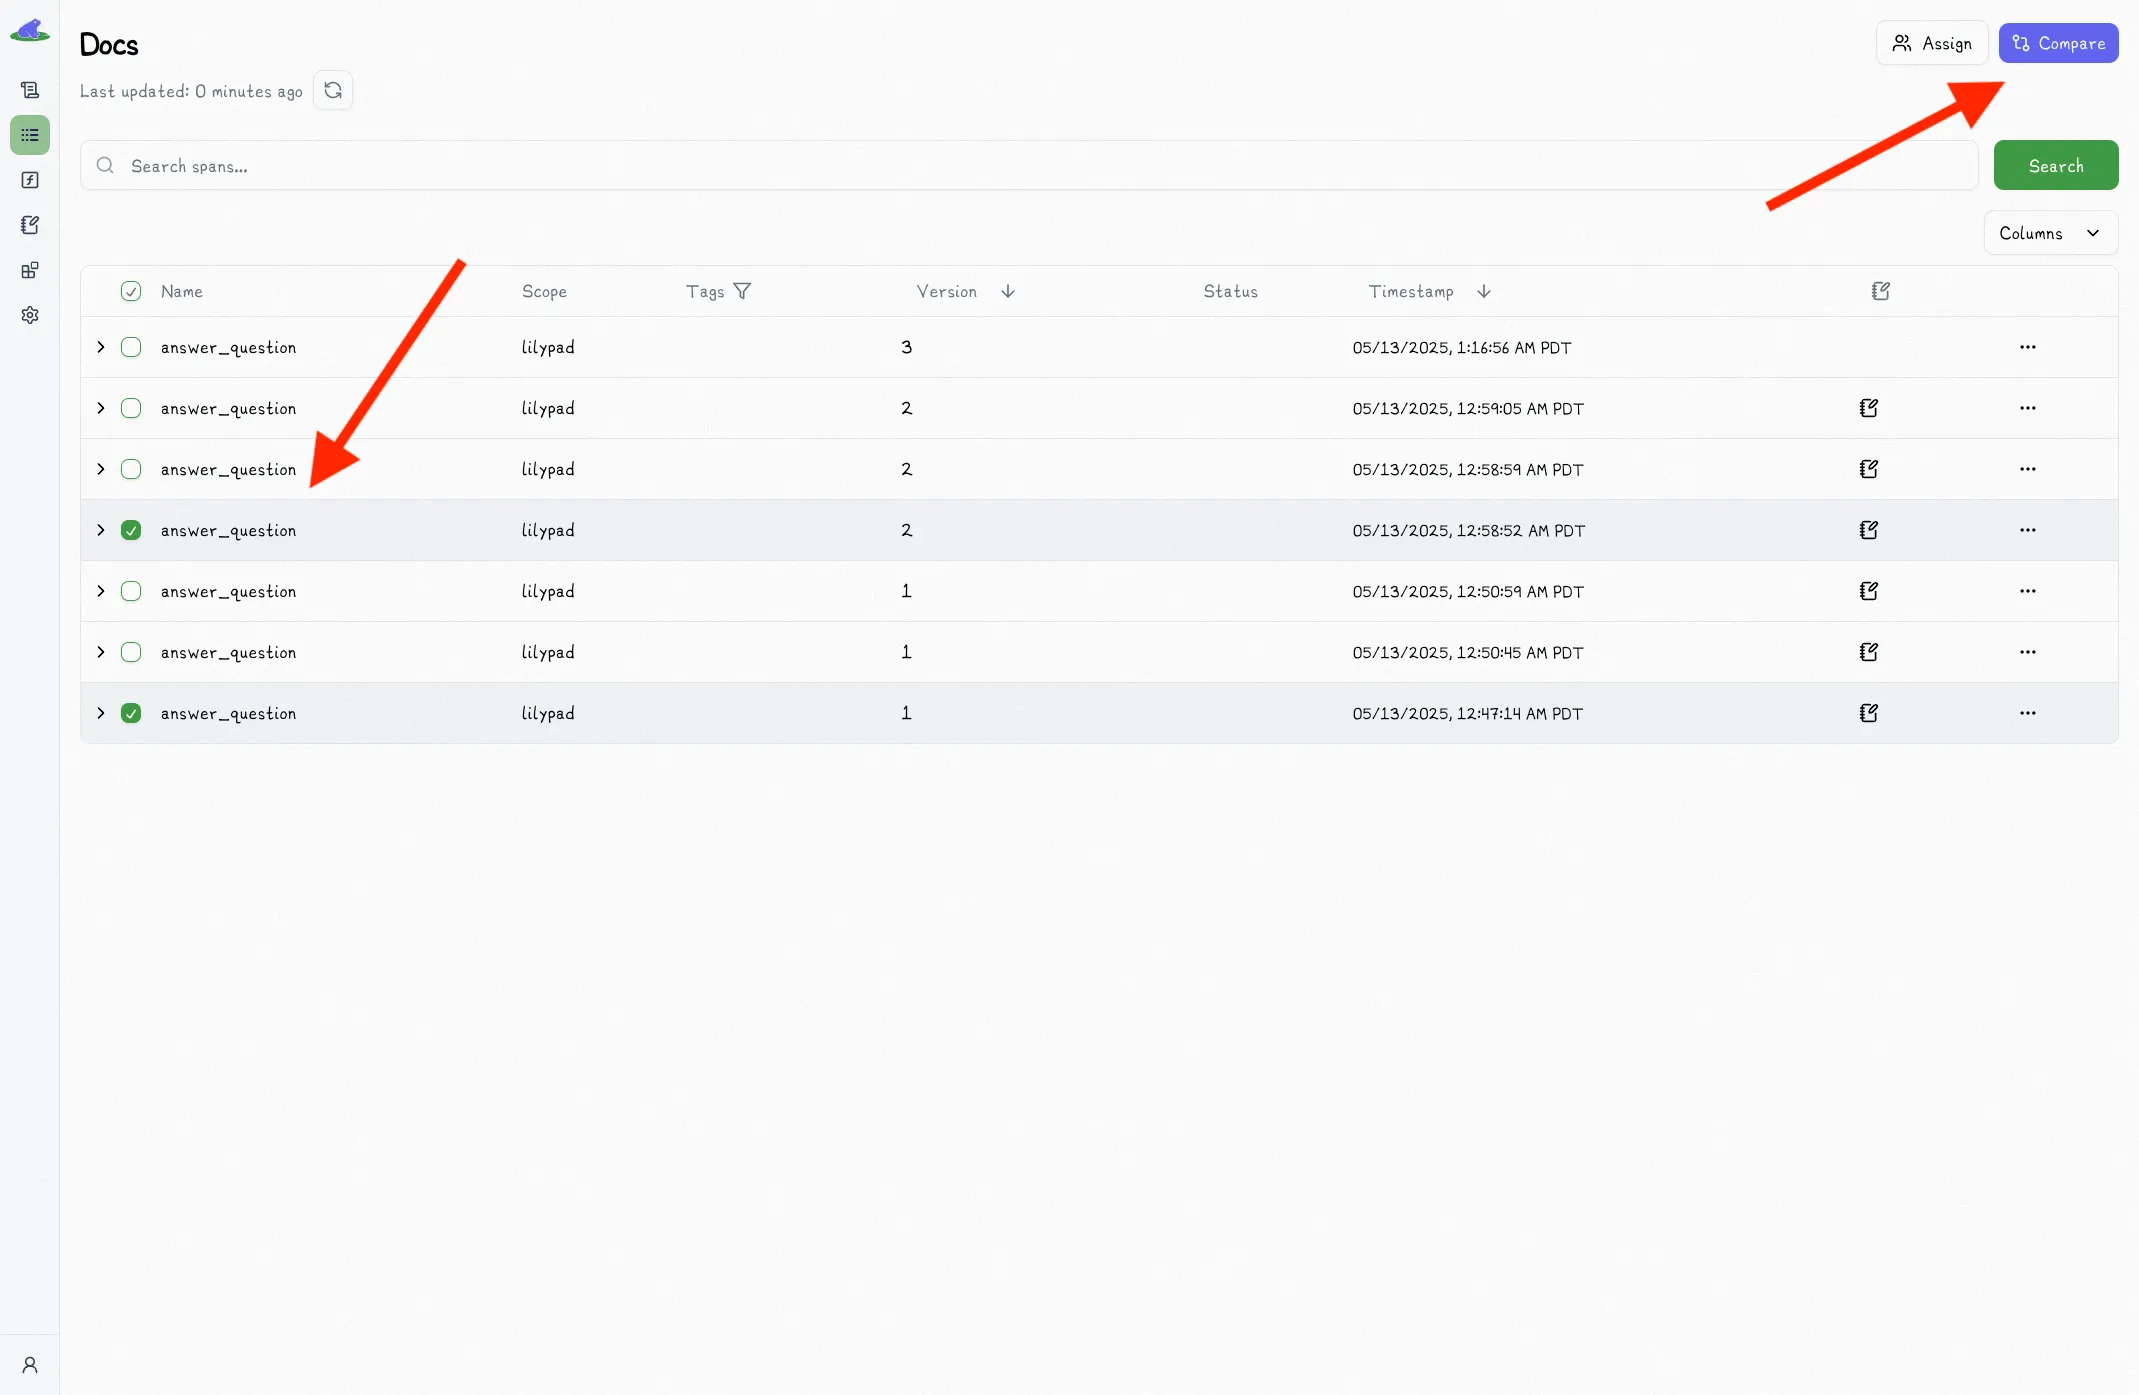
This will open the comparison view, which shows you the two spans side by side:
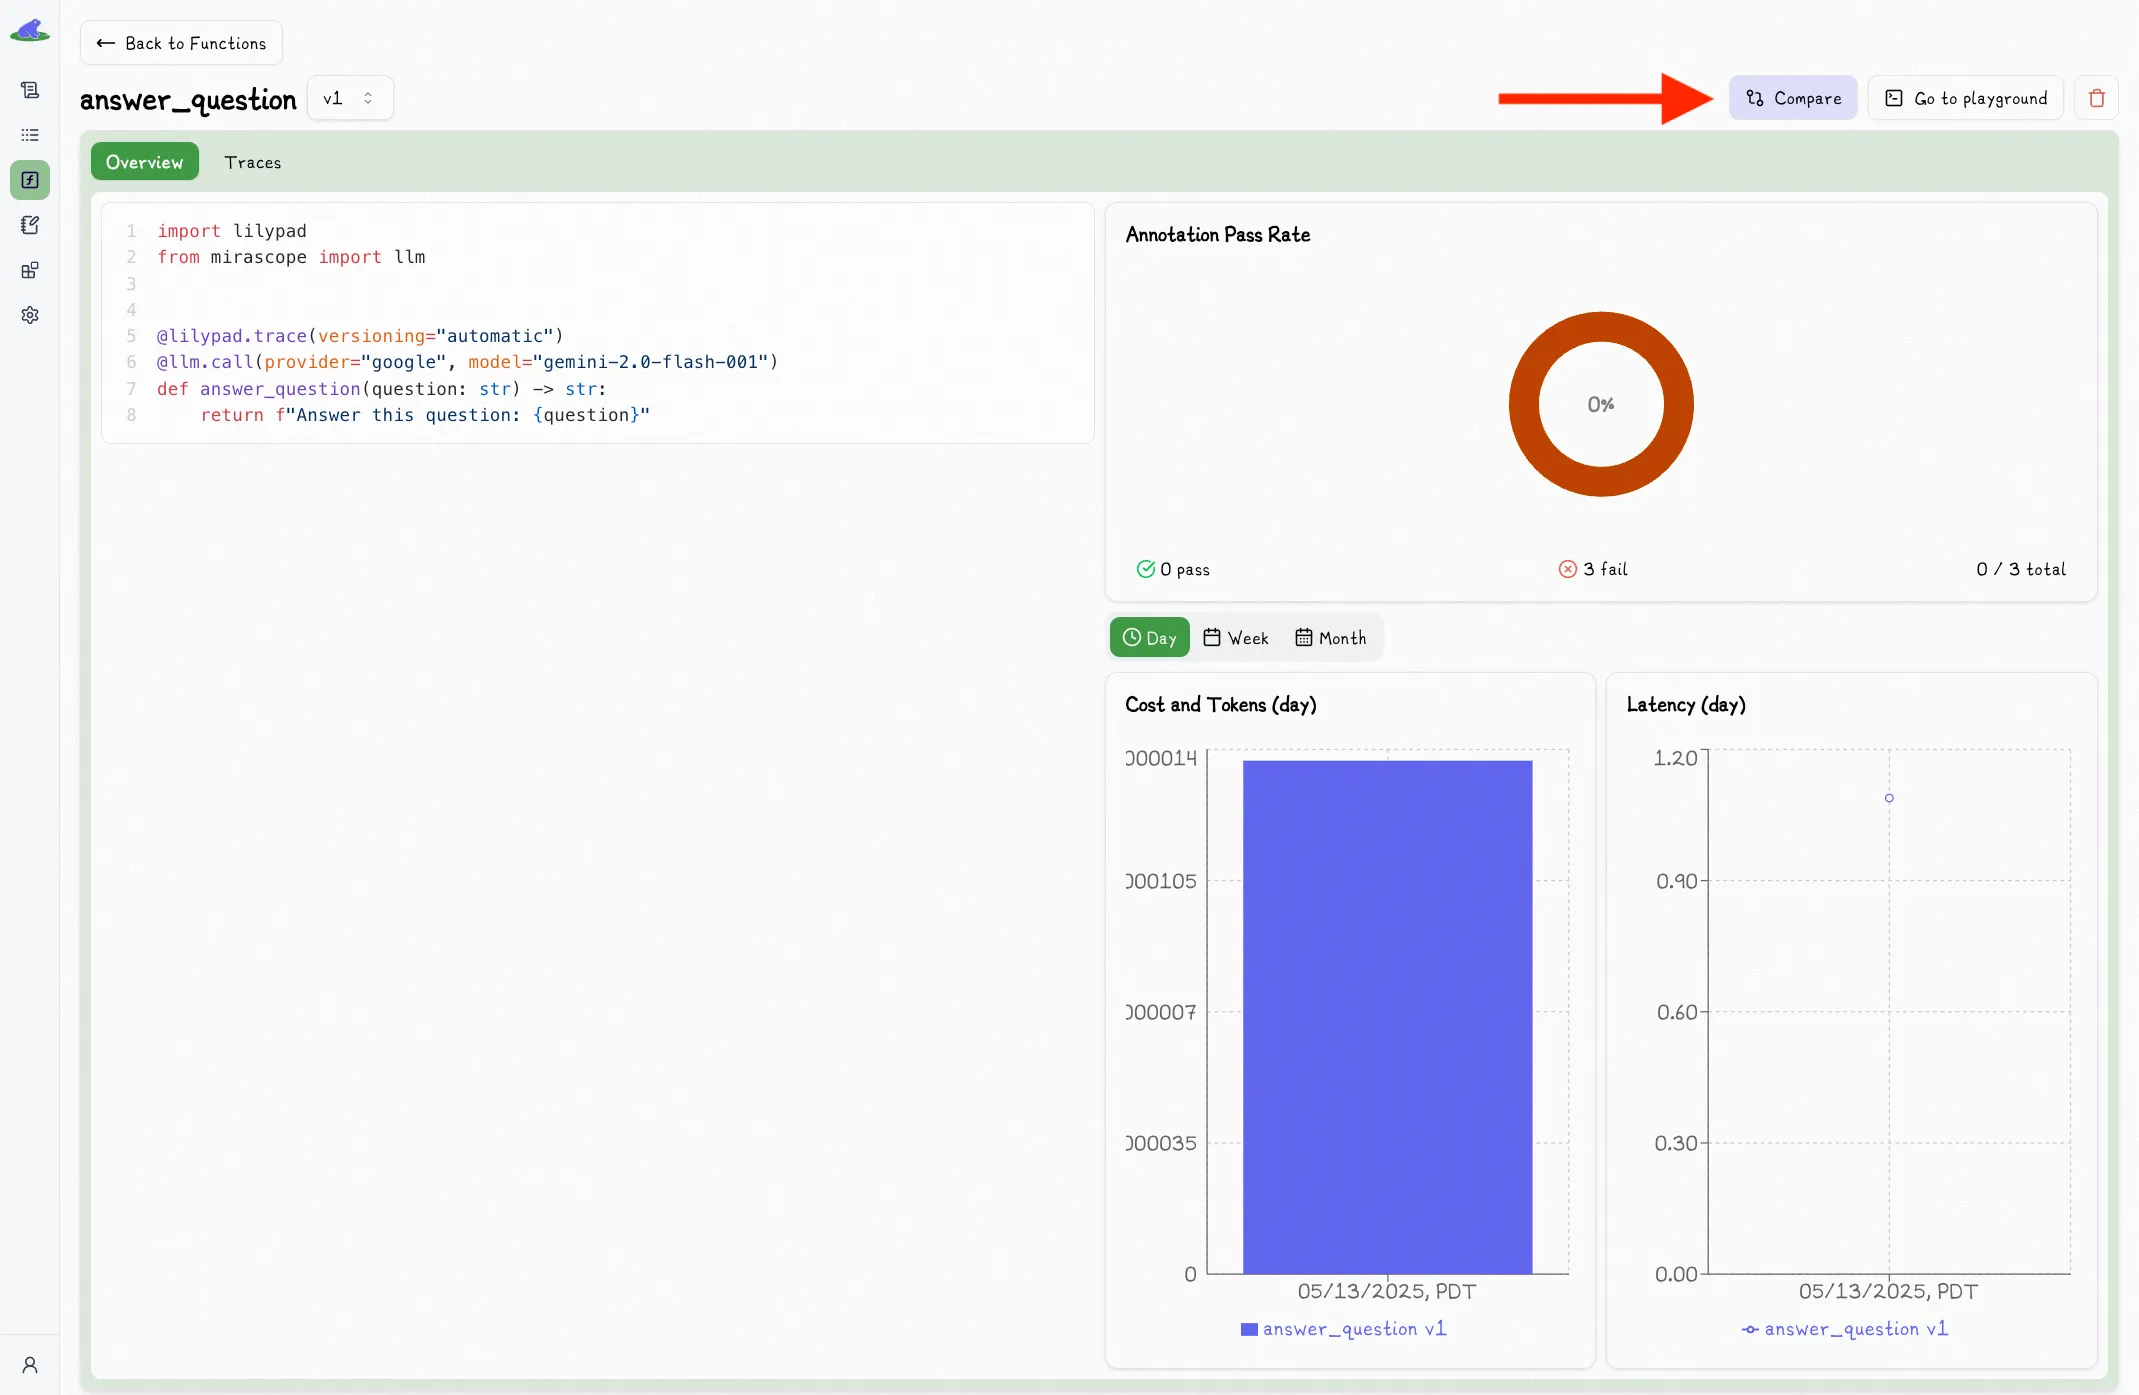
## Comparing Function Versions
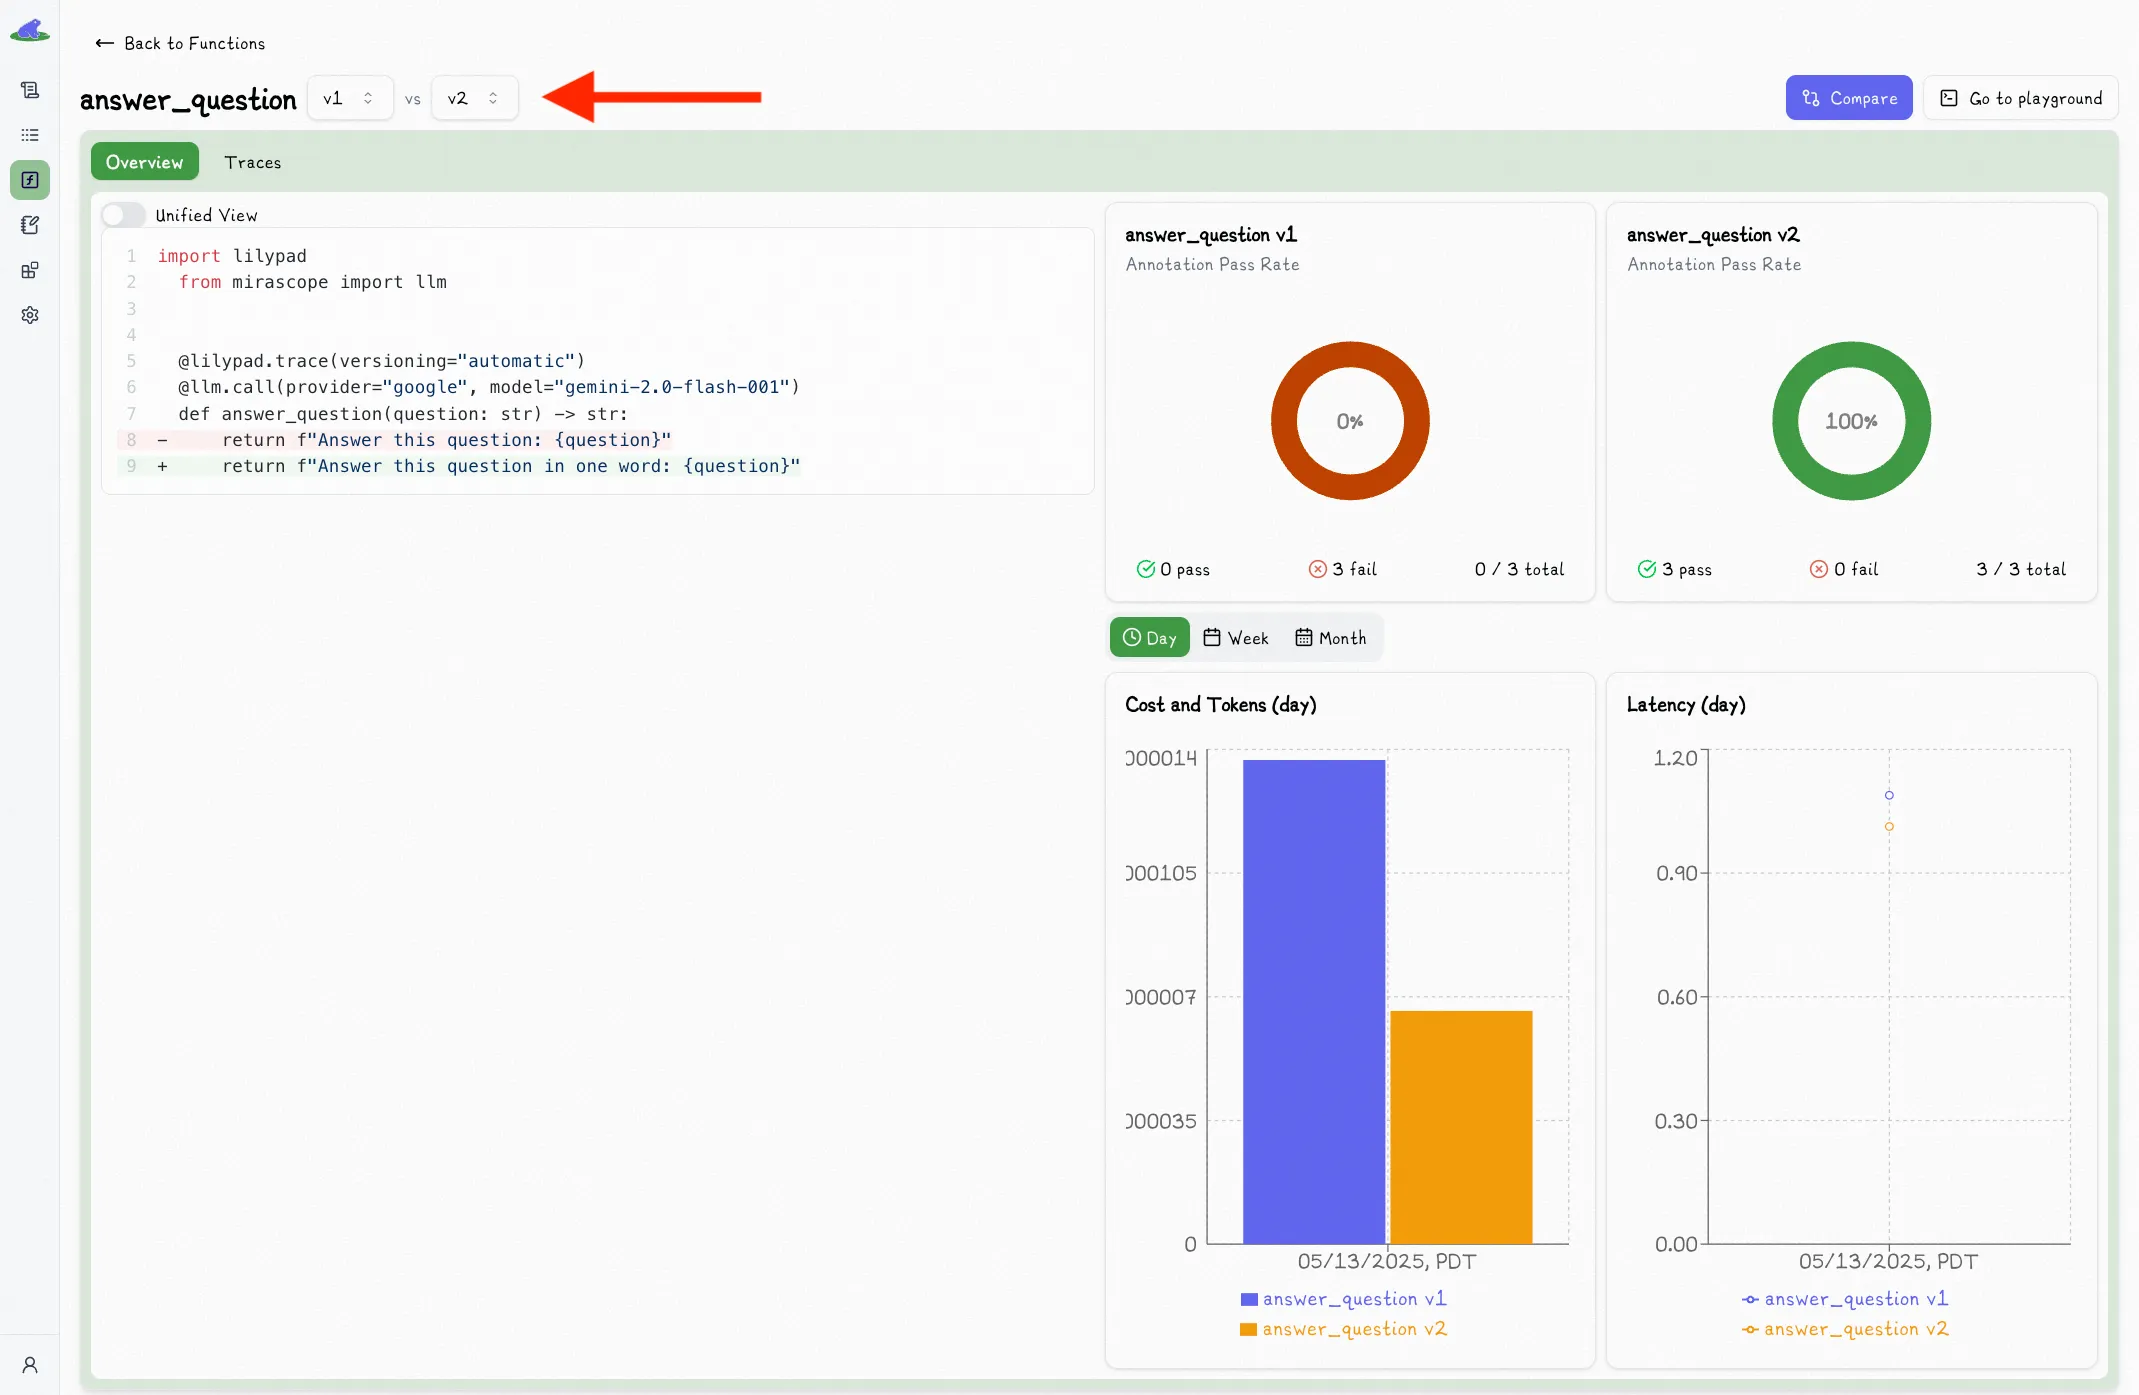
In the versioned function view, you can click the "Compare" button to toggle a second version dropdown:
Selecting a second version will show you a comparison view of the two versions:
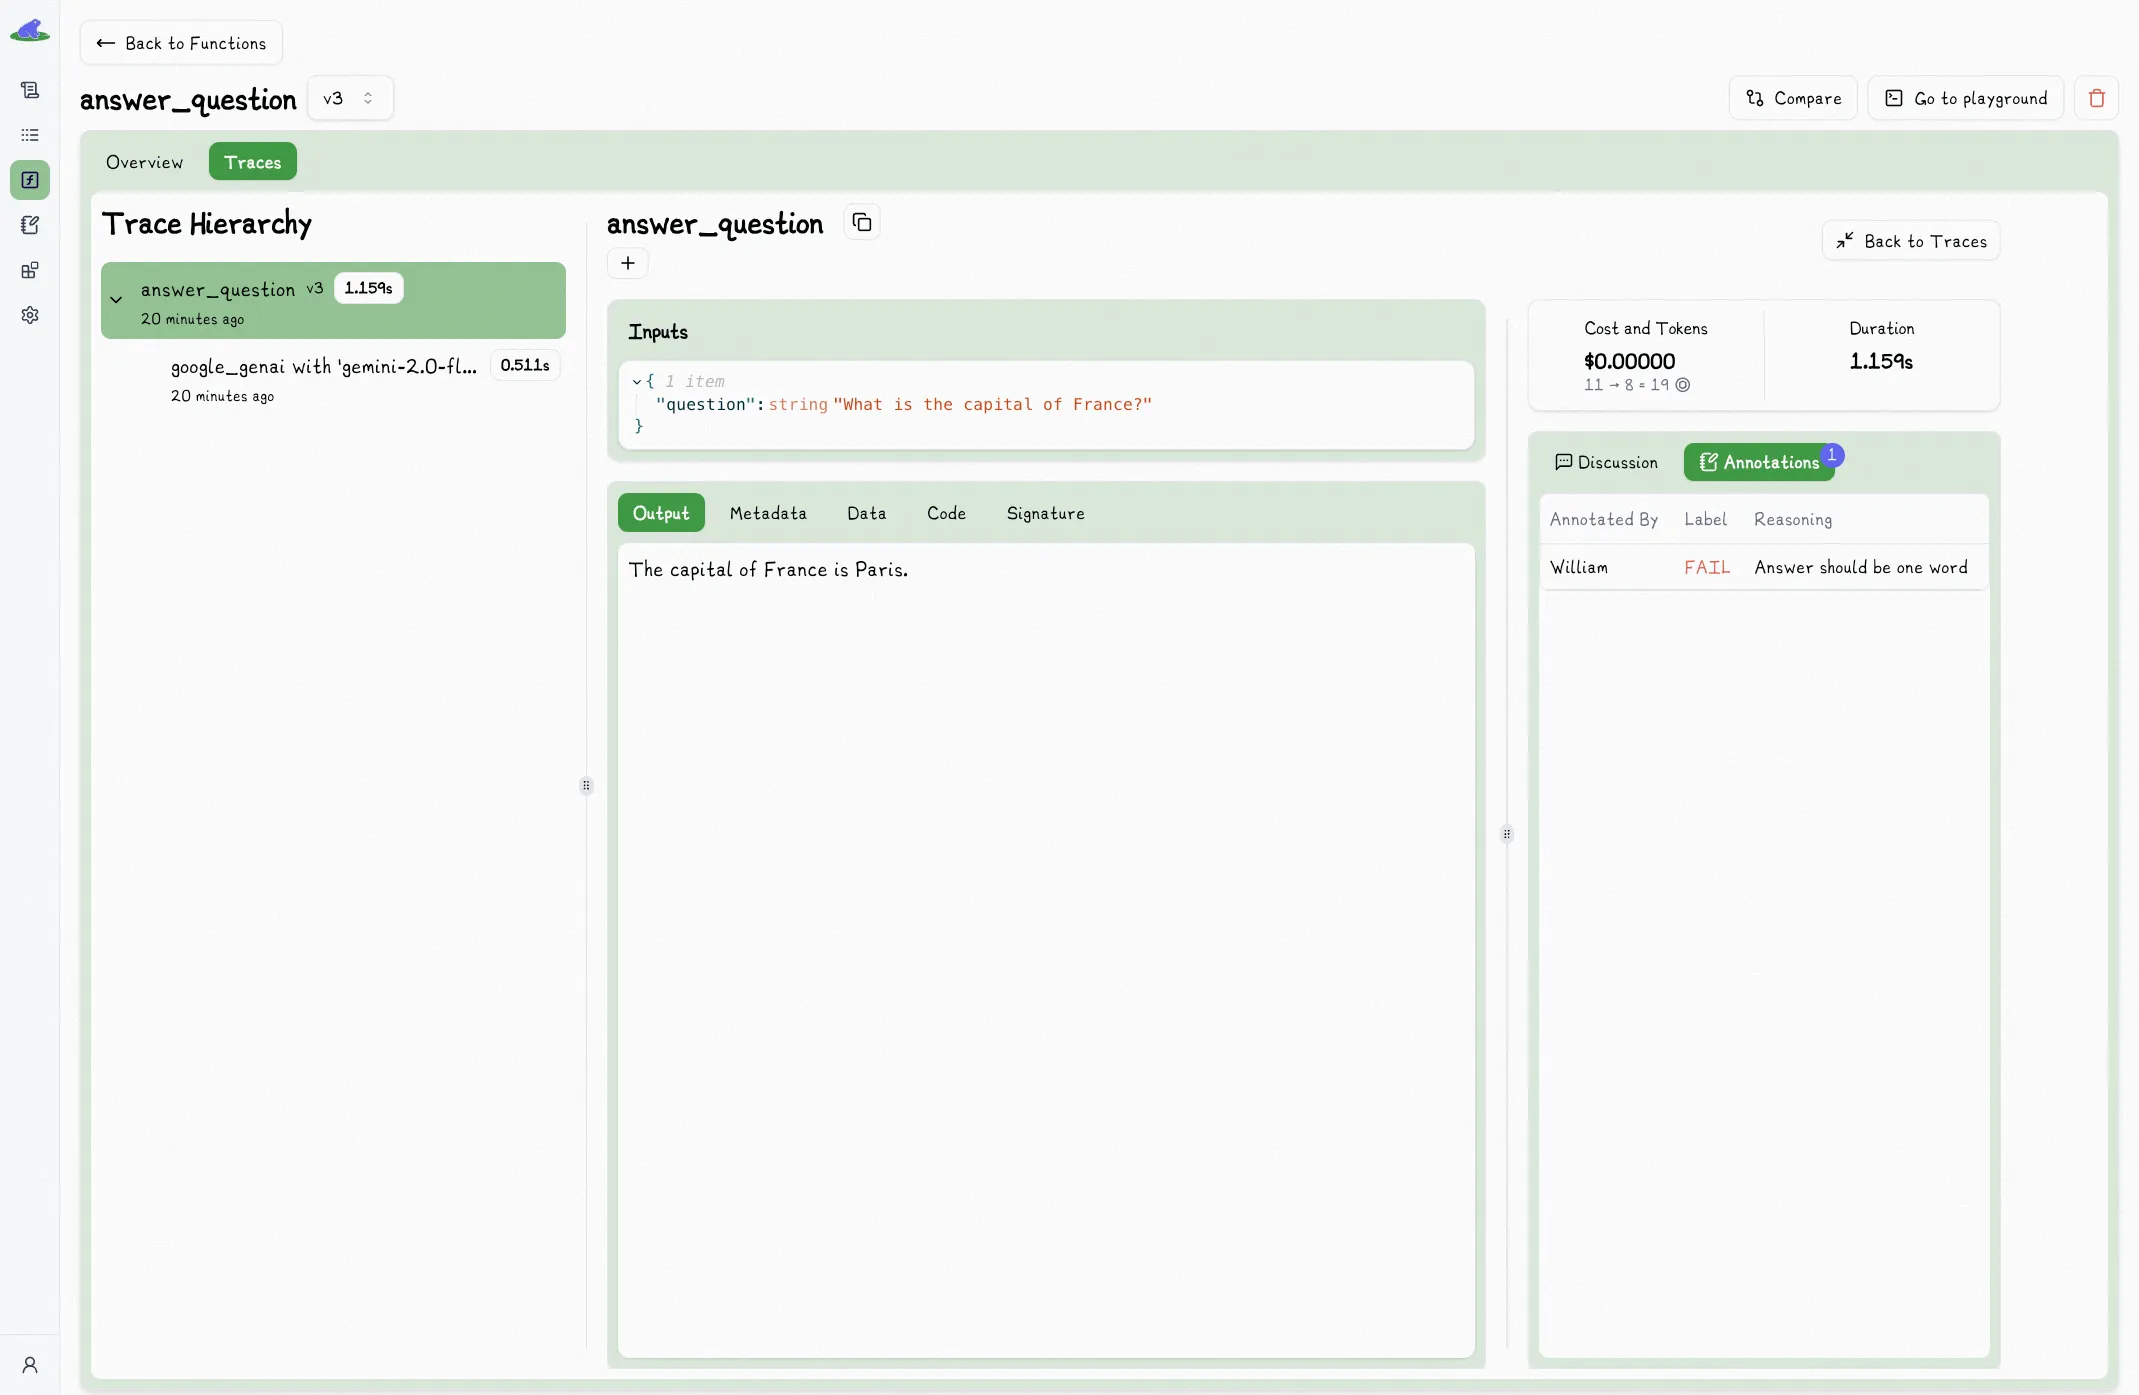
# Annotations
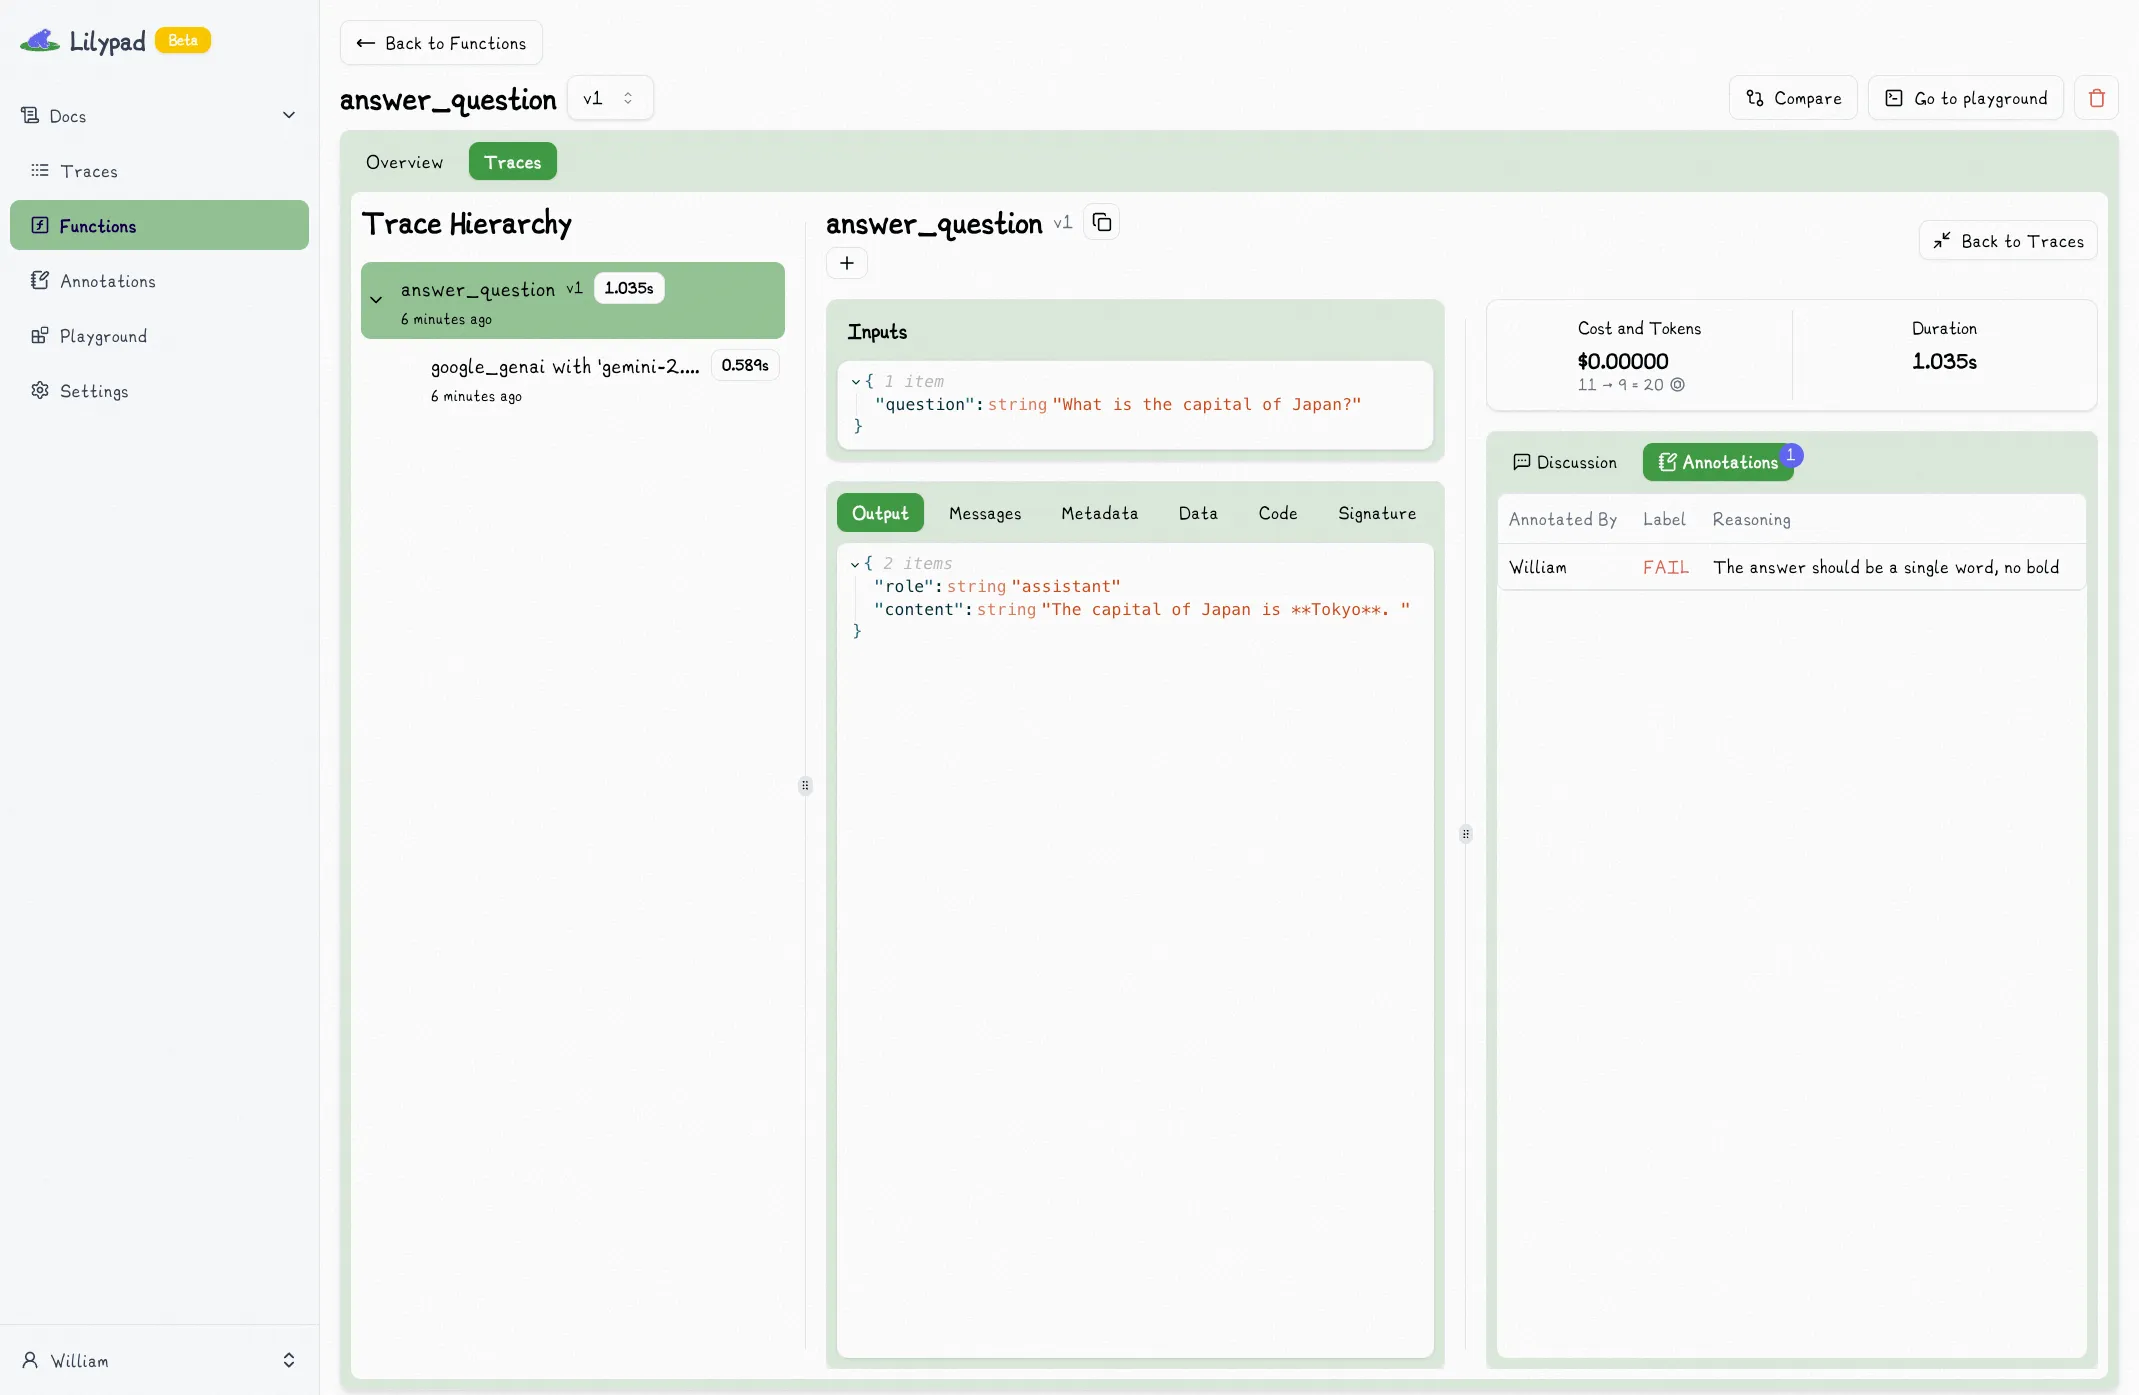
When you are viewing a trace in the full view, the right sidebar contains a section for discussions and annotations.
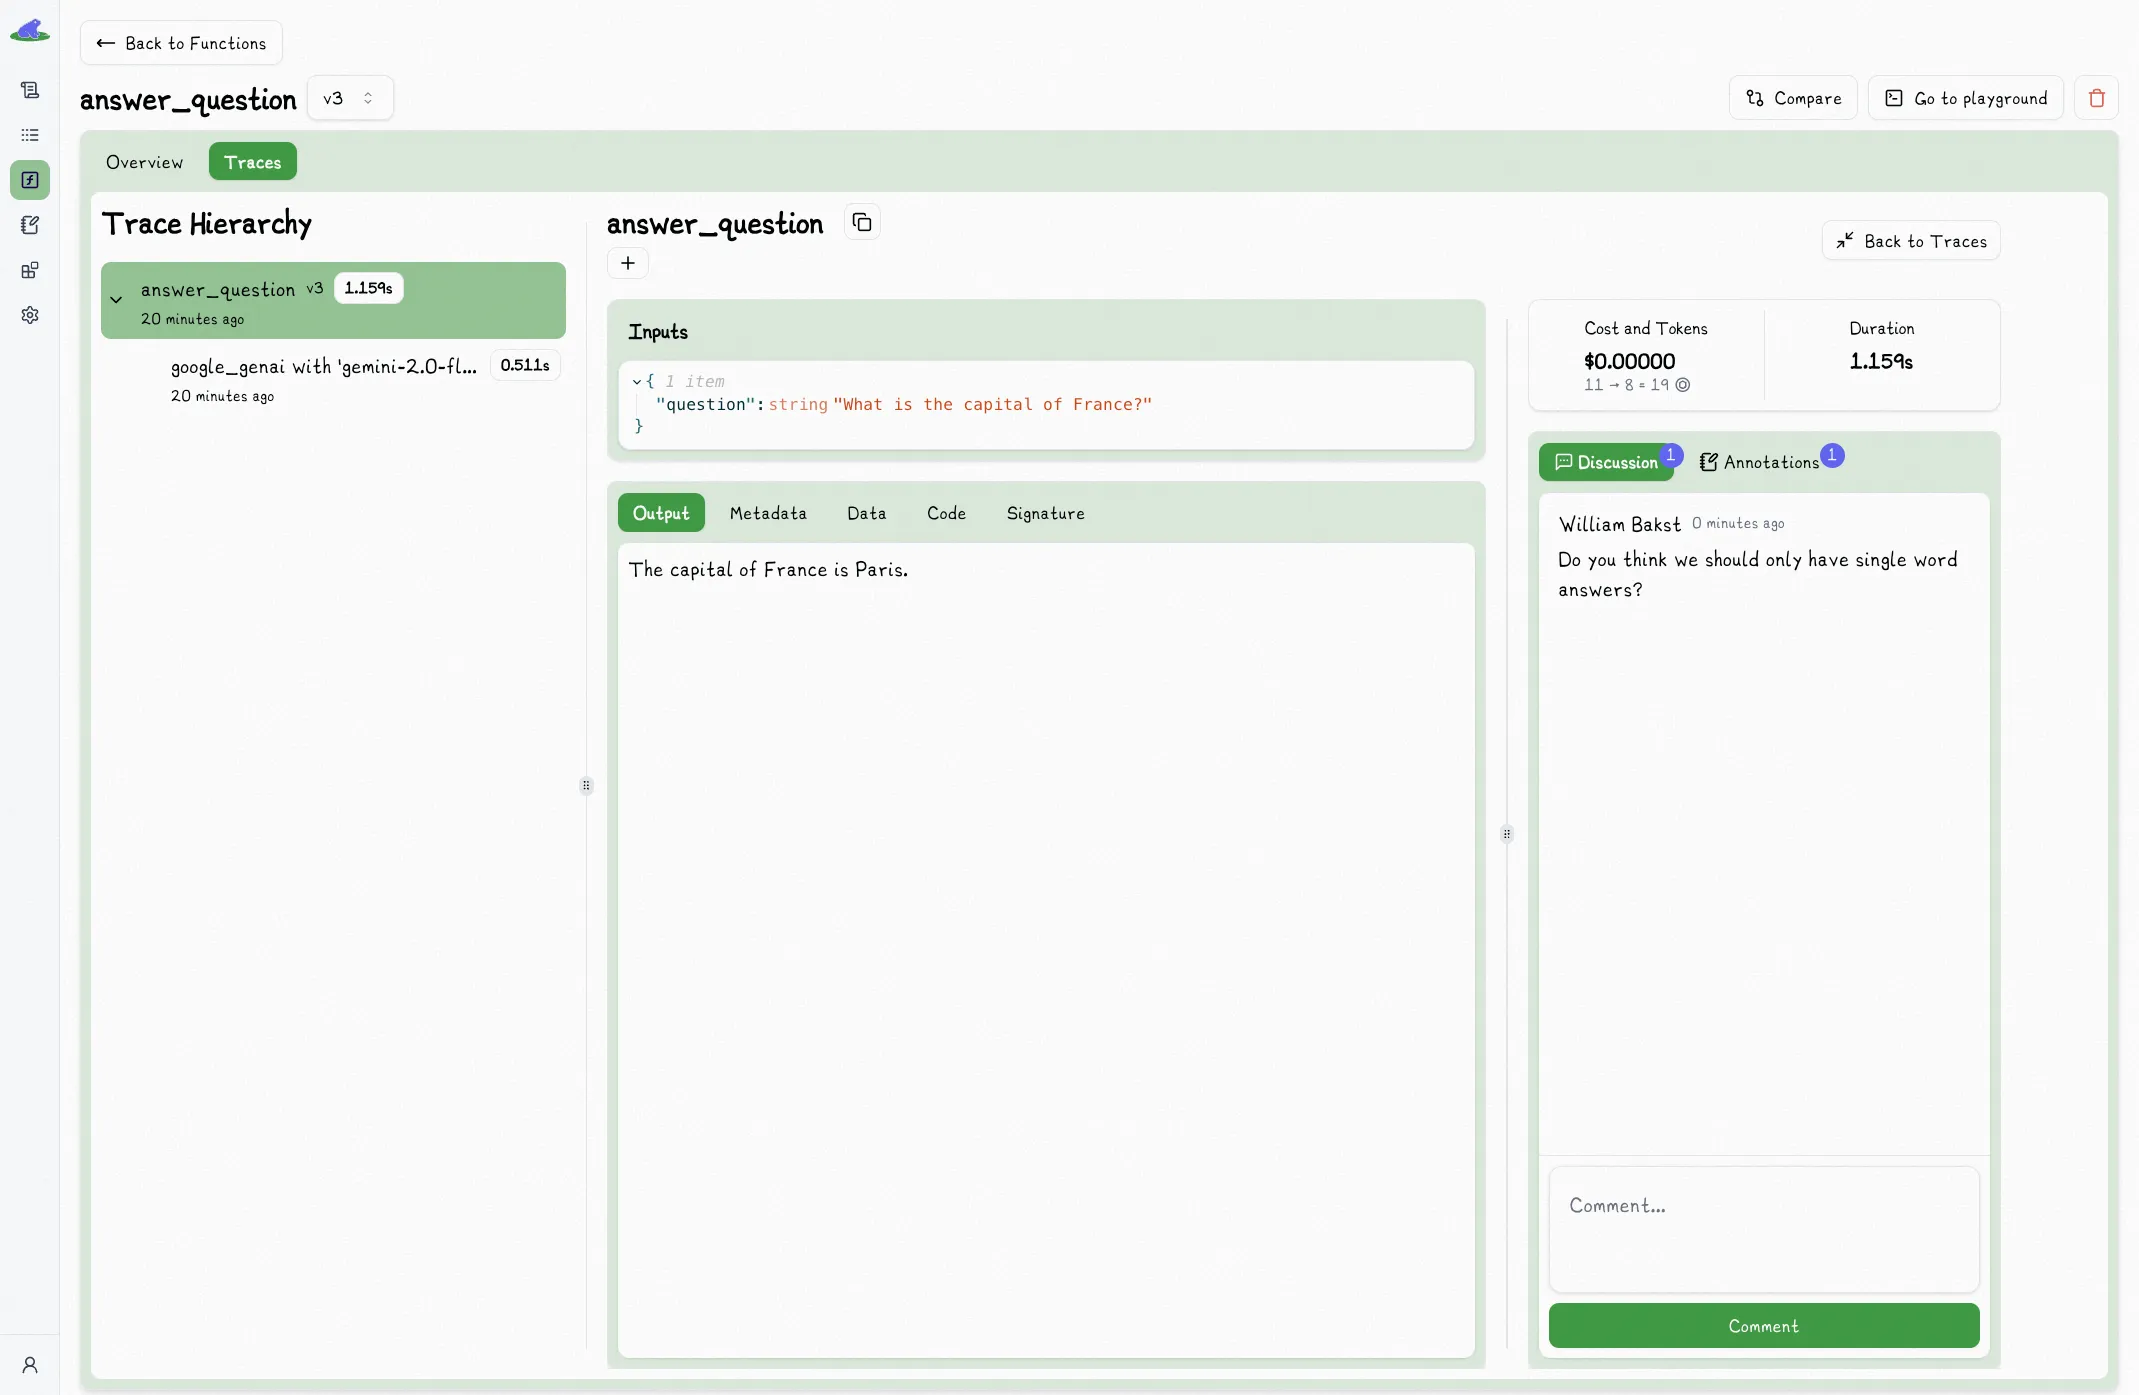
## Discussion
The discussion tab is a place for you to leave open-ended comments on the trace.
Often this is the first step towards annotating the trace. When you aren't yet sure how to annotate or trace (or if you want to), open-ended discussions are a great way to start.
You can use this to ask questions, leave feedback, discuss the trace with your team, or even just leave a note to yourself.
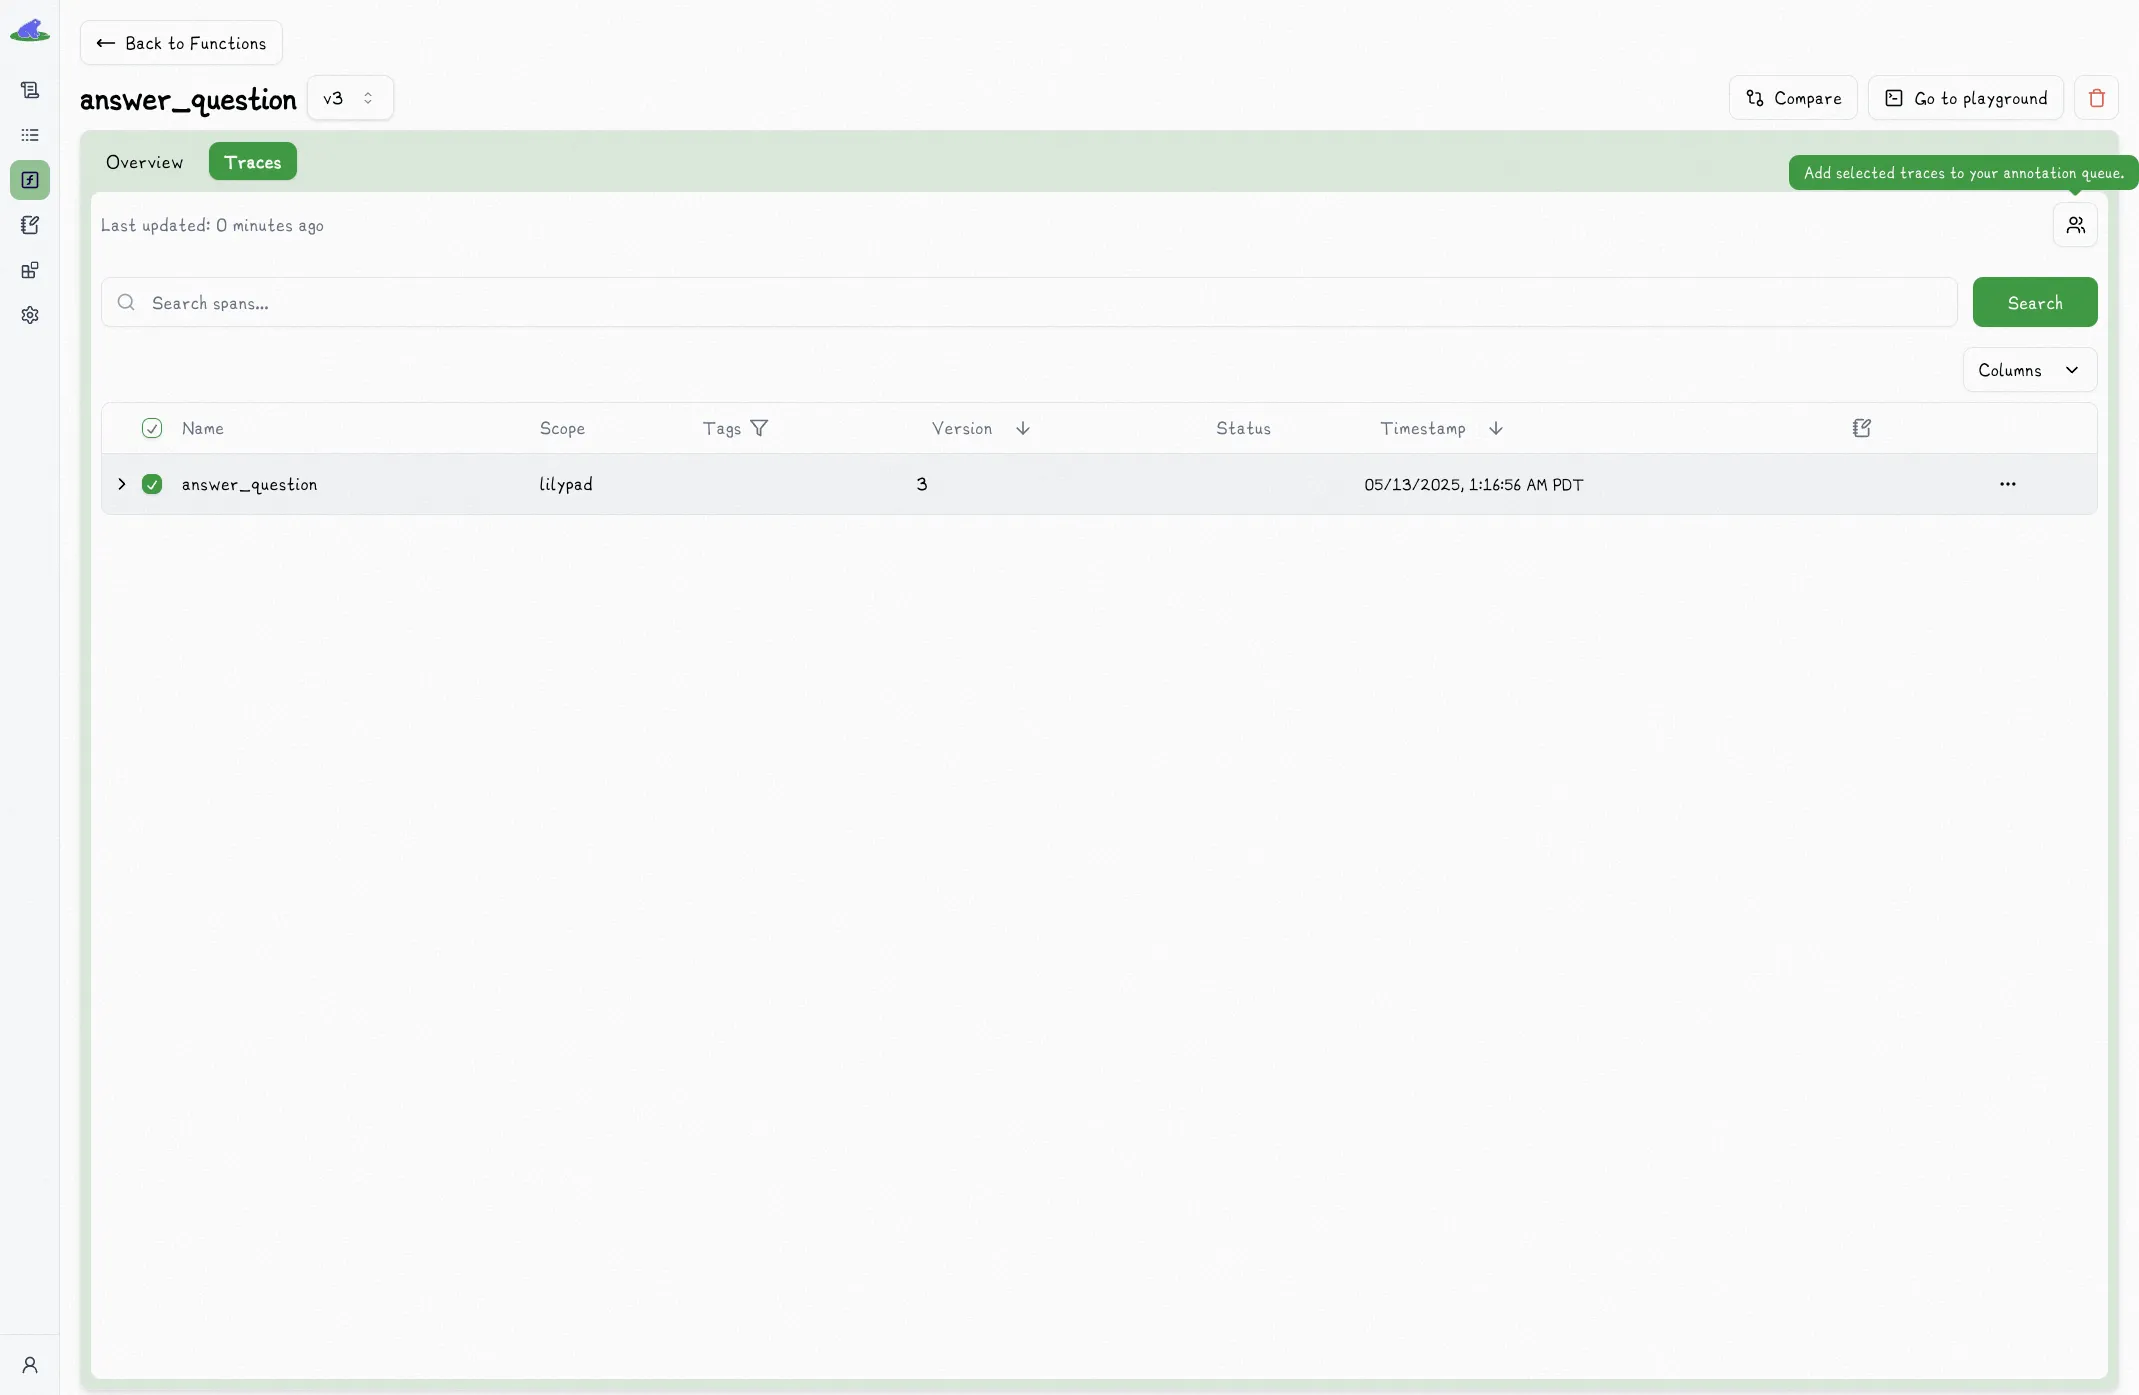
## Assigning Traces For Annotation
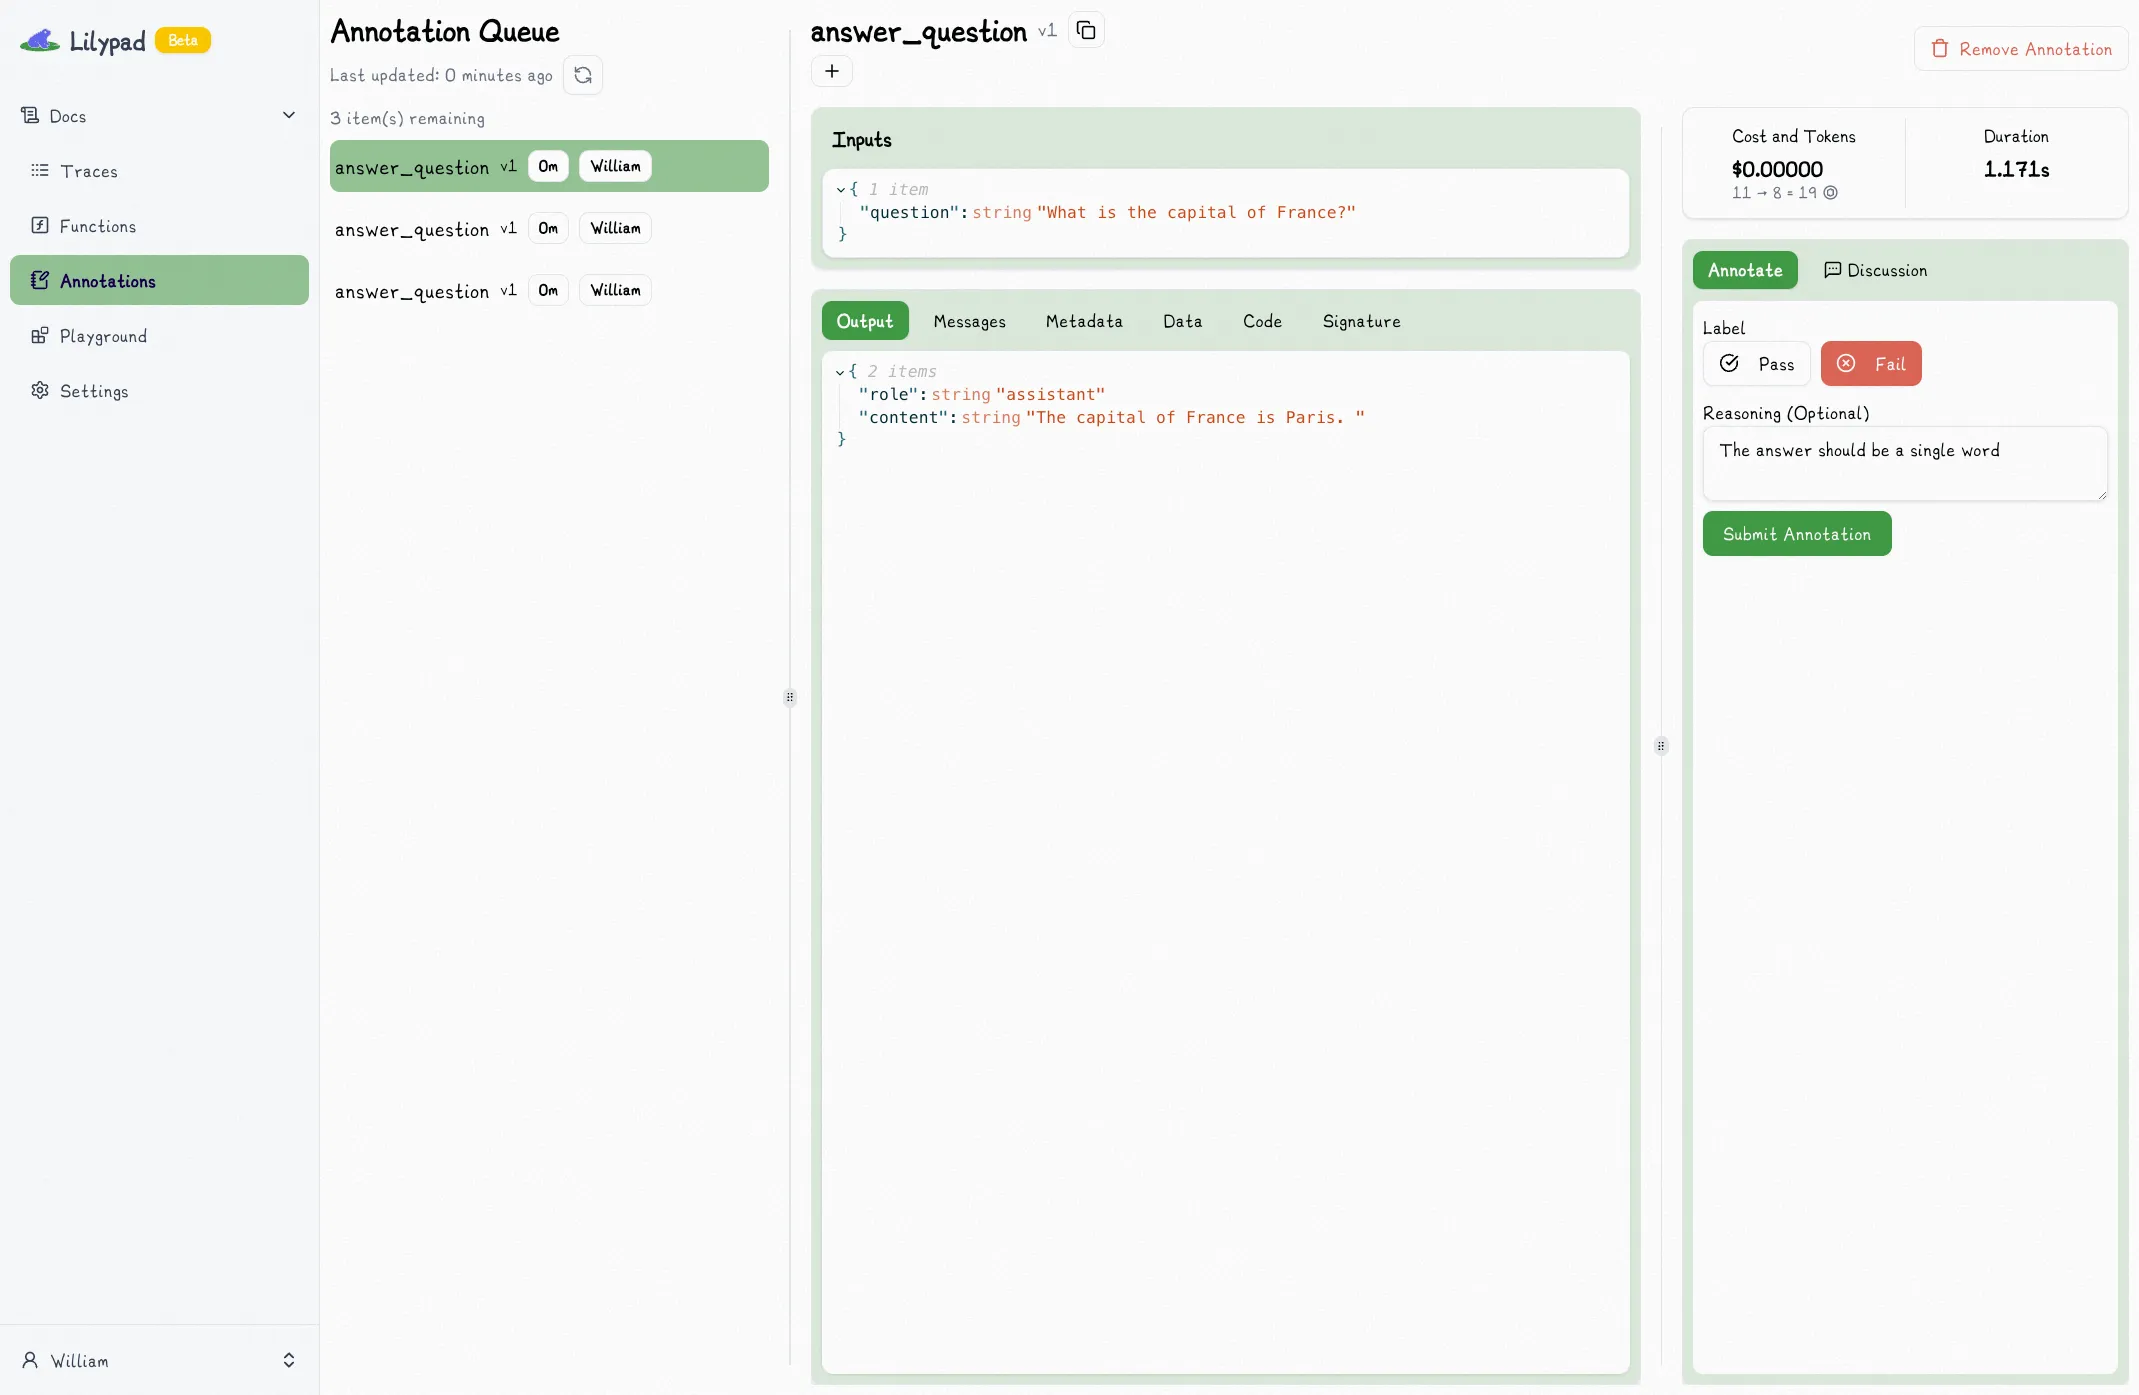
In the trace view, annotations are read only. You can annotate a trace by assigning to a user, which adds it to their annotation queue.
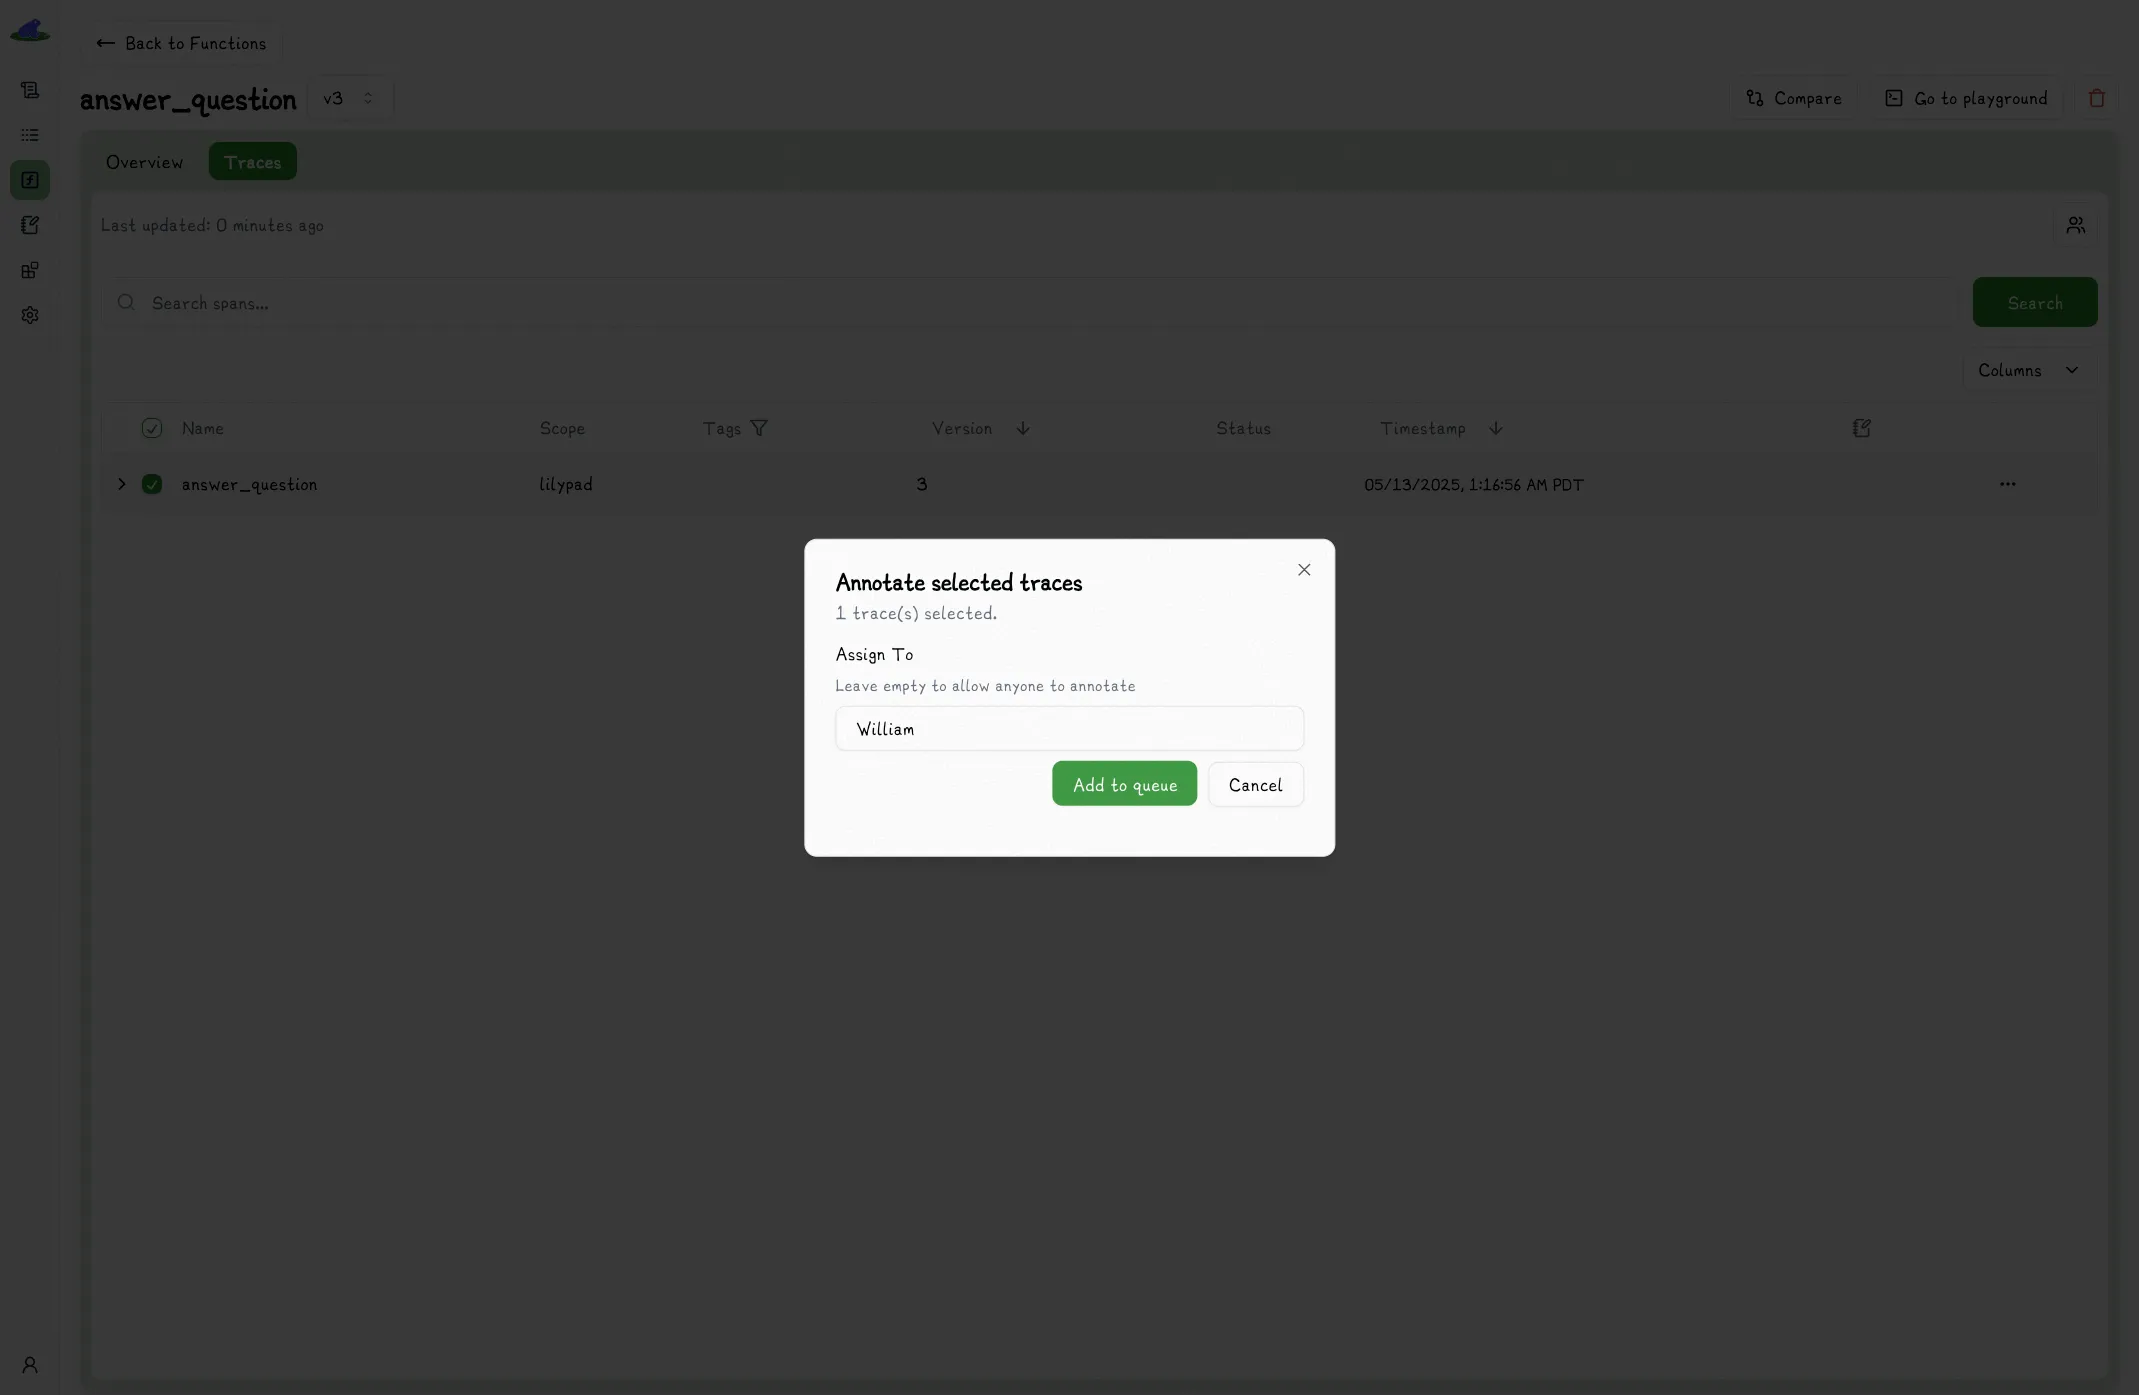
Once added to the queue, you can annotate the trace by clicking the label, (optionally) providing a reason, and clicking submit.
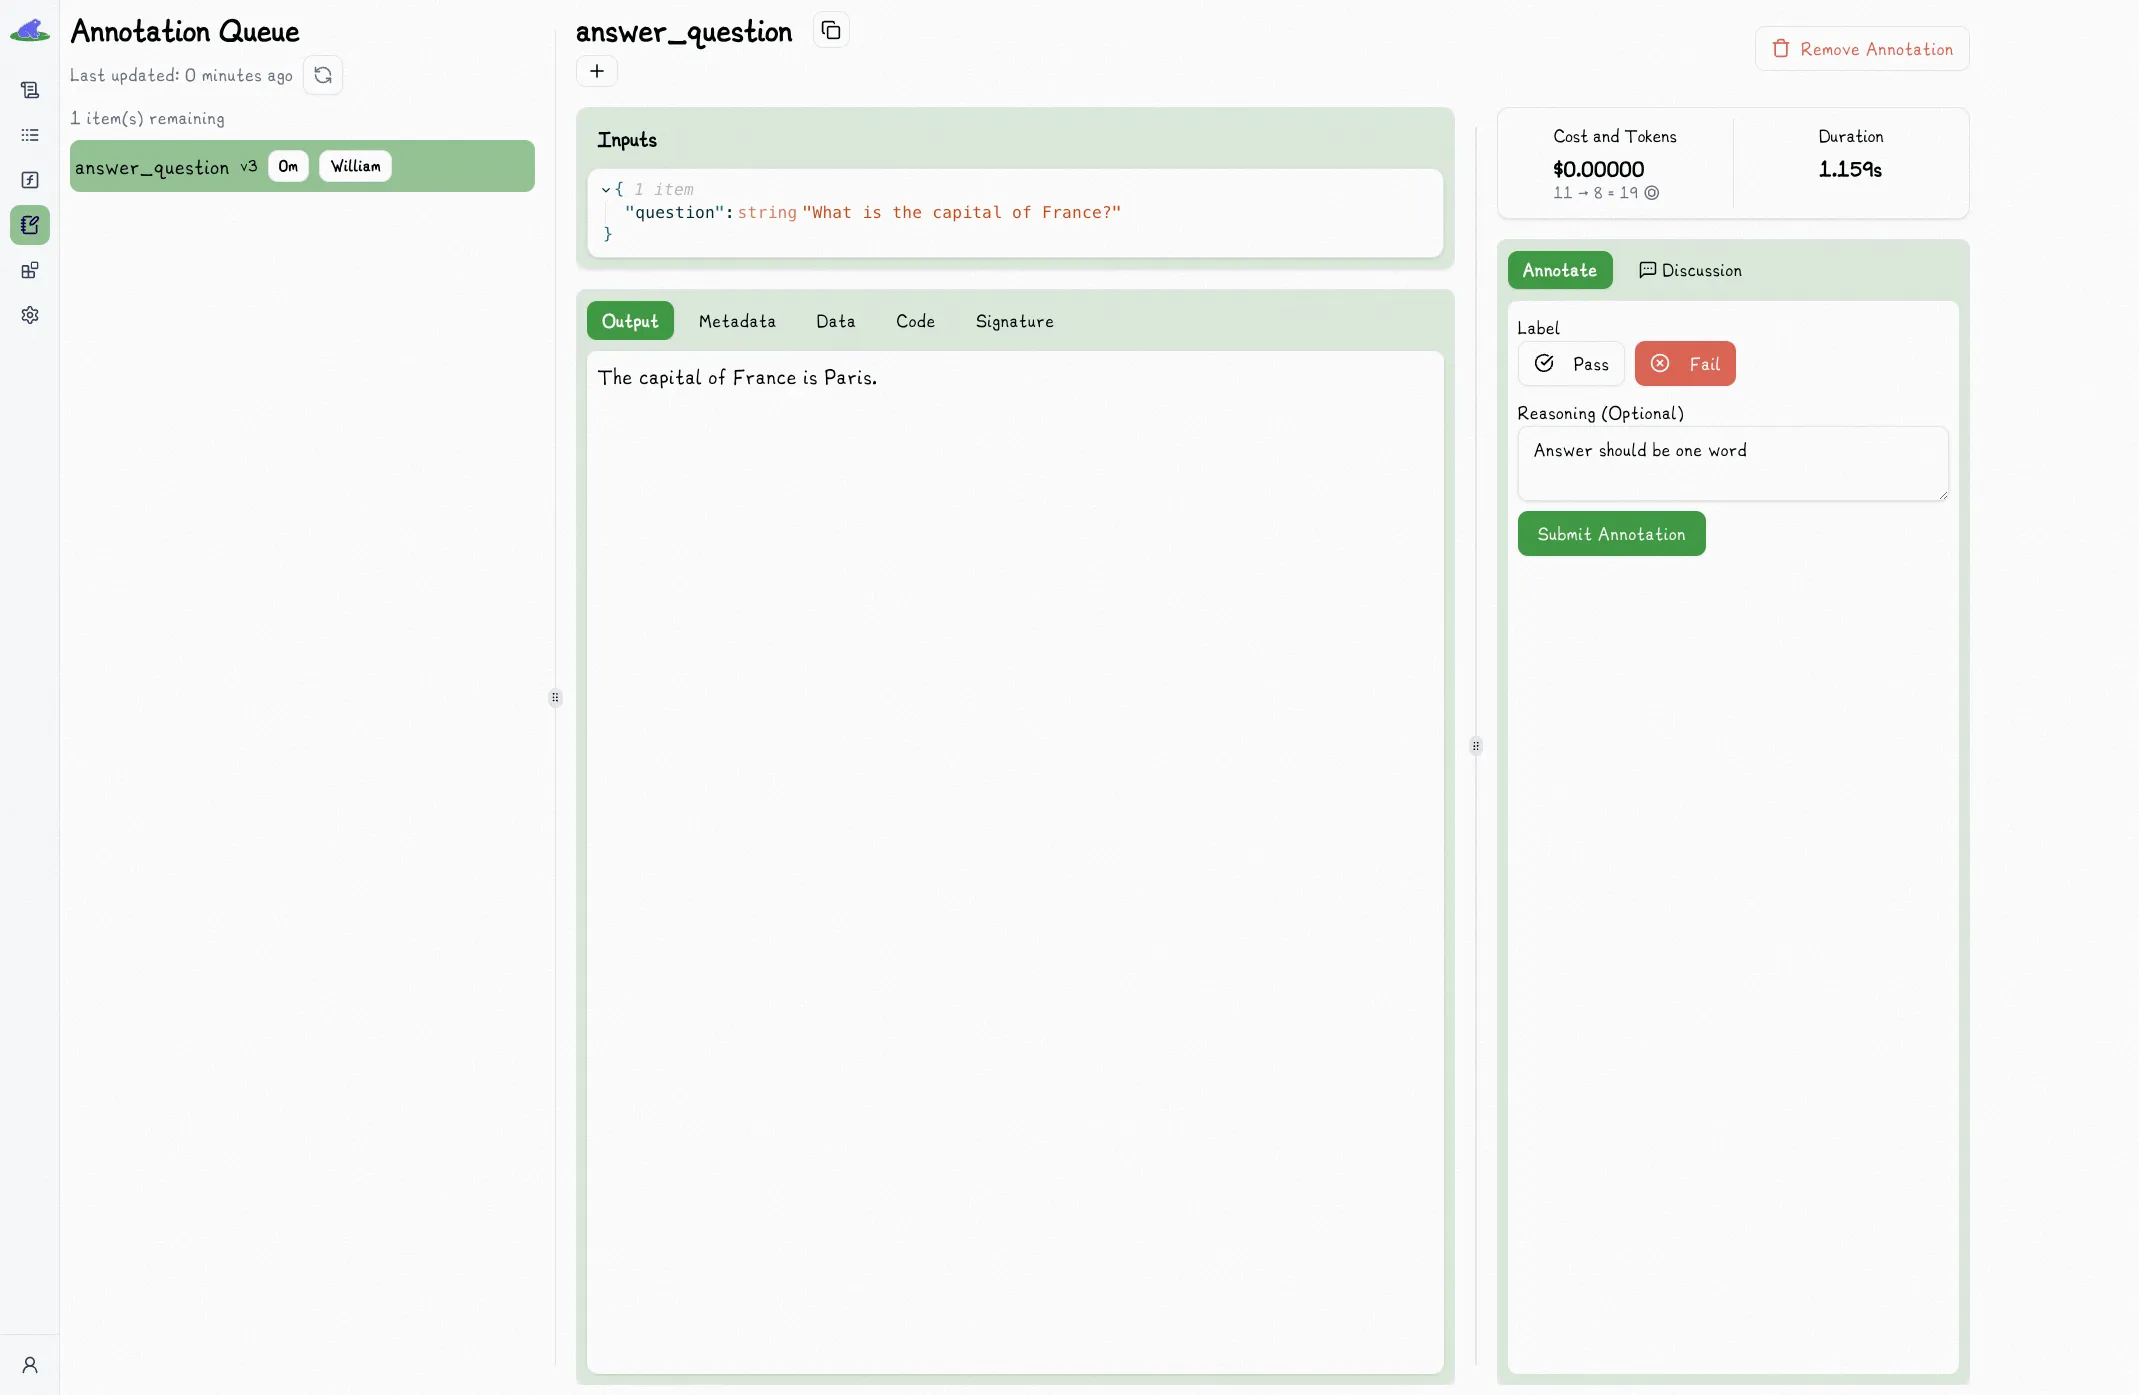
When annotating a trace, existing annotations are not shown to you. This is to prevent biasing your annotation.
## Annotating In Code
You can also annotate traces in code. This is useful when you want to annotate a trace using a custom script or UI.
```python
import os
from lilypad import Lilypad
client = Lilypad()
client.ee.projects.annotations.create(
project_uuid=os.environ["LILYPAD_PROJECT_ID"],
body=[
{
"span_uuid": "...",
"project_uuid": os.environ["LILYPAD_PROJECT_ID"],
"function_uuid": "...",
"label": "pass", # [!code highlight]
"reasoning": "this is a pass because...", # [!code highlight]
"type": "manual",
"data": {},
"assigned_to": ["..."],
"assignee_email": ["e@mail.com"],
}
],
)
```
## Passthrough Annotations
Setting `mode="wrap"` in the `trace` decorator converts the original return type of the decorated function into a `Traced[R]` that provides methods for operating on the corresponding trace directly.
For example, you might want to enable passthrough annotation so that your users can annotate traces directly:
```python
from google.genai import Client
import lilypad
client = Client()
lilypad.configure()
@lilypad.trace(name="Answer Question", versioning="automatic", mode="wrap") # [!code highlight]
def answer_question(question: str) -> str | None:
response = client.models.generate_content(
model="gemini-2.0-flash-001",
contents=f"Answer this question: {question}",
)
return response.text
trace: lilypad.Trace[str | None] = answer_question("What is the capital of France?")
print(trace.response) # original response
# > The capital of France is Paris.
annotation = lilypad.Annotation( # [!code highlight]
label="pass", # [!code highlight]
reasoning="The answer was correct", # [!code highlight]
data=None, # [!code highlight]
type=None, # [!code highlight]
) # [!code highlight]
trace.annotate(annotation) # [!code highlight]
```
# Lilypad API Reference
The Lilypad API reference is under active development during the beta period.
For now, please use the [Lilypad FastAPI Docs](https://lilypad-api.mirascope.com/v0/docs) for the most up-to-date reference of what's available.
You can use the `Lilypad` (or `AsyncLilypad`) client to interace with the Lilypad API in code:
```python
import os
from lilypad import Lilypad
client = Lilypad(
base_url="https://lilypad-api.mirascope.com/v0", # can be ommitted if set in env
api_key=os.environ["LILYPAD_API_KEY"], # can be ommitted if set in env
)
traces = client.projects.traces.list(
project_uuid=os.environ["LILYPAD_PROJECT_ID"],
)
print(traces.items[0])
# > {'span_id': '...', ...}
```
```python
import asyncio
import os
from lilypad import AsyncLilypad
client = AsyncLilypad(
base_url="https://lilypad-api.mirascope.com/v0", # can be ommitted if set in env
api_key=os.environ["LILYPAD_API_KEY"], # can be ommitted if set in env
)
async def main():
traces = await client.projects.traces.list(
project_uuid=os.environ["LILYPAD_PROJECT_ID"],
)
print(traces.items[0])
# > {'span_id': '...', ...}
asyncio.run(main())
```